DULCE DE LECHE CHEESECAKE WITH SHORTBREAD CRUST

When it comes to cheesecake I’ve got the biggest weak spot! This year, for my birthday I requested my boyfriend’s mom make her famous cheesecake recipe with a dulce de leche topping and shortbread crust and boy was I in heaven. Ever since we went to Argentina together on a family trip I have been obsessed with dulce de leche and to have it on my birthday cake just made all the amazing memories come flooding back. If you are not into dulce de leche, no worries. The cheesecake in this recipe has vanilla in it so it also makes for a great, more subtle vanilla cheesecake recipe.

ENJOY!

INGREDIENTS:

-Shortbread Crust -

1/2 CUP if Butter (softened)
1/4 CUP of Sugar
1 CUP of All-Purpose Flour

- Cheesecake Filling -

1 CUP of Whipping Cream 35% - divided into 2 portions
3 x 8oz Packs of Cream Cheese (softened)
3/4 CUP of Sugar
2 TBSP of Cornstarch
4 Eggs
4 TBSP of Vanilla

- Topping -
Apx 300ml of Dulce De Leche

DIRECTIONS:

In a large bowl, beat butter and sugar until fluffy before slowly incorporate the flour until crumbly.

Press dough into a 9-inch springform pan before refrigerating for 10 minutes.

Preheat oven to 400 degrees and when ready, bake shortbread crust for 15 minutes until golden.

In another bowl, whip one portion of cream until stiff peaks start to form. Set aside.

In another large bowl, beat cream cheese until it starts to become fluffy before adding in sugar and cornstarch. Continue to beat until the filling has a smooth texture.

Next, beat in eggs one at a time until blended before beating in the remaining whipping cream and vanilla.

Lastly, fold in whipped cream and pour over the baked crust before returning the cake back to the oven and reducing the temperature to 300 degrees. Allow cheesecake to bake for 70 minutes or until the center is almost set.

When ready, allow the cheesecake to sit in the springform pan while it cools on a cooling rack. You can run a knife along the edge of the pan to help you remove it. After removing the springform pan refrigerate for at least 6 hours or overnight if possible before serving.


I hope you enjoyed this recipe as much as I do. If you have any comments please leave them below and I'll be happy to answer them as soon as I can! Bon Appetite!!!


PIN THIS POST

MOLTEN CHOCOLATE CAKE!!!!

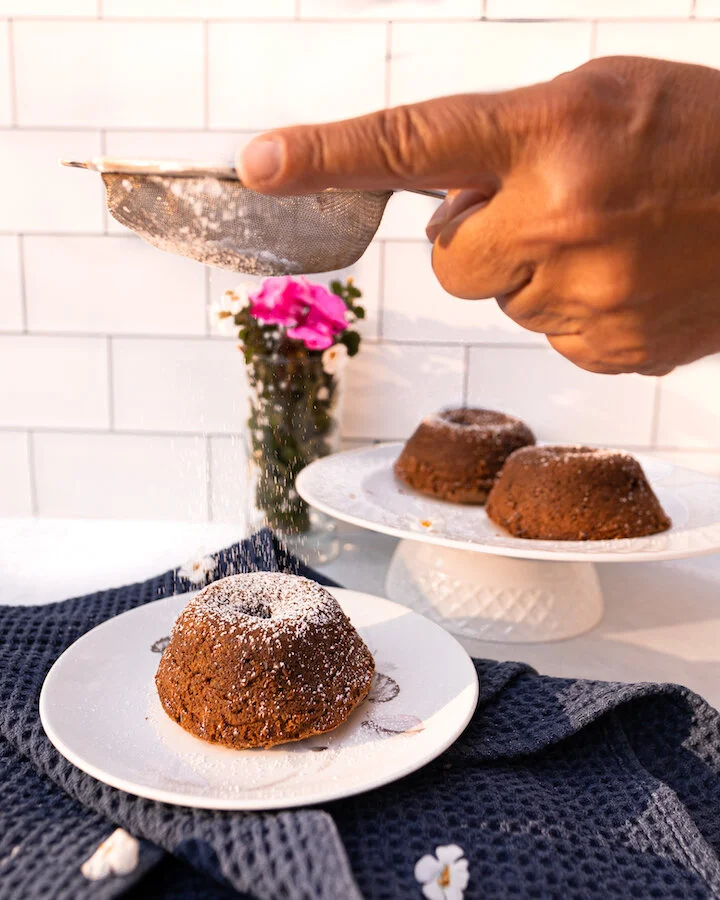
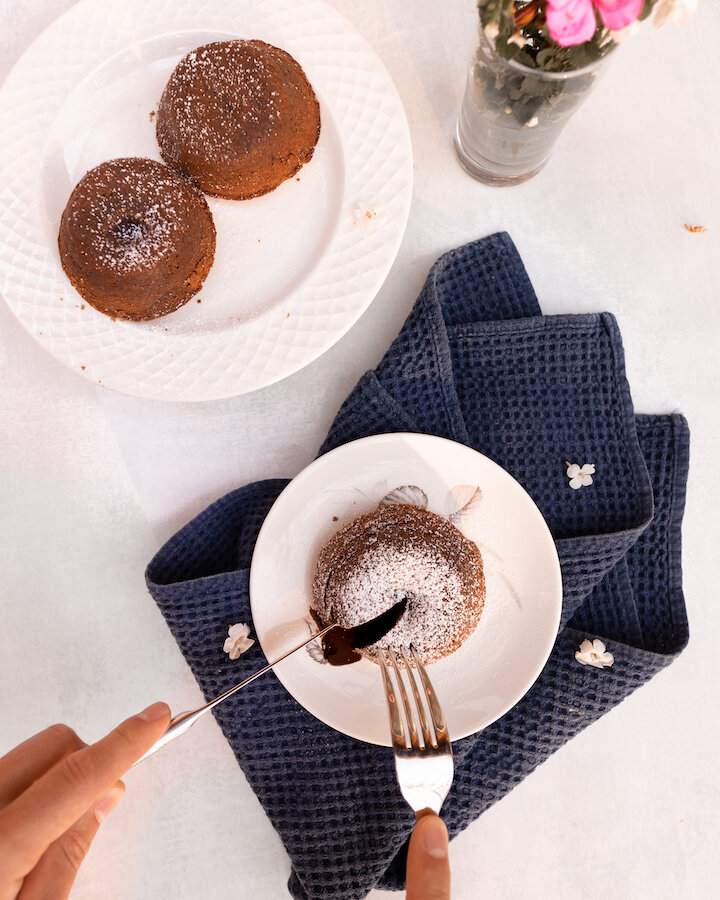
This molten chocolate cake is one of those desserts where you just can't say no to. My boyfriend's mom gave me this recipe after I tried one of her molten cakes straight out of the oven. So rich and decadent but small enough where you don't feel too guilty about indulging. The whole point of molten cakes is to underbaked them so that the chocolate center oozes out of it when cut into. If you have a chocolate lover in your family, this is sure to put a smile on their face. Enjoy!

INGREDIENTS:

Makes 6 small cakes

5 oz of bittersweet (not unsweetened) or semisweet chocolate (break into smaller blocks)
10 TBSP Unsalted Butter (melted)
3 Large Eggs
3 Large Egg Yokes
1.5 Cups of Icing Sugar
1/2 Cup of All Purpose Flour
Vanilla Ice Cream (optional)
 

DIRECTIONS:

Set the over to bake 450 Degrees and let it preheat.

Get 6 x 3/4 cup souffle dishes or custard cups and butter them.

While the oven is heating melt the chocolate and the butter down in a small heavy sauce pot on low heat, stirring all the time. Let it cool slightly.

In a bowl whisk the egg and egg yokes together. Then start to add in the icing sugar bit by bit, followed by the melted chocolate and finally by the flour. Whisk the whole time!!

When everything is whisked together and smooth pour the mixture into the buttered souffle dishes in equal portions.

Bake for 11-12 minutes. You want the cake sides and top to be set but the center to be runny. If you had prepared the batter ahead of time and refrigerated it during dinner you may need 2 or so more minutes (14min total max)

Run knife around the cakes to help release them. Place a plate upside down on top of the souffle dish and flip the dish so the cake is upside-down on the plate. Garnish with ice cream and it is ready to be served.

I really hope you liked this cake! If you have any questions or comments please leave them below I would love to hear from you about your baking experience. Bon Appetite :)


I hope you enjoyed this recipe as much as I do. If you have any comments please leave them below and I'll be happy to answer them as soon as I can! Bon Appetite!!!


 PIN THIS POST

ITALIAN CROSTATA RECIPE - MEMORIES FROM ITALY

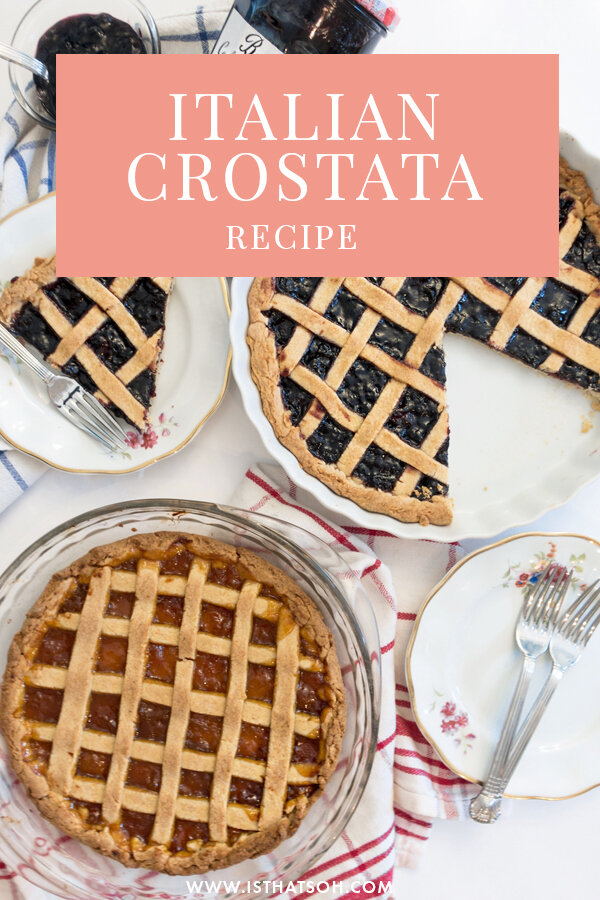
Having recently received a package of Bonne Maman jams (best surprise ever!) I decided that I would put them to good use and make some delicious Italian breakfast tarts known as Crostatas. If you ever find that you have lots of jam in your fridge and you are looking for ways to use them up this is a great idea. The recipe is really easy and forgiving, and can be a fun activity to do with kids. Although Italians typically serve this tart with breakfast it can easily transition to an after dinner dessert with the help of a scoop of ice cream. Buon appetito!!

INGREDIENTS:

2 Cups of flour
1/2 Cup of granulated sugar
1/2 Teaspoon of baking powder
1 Egg + 1 Egg yoke (throw out whites for just one egg)
1/2 Cup of butter (softened!)
3/4 Cup of jam of your choice

DIRECTIONS:

Using a large bowl add in your flour, sugar, and baking powder - whisk until fully incorporated together.

Make a well and add in your eggs and butter, and start to incorporate it all together. I like to start with my whisk and then move to using my hands as it gets more clumpy.

Kneed the clumps together until they form a dough (this may take some time but the butter will eventually spread and help form the dough).

Once dough is formed wrap in plastic wrap and place in fridge for 30 minutes.

Preheat oven to 350 degrees

Take dough out of fridge after 30 minutes and roll out using a rolling pin to about 1/8 of an inch thickness.

Spread the dough out over your pie dish and get rid of any excess dough. You can kneed the excess dough together again and roll it out again to create strips of dough which are equal in thickness to decorate the top of the crostata with a lattice later if you want.

Add in your jam and spread out evenly. You want just enough jam where you don't see the crust below.

Add your decorative stripes of dough to the top now. I like to form a lattice but some people cut out shapes instead. You can turn down the edges of the pie to hold the lattice strips in place.

Place in oven for 30 - 35 minutes or until top is golden.

Once ready remove and let cool for 10 minutes before serving. Enjoy!


If you like this recipe or have any comments/questions, feel free to leave them in the comment section below!


PIN THIS POST


VEGAN AND WHEAT FREE CARROT CAKE

So to start I must admit I am not vegan nor have a gluten free diet but this past weekend I was browsing my bookshelf and remembered this vegan cook book I have and decided to pull it out (for anyone who is interested in knowing more about the cookbook I will post a link below). As I perused the pages I came across this carrot cake recipe I 'dog eared' (weird expression I know) and decided to try it out. The results were a very nice and moist cake that I am sure will make any vegan person jump for joy.

INGREDIENTS:

Can of vegan, oil based non stick cooking spray
3/4 Cup Garbanzo Bean Flour
1 1/4 Cup Rice Flour
2 TSP Xanthan Gum
2 TSP Baking Soda
1/4 TSP Salt
2 TSP Cinnamon
1/2 Cup Apple Sauce
1 Cup Canola Oil
1 Cup Water
1 1/4 Cup of Maple Syrup
1 TSP Vanilla Extract
2 Cups Grated Carrots

Frosting - choose whichever flavor you like (mine was cream cheese) pre-made or I can list ingredients below.

Coconut Cream Cheese Frosting
8 OZ firm Silken Tofu
12 OZ Soy cream cheese
1 Cup of Powdered Sugar
1 TSP of coconut extract
1/2 Cup of Unsweetened Coconut
2 TSP of Xanthem Gum (for thickening)

DIRECTIONS: - SHORT VIDEO BELOW

*Like with most cakes you start by mixing all the dry ingredients together in one bow.. mixing all the wet ingredients in another bowl and then combining them together...vegan baking is the same

Preheat the oven to 325 degrees

Grab a 9 inch bread baking pan and coat it in non-stick cooking spray.

In a large bowl mix your garbanzo bean flour, rice flour, xantham gum, baking soda, sat and cinnamon together.

In a separate medium bowl mix your applesauce, canola oil, water, vanilla extract and maple syrup.

Next mix your wet ingredients into the bowl with the dry ingredients and stir until it is well incorporated. Then add in your grated carrots and mix well.

Pour cake mix into the coated baking pan and bake in the over for 75-80 minutes

Once finished remove from the oven and allow to cool before adding icing on top.

To make the frosting simply place all ingredients except the unsweetened coconut in a food processor and blend until smooth. Stir in the coconut after by hand. If possible you can make this the night before and refrigerate so it has more time to set and thicken.


For those who are interested in the cookbook I got this recipe from 'Sinfully Vegan' by Lois Dieterly.


I hope you enjoyed this recipe as much as I do. If you have any comments please leave them below and I'll be happy to answer them as soon as I can! Bon Appetite!!!