HOLIDAY DANISH WITH CREAM CHEESE DRIZZLE

With the holidays just around the corner I thought I would get a head start on trying some festive recipes, and since sweets go hand in hand with festive celebrations I thought I’d kick things off with this candy cane shaped danish! It’s the perfect dessert to bring to a friends for dinner and totally enhance any dessert table! I used store bought puff pastry and the left over cream cheese filling to create a icing drizzle which cut down on the time needed to whip this dessert up significantly. Also, feel free to switch up the jam and put your own unique twist on it! Happy Holidays!


FOLLOW ME ON INSTAGRAM @ISTHATSOH!


INGREDIENTS:

Serves 4-5 People

1 Sheet of Puff Pastry - leave out 2 hours in advance so it has time to de-thaw or place overnight in the fridge
2-3 TBSP of Flour - to sprinkle
2 TBSP of Unsalted Butter - melted as a wash

- Filling -

4 Oz of Cream Cheese
1 TSP of Vanilla
1/4 CUP of Sugar
Jam of Choice - I went with Raspberry

- Cream Cheese Icing -
Remaining Cream Cheese Filling
1 TBSP of Milk

- Tools -
Ruler
Knife


CHECK OUT THESE OTHER FESTIVE RECIPES!


DIRECTIONS:

Preheat oven to 375 degrees

Roll out puff pastry leaving the parchment paper on the backside. Using a ruler, measure and cut the pastry dough in half. Starting with one half, create isosceles triangles by notching every two inches down the longest side and finding the halfway point on the opposite side.

Next, overlap the triangles one by one in the shape of a candy cane. Press overlapping sides together to bind them.

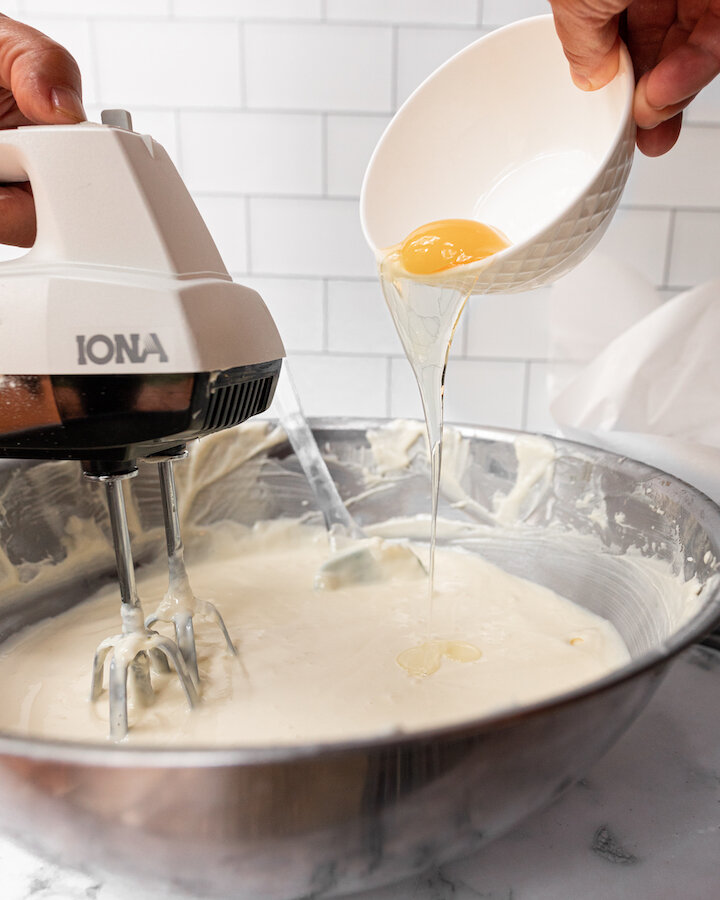
In a bowl combine your cream cheese, sugar, and vanilla. Beat with a hand mixer until well combined.

Spoonful cream cheese mixture onto the thickest part of the dough leaving a 1/2 inch border along the outer edge followed by your choice of jam.

Fold triangle points over and pinch along the 1/2 inch border to secure in place.

Brush dough with melted butter. You can also use to it seal the triangle points into place.

Bake for 16-20 minutes or until golden brown and allow to cool for 5 -10 minutes before adding icing.

Combine the remaining cream cheese mixture with 1 TBSP of milk and beat with a fork. Depending on how much cream cheese you used for filling you may need to add a little bit more milk to the mixture to make it more liquid. You will know you have the right consistency when you hold the fork above the mixture and have a pretty steady stream. Drizzle cream cheese icing over the danish and serve.

Alternatively, you can also sprinkle with powdered sugar.

Enjoy!


I hope you enjoyed this recipe as much as I do. If you have any comments please leave them below and I'll be happy to answer them as soon as I can! Happy cooking!!!


PIN THIS POST

BURNT BASQUE CHEESECAKE

We may not be able to travel right now but that doesn’t mean we can’t eat the delicious foods we discovered while away. I recently was reminded of Adam and I’s trip to Spain and the small little surfing town of San Sebastian that we visited while there. In the evening, we would wander around the small town looking for a bar to grab some pinchos (small traditional snacks typically eaten in bars in northern Spain) and on one of those evenings, we were also introduced to a popular dessert in the region, the Burnt Basque Cheesecake. Unsure of how to make it myself, I recently scoured the internet in search of a recipe that was not only super simple but tasted just as I had remembered. Not only was I super happy with how my cheesecake turned out but I would highly recommend giving this dessert recipe a good if you are looking for something to whisp you away to memories of Spain with a single bite!

Enjoy!

INGREDIENTS:

Unsalted Butter
2 LBS of Cream Cheese - Room Temperature
1.5 CUPS of Sugar
6 Large Eggs
2 CUPS of Heavy Cream
1 TSP of Kosher Salt
1 TSP of Vanilla
1/3 CUP of Flour

10” Spring Form Pan
Parchment Paper
Sifter

DIRECTIONS:

Preheat oven to 400 degrees and make sure your middle rack is not obstructed.

Using unsalted butter, butter your springform pan and line with two pieces (overlappings slightly in the middle) of parchment paper. You need them to help hold up the cheesecake once it rises so it’s okay if it comes over the top of the pan (just make sure it’s not too tall where it will touch the oven elements.

Beat cream cheese and sugar with a hand mixer on medium-low until sugar dissolves and the texture is smooth. Remember to scrape the sides!

Next, increase your speed slightly before adding one egg in at a time in 15-seconds intervals.

Next, reduce your speed slightly and add in your cream, salt, and vanilla. Mix until well incorporated, approximately 20-30 seconds.

Next, sift in your flour and beat on low until well incorporated. Make sure to scrape down the sides of the bowl to get the extra build-up on there. The batter should be a smooth consistency.

When ready, pour batter into your springform pan and bake on the medium rack for 60-65 minutes until it’s a deep golden brown.

When ready, set cheesecake aside to cool in the springform pan. The cheesecake will fall dramatically so don’t worry if it came over the sides a lot. Once cooled you can remove springform pan and carefully peel away the parchment paper.

At this point, feel free to cut the cake into wedges and serve however I like the consistency more the following day when it becomes more reminiscent of thicker creamy cheesecake as oppose to a flan texture.


I hope you enjoyed this recipe as much as I do. If you have any comments please leave them below and I'll be happy to answer them as soon as I can! Happy cooking!!!


PIN THIS POST

DULCE DE LECHE CHEESECAKE WITH SHORTBREAD CRUST

When it comes to cheesecake I’ve got the biggest weak spot! This year, for my birthday I requested my boyfriend’s mom make her famous cheesecake recipe with a dulce de leche topping and shortbread crust and boy was I in heaven. Ever since we went to Argentina together on a family trip I have been obsessed with dulce de leche and to have it on my birthday cake just made all the amazing memories come flooding back. If you are not into dulce de leche, no worries. The cheesecake in this recipe has vanilla in it so it also makes for a great, more subtle vanilla cheesecake recipe.

ENJOY!

INGREDIENTS:

-Shortbread Crust -

1/2 CUP if Butter (softened)
1/4 CUP of Sugar
1 CUP of All-Purpose Flour

- Cheesecake Filling -

1 CUP of Whipping Cream 35% - divided into 2 portions
3 x 8oz Packs of Cream Cheese (softened)
3/4 CUP of Sugar
2 TBSP of Cornstarch
4 Eggs
4 TBSP of Vanilla

- Topping -
Apx 300ml of Dulce De Leche

DIRECTIONS:

In a large bowl, beat butter and sugar until fluffy before slowly incorporate the flour until crumbly.

Press dough into a 9-inch springform pan before refrigerating for 10 minutes.

Preheat oven to 400 degrees and when ready, bake shortbread crust for 15 minutes until golden.

In another bowl, whip one portion of cream until stiff peaks start to form. Set aside.

In another large bowl, beat cream cheese until it starts to become fluffy before adding in sugar and cornstarch. Continue to beat until the filling has a smooth texture.

Next, beat in eggs one at a time until blended before beating in the remaining whipping cream and vanilla.

Lastly, fold in whipped cream and pour over the baked crust before returning the cake back to the oven and reducing the temperature to 300 degrees. Allow cheesecake to bake for 70 minutes or until the center is almost set.

When ready, allow the cheesecake to sit in the springform pan while it cools on a cooling rack. You can run a knife along the edge of the pan to help you remove it. After removing the springform pan refrigerate for at least 6 hours or overnight if possible before serving.


I hope you enjoyed this recipe as much as I do. If you have any comments please leave them below and I'll be happy to answer them as soon as I can! Bon Appetite!!!


PIN THIS POST

SCRAMBLE EGGS WITH SMOKED SALMON, CHIVES AND CREAM CHEESE

Eggs are known to be a great breakfast foodbut they can get a little boring after awhile. Why not reinvent your breakfast by adding some smoked salmon, chives and cream cheese? Smoked salmon is a great source of Omega 3's which helps with joint stiffness, asthma and depression while eggs are a great source of protein in the morning. Enjoy!

INGREDIENTS:

1 TSP of Butter
2 Eggs (beaten)
1 TBSP of Milk
Salt and Pepper to taste
1 TSP of Chives (chopped)
50-100 Gr of Smoked Salmon
A dollop of Light Cream Cheese
 

DIRECTIONS:

Place butter in a frying pan and set to low-medium heat. Let butter melt.

Add milk, salt and pepper to beaten eggs in a small bowl. Mix and add to frying pan and allow to cook and become fluffy moving the eggs around so they can evenly cook.

Plate your eggs when ready, top with chopped chives and accompany with smoke salon and cream cheese. Serve!


I hope you enjoyed this recipe as much as I do. If you have any comments please leave them below and I'll be happy to answer them as soon as I can! Happy cooking!!!

SMOKE SALMOM SANDWICH ON PUMPERNICKLE

I love lox bagels but I sometimes feel guilty about all the calories in bagels. Who needs all that calories, right? Pumpernickel bread is made with coarsely ground rye flour and therefore it has a much lower glycemic load then white bread. That means that when you eat pumpernickel your body which turns carbs in the bread to sugar doesn't have as much carbs to turn to sugar as regular bread which is great if you have diabetes. Salmon is a great source of Omega 3 as well as protein, B vitamins, vitamin D, magnesium and selenium which is essential for daily body functions. Enjoy guilt free.

INGREDIENTS:

100 Gr Of Smoke Salmon
Light Cream Cheese
2-3 Branches of Chives (diced)
1 Small Red Onion (sliced)
1 Vine Ripe Tomato (sliced)
2 Pieces of PumperNickle Bread (toasted)


DIRECTIONS:

Take both of your toasted pumper nickle bread and cover in light cream cheese.

Sprinkle your cut chive on either side of the bread you just dressed with cream cheese

Next start to build up your sandwich with tomato slices and onion and lastly with smoke salmon.

Next add more tomato and onion and the other sandwich, cream cheese side down. Serve!


I hope you enjoyed this recipe as much as I do. If you have any comments please leave them below and I'll be happy to answer them as soon as I can! Happy cooking!!!