AUTHENTIC BAJA FISH TACOS WITH CHIPOTLE SAUCE & COLESLAW + BAJA SHRIMP TACOS!

Authentic Baja Fish Tacos and Baja Shrimp Tacos served with a spicy chipotle sauce and coleslaw

I have always been a big fan of Baja fish tacos but being pregnant has put my cravings for fish tacos into overdrive! I crave them and Baja shrimp tacos (I don’t discriminate) at least twice a week so when I went to Punta Mita, Mexico to visit my mom last month, I asked her housekeeper and cook to teach me how to make authentic Mahi Mahi fish tacos from scratch!

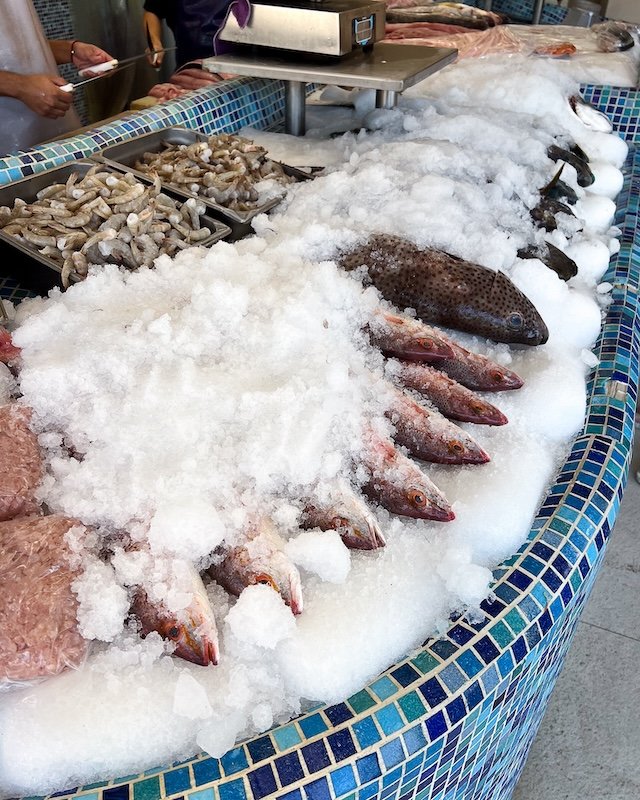
I don’t think I’ve ever tasted anything better! I mean, that week we were in Mexico we had tacos two or three times over the course of a week but the fish tacos we made at home were definitely my favourite. Maybe it was because the fish was fresh - we had gone to La Cruz that morning to the Mercardo del Mar to purchase the Mahi Mahi caught by local fisherman that morning - but they were out of this world!

Of course I didn’t leave Mexico without snagging the recipe for myself. I mean, now that I know how easy they are to make at home, I’ll definitely be making them whenever a pregnancy craving strikes!

* Please Note - Some links in this post may be affiliate links *


FOLLOW ME ON INSTAGRAM @ISTHATSOH


INGREDIENTS FOR BAJA MAHI MAHI FISH TACOS & BAJA SHRIMP TACOS:

SERVES 4 PEOPLE
- BATTER FOR BAJA FISH TACOS & BAJA SHRIMP TACOS -

2 Cups of Flour

2 x 355ml Cans of Beer (I used Corona!)

1 TBSP of black pepper

1 TBSP of Salt

- COLESLAW FOR FISH TACOS -

4 Cups of Green or Red Cabbage (shredded)

3 TBSP of Lime Juice

1/2 TSP of Salt


- BAJA FISH TACO SAUCE -

3 Chipotle Chilies - you can freeze any leftover Chipotle peppers from the can by placing them in a Ziplock bag.

3/4 Cup of Mayonnaise

A pinch of salt

A pinch of pepper

2 TBSP of lime juice

- ADDITIONAL INGREDIENTS -
1.5 - 2 lbs of Mahi Mahi cut into 1 x 3 inch strips 

20 pieces of Shrimps - de-veined with shell and tail removed 

Vegetable Oil for Frying

1 Lime cut into wedges for serving

Flour or Corn Tortillas - warmed
Guacamole *optional

Cilantro for Garnish *optional


CHECK OUT THESE OTHER SEAFOOD RECIPES


HOW TO MAKE BAJA FISH TACOS:

Begin by making the coleslaw for your fish tacos. Toss the cabbage, lime juice and pinch of salt in a bowl and mix well before setting aside to soak. The acidity in the lime juice will help soften the cabbage.

Next, begin making your Baja fish taco sauce. In a blender combine your chilies, lime juice, and mayonnaise with a pinch of salt and pepper. Blend and taste. Add more chilies if you want it spicier or mayonnaise to cool it down.

Fill your frying pan with vegetable oil (you’ll need about a 1/2 inch depth of oil) and slowly let it rise to temperature on the stove over medium heat. You want it to heat to 350 degrees Fahrenheit. Use a deep fry thermometer if you have one or test the oil with a wooden spoon - if it sizzles when dipped in the oil, it’s ready.

While you are waiting for the oil to heat up you can make your batter for the Baja fish tacos and Baja shrimp tacos. Mix the flour, salt and pepper in a medium size bowl and slowly whisk in the beer, little by little until you have a smooth consistency with no lumps.

Once the oil in the pan is up to the correct frying temperature, dip the fish strips and cleaned shrimp in the beer batter, making sure to coat both sides well but letting any excess batter to drip off. Place battered fish and shrimp in the frying pan, a few pieces at a time so not to overcrowd the pan too much. Allow each piece to fry until golden brown and cooked through (approximately two minutes) before transferring the cooked pieces to a plate lined with paper towel. The paper towel will soak up all the excess oil. Repeat until all the fish is cooked.

Baja fish taco recipe - making mahi mahi fish tacos and baja shrimp tacos

Fry the battered fish and shrimp in a half inch of vegetable oil over medium heat until golden (approximately 2 minutes)

While you are cooking the fish you can also warm the tortillas in the oven for a few minutes.

When ready to plate, line the tortillas up on a plate and place a piece of fish or 2-3 pieces of shrimp in each taco shell. Top with some cabbage slaw and drizzle with some Chipotle fish taco sauce.

You can garnish the Baja fish tacos and Baja shrimp tacos with cilantro before servicing if you like but make sure to also include a wedge of lemon.

This dish also goes well with guacamole and chips or just guacamole on its own which you can always add on as an extra topping to your fish tacos.

Enjoy!


I hope you enjoyed this Baja fish taco recipe with Chipotle Baja fish taco sauce and coleslaw as much as I do. If you have any comments please leave them below and I'll be happy to answer them as soon as I can! Hasta Pronto!!!


PIN THIS POST

Baja fish taco recipe - making mahi mahi fish tacos and baja shrimp tacos from scratch - baja style fish tacos.jpg

PERSIAN COOKING - KASHKE BADEMJAN RECIPE! VEGETARIAN EGGPLANT DIP

KASHKE BADEMJAN (pronounced Cash-kay Bad-em-jan) is a traditional Persian eggplant dip that accompanies meals and is always a favorite amongst my guest. Bademjan literally translates into eggplant in Farsi while Kashka refers to a type of middle eastern dairy. Usually served a little warm or room temperature, this Persian eggplant dip or side dish should always be accompanied by toasted pita or flatbread wedges. I recently made kashke bademjan for a dinner party I had at my sister’s house in Los Angeles and as you can guess, it was a total crowd pleaser. If you are a Vegetarian, love Persian food, or are just a big fan of eggplants then I highly recommend you try this kashke bademjan recipe!

KASHEK BADEMJAN can also easily be made GLUTEN FREE if you serve it on a gluten free pita equivalent or vegan if you do not add the yogurt.

For my dinner party, I made a serving of this for about 6 people. This recipe yields enough for each person to have a really nice size dollop! 

PS Don’t forget to watch the video at the bottom if you need extra help!

INGREDIENTS:

6 Chinese Eggplants or Italian Eggplant - cut lengthwise into 1/4 inch strips (if you can’t find Italian or Chinese eggplant you can use regular eggplant too)
1 Cup of Vegetable Oil - divided in 4TBSP portions
4-5 cloves of Garlic minced
1.5 Large White or Sweet Onion chopped
2/3 Cup of Water
1 TSP Salt
1 TSP Pepper
1/2 TSP Cayenne Pepper
1/2 Cup of Walnuts - chopped (I bought them already chopped at the store to avoid needing a food processor)
1 TBSP dried Mint leaves
1 Cup of Plain Greek Yogurt (optional)
Pita Bread


CHECK OUT THESE OTHER DELICIOUS RECIPES FOR SIDE DISHES!


DIRECTIONS:

Start off by adding about 4 TBSP of oil to your skillet. Heat up the oil at medium heat and then add a single layer of eggplant. Cover and let cook for about 6 minutes. Keep an eye on the eggplant so that they don't burn. Once they are browned flip to the other side and let cook for an additional 3-4 minutes or until they are brown as well. Remove cooked eggplant from skillet and onto a side dish. REPEAT until this step until all the eggplant is fried.

In the meantime get another skillet and add about 3 TBSP of oil to it. Let it heat up at medium heat for a minute and once the oil is hot add the chopped onions. Let the onion cook it they become a nice golden (caramelized) colour. This may take several minutes but stir often so they do not burn.

Once all the eggplant is finished and removed from the first skillet add the spices and the garlic to the skillet. Let the garlic cook for a minute making sure to stir it around and coat the bottom of the skillet. Also make sure that the temperature is still on medium so you do not burn the garlic. After a minute add back in the eggplant and mix together. Once mixed add in the water and cover. Let this simmer for about 15-20 minutes or until the eggplant becomes soft and the water evaporates. You may notice that there is a lot of oil that has seeped out the of eggplant, you can drain a spoonful or two out.

In the other skillet the onions should start to look nice and golden. Once the onion is ready remove it from the heat and add in the dried mint. Make sure to crush the dried mint with your hands as you add it in to release/activate the mint smell. Mix in the mint with the onions. *I would remove 2-3 TBSP of this to use as a garnish later.

If you didn’t buy walnuts already chopped, add you walnuts to your food processor and chop them till they are fine but still crunchy (do not over do it otherwise they will become a paste or nut butter)

When the eggplant is nice and tender remove it from the heat and add in the onion, mint and walnuts and stir. 

If you are Vegan you are finished.

If you want to continue with the dairy stir in the Greek yogurt until it is fully blended.

Transfer the mashed eggplant to a serving bowl, add the onion garnish you set aside earlier and serve at room temperature with toasted pita or flat bread.


FOLLOW ME ON INSTAGRAM @ISTHATSOH


Thanks for joining me today! I hope you enjoyed this Kashke Bademjan recipe as much as I do. If you have any questions or comments about this persian eggplant dip recipe, please feel free to leave them in the comments below and I will try and answer them as soon as I can!


PIN THIS POST!

CLASSIC ITALIAN BRUSCHETTA RECIPE

italian brushcetta recipe_-3.jpg

A classic Italian Bruschetta Recipe with Cheese

Italian cuisine has always been one of my favorites. When I was little my mom took my brother and I to Italy for the summer and we stayed in this villa outside the small medieval town of Montalcino, smack in the middle of Tuscan wine country. The villa was owned by a winemaker and farmer and was situated on the edge of his vast property. I remember running through the rows of grapevines, chasing sheep, and stomping buckets of grapes for fun. A child's dream playground and also the place I was first introduced to Italian cuisine (at least as far back as I can actually recall) and believe me it was love at first taste!

Bruschetta is a typical antipasto that comes before your meal and opens up your stomach for the usual large plant of pasta to follow. I am a huge fan of a classic tomato bruschetta and making it at home quite often. Not only is a classic bruschetta actually quite easy and straightforward to make but it also takes no time at all. If you are looking for an easy authentic Italian bruschetta recipe to make for your next meal, check out my bruschetta recipe below!

INGREDIENTS:

Serves 3-4 as an appetizer

1/4 Cup of Extra Virgin Olive Oil
2-3 Cloves of Garlic (if you like garlic put more... obviously) - minced
3 Tomatoes (I use vine tomatoes) - remove seeds and chop into pinkie nail size bits
1/3 Cup of Chopped Fresh Basil Leaves
Salt and Pepper to taste
French Baguette - Cut into pieces
Parmasan Cheese - optional garnish


CRAVING ITALIAN FOOD? CHECK OUT THESE OTHER DELICIOUS ITALIAN RECIPES!


HOW TO MAKE AN AUTHENTIC ITALIAN BRUSCHETTA!

In a small skillet, heat up extra virgin olive oil on medium - low heat. When ready, add in the garlic and allow to cook until aromatic and translucent (about 2-3 minutes). Remove from heat.

In a bowl, add your garlic and olive oil, chopped tomatoes, and basil. Sprinkle with salt and pepper to taste. Mix thoroughly and set aside.

italian brushcetta recipe_-4.jpg

An authentic Italian bruschetta with cheese

Cut the baguette into 1/2 inch slices and brush with olive oil on one side. Place them on a baking sheet, olive oil side up, and broil them in the oven until they start to brown (like toast). Once out of the oven dress the baguette with the bruschetta ingredients in the bowl.

Garnish with some more chopped fresh basil or parmesan cheese if you like and it is ready to serve!

italian brushcetta recipe_-2.jpg

An authentic Italian bruschetta with cheese

CHECK OUT THIS VIDEO ON HOW TO MAKE BRUSCHETTA


FOLLOW ME ON INSTAGRAM @ISTHATSOH


I hope you enjoyed this easy Italian bruschetta recipe. If you did please tell me about your experience in the comments below. If you want me to try something else I am always up for suggestions!!!!


PIN THIS POST

PENNE ALLA VODKA - AN AUTHENTIC VODKA SAUCE RECIPE

This authentic vodka sauce recipe is one of my all-time favorite pasta dishes and one of my most frequently asked for. People just love it, especially in the winter when the warmth and spiciness of this dish balance out the weather outside. Jam-packed full of carbs and comfort this dish definitely gives you the energy your body needs to stay warm all year round. All that aside though, it is a classic Italian vodka sauce recipe you can easily tweak to your desired spice level! First time cooking with vodka? Don’t worry, all alcohol in the vodka does evaporate during the cooking process while the vodka helps detach all the juicy pork flavor from the bottom of the skillet to ensure the most flavorful sauce you can possibly get! Enjoy!

INGREDIENTS:

SERVES 4-5
10 Min Prep, 50 min Cooking Time

1 Pack of Penne Pasta (Usually feeds 4-5)
1-1.5 650ml Bottles of Tomato Sauce (basic Pomodoro or tomato & basil)
1 TBSP of Butter (Salted
1 Cup of Vodka
200-300grams Of Pancetta or Black Forest Ham (chopped finely - almost minced)
1 TSP of Chili Flakes (optional)
1 Medium box of 35% Whipping cream
Parmesan Cheese (1 Cup Shaved and 1 Cup for garnish)
Salt and Pepper to Taste
Baguette (optional)


HERE ARE SOME OTHER PASTA RECIPES YOU MAY ALSO ENJOY!


DIRECTIONS:

Melt the butter down in a deep skillet on medium heat. Once the butter is melted and hot add in the chunks of pancetta or minced ham, tossing it in the butter and allowing it to cook until it becomes crispy.

Once the pancetta or ham is crispy add in your cup of vodka. It will create some more heat and steam but don't worry all the alcohol will burn out. This helps all the flavor from the ham that stuck to the bottom of the skillet to be transferred back into the flavors of the sauce later. Scrape the bottom of the skillet with a wooden spoon to help them along. Let this cook down until there is only a little bit of moisture left. Take your time.

Next, add in the tomato sauce (whether homemade or bought from the store you want the most basic Pomodoro kind). This will add in a lot of liquid to your sauce so make sure you boil this down as well so that a lot of the water evaporates and you are left with a nice thick sauce. About 20-30 minutes.

If you want your sauce to be a little bit spicy add in your chili peppers now and let them cook into your sauce. Sprinkle and stir. You can also add in some Salt and Pepper now to your taste.

Next, add in your cream. First, about a 1/2 cup stirring the whole time than a 1/4 cup until you get the perfect red/orange color. You can taste it as you go to see if you want more cream. To help thicken the sauce up shave about a cup of parmesan down and add it into the sauce, stir it in. Let the water cook out of this while you start cooking the penne pasta in a pot. Some people also like to use a hand blender and blend the sauce at this point so that the small bits of pancetta/ham become undetectable and the sauce is extra smooth in texture.

Boil water for the pasta adding about 1-1.5 TBSP of salt to the water once it boils. Add in pasta and let it cook till it is al dente.

Now you should be ready to serve the sauce with the pasta. You can either mix it together or spoon some sauce on top of a plate of pasta. Garnish with more parmesan cheese and a slice of baguette.


FOLLOW ME ON INSTAGRAM @ISTHATSOH


I hope you enjoy this authentic penne alla vodka sauce recipe as much as I do! Please let me know your thoughts and comments below I’d love to hear from you! Happy cooking :)


PIN THIS POST

PAD GRA PROW - EASY THAI STREET FOOD RECIPE!

Since I am always and forever dreaming of travel, I thought I’d share a new recipe and popular street food dish today from a country on my bucket list, Thailand. Pad Gra Prow (sometimes also seen spelled Pad Gra Pow or Pad Kra Prow) is a flavourful, ground pork dish that is served on top of a bed of steamed Jasmin rice and topped with a sunny-side-up egg. Not only is it super simple to make but it will have you asking for second helpings! Don’t like pork? That’s okay! Tofu makes a great vegetarian substitute for pork or even ground chicken. Alternatively, if you are looking for a low-carb option you can also substitute the rice for a lettuce wrap which adds an extra refreshing element to this already delicious dish. No matter what your preference, this recipe will have you daydreaming of traveling to Thailand one day soon too.

INGREDIENTS:

Yields 2-3 Servings

2 CUPS of Steamed Jasmin Rice
4 TBSP of Vegetable Oil divided - 1 TBSP and 3 TBSP
1 TBSP of Oyster Sauce
1 TBSP of Soy Sauce
1.5 TSP of Fish Sauce
2 TBSP Garlic - minced
1/2 TSP of Thai chili - minced
1 LB or 450g of Ground Pork - you can substitute for chicken or tofu but squeeze out all the water if you use tofu
1 Cup of French Beans - cut in 1” pieces
1/2 a White Onion - cut in 1/4 inch strips
2 Eggs
1 Cup of Thai Holy Basil - roughly chopped - if you can’t find Thai Holy Basil you can use regular Italian Basil instead
Salt and Pepper


MORE MOUTHWATERING ASIAN RECIPES


DIRECTIONS:

Cook rice and set aside.

While rice is cooking, add the oyster sauce, soy sauce and, fish sauce to a bowl and mix thoroughly, set aside

Next, in a wok heat up your vegetable oil and add in your garlic and chili. Cook until fragrant.

Once fragrant, add in your ground pork (or substitute with chicken or crumbled tofu) and allow to cook completely. Salt and pepper as desired.

Next, add in veggies (onion and beans) and continue to cook for about 2 minutes.

During this time/, fry eggs sunny side up in a skillet with a little bit of vegetable oil until whites are cooked but yolk is still runny, set aside.

Once pork/veggies are done, add the sauce mixture you made earlier to the wok and stir until well incorporated.

Next, stir in basil until wilted

Lastly, plate the pad gra prow on top of a bed of rice adding the fried egg on top and garnish with a piece of fresh basil.

Additionally, you can add a lime wedge on the side as well as a few extra small pieces of chili in a tablespoon of fish sauce when serving.

Enjoy!


FOLLOW ME ON INSTAGRAM @ISTHATSOH


I hope you enjoyed this recipe as much as I do. If you have any comments please leave them below and I'll be happy to answer them as soon as I can! Happy cooking!!!


PIN THIS POST