KOREAN KIMCHI PANCAKES (KIMCHIJEON) WITH DIPPING SAUCE - A YUMMY KOREAN STREET FOOD RECIPE

Korean kimchi pancakes (often referred to as kimchijeon in Korea) are a delicious street food dish often enjoyed as a snack or after a night out, that is so easy to make at home! To tell you the truth, it’s just like making traditional pancakes where you add everything together in a bowl and fry it up except Korean Kimchi Pancakes are way more savory than your traditional North American pancake thanks to the addition of green onions and some spicy kimchi! If you enjoy Korean food and want to learn how to make delicious kimchi pancakes at home, check out this foolproof recipe with dipping sauce below!

IS KIMCHI VEGAN?

It all depends on the brand you buy! Traditional kimchi does contain fish sauce but depending on the brand you buy you can also find it without, so make sure to check the ingredient list. Additionally, Kimchi is not difficult to make, so if you want to try making it at home you can just leave out any animal products to make it vegan.

In my opinion, the best kimchi brand is Myungga Mat Kimchi however, I did recently do a Whole 30 cleanse and found a plant-based kimchi brand called LIVE at Ambrosia that I very much enjoy. It doesn’t have any added fish sauce and uses apple for sweetness instead of sugar. *NOTE: This recipe is not whole 30!

WHAT ARE SOME KIMCHI BENEFITS?

Kimchi is so good for your gut! It aids with digestion and is packed full of great probiotics. It is also said to help with inflammation, aid with weight loss, strengthen your immune system and support heart health!

DOES KIMCHI GO BAD

Yes! I recently had to throw out the remnants of a jar of kimchi that was a month or so old. You could tell by the way it smelled that it had ‘over fermented’. It smelled like a bottle of wine that has been sitting out for a few days. If you open your jar and it smells kind of sour with a pungent alcohol smell - it’s most likely gone bad.

* Please Note - Some links in this post may be affiliate links *

INGREDIENTS FOR KIMCHI PANCAKES:

Makes 2-3 Pancakes

3-4 Green Onions (chopped diagonally) - set a little aside for garnish
1/2 a CUP of Kimchi (chopped) *Use a plant-based Kimchi if you want this recipe to be vegan!
1/2 a CUP of Korean Pancake Mix
2-3 TBSP of Kimchi Juice and/or Korean Chili Paste
About 1 Cup of Water (to be added a 1/4 CUP at a time)
1-2 TBSP of Vegetable Oil

- Garnish -
1 TBSP of Seasame Seeds (roasted)
Dried Seaweed (cut into 2-inch strips)

- Dipping Sauce -

2 TBSP of Soya Sauce
1 TBSP of Water
2 TSP of Rice Vinegar
1 TSP of Sugar
2 TSP of Sesame Oil
1 TSP of Sesame Seeds


CHECK OUT THESE OTHER ASIAN INSPIRED RECIPES


HOW TO MAKE KIMCHI PANCAKES:

In a small bowl, add all your dipping sauce ingredients, and using a fork mix it together before setting it aside.

In a bowl add in your green onions (making sure to put some to the side for a garnish later), Korean pancake mix, kimchi, and kimchi juice/ Korean chili paste in a bowl. Stir in a 1/4 cup of water at a time until a batter starts to form. You want it to be the same consistency as a regular pancake mix so keep adding water until you achieve this desired consistency.

Heat up 1-2 TBSP of vegetable oil in a pan and pour in your Kimchi pancake batter when hot. Allow the Kimchi pancake to cook on one side for 2-3 minutes before flipping - same as you would a regular pancake.

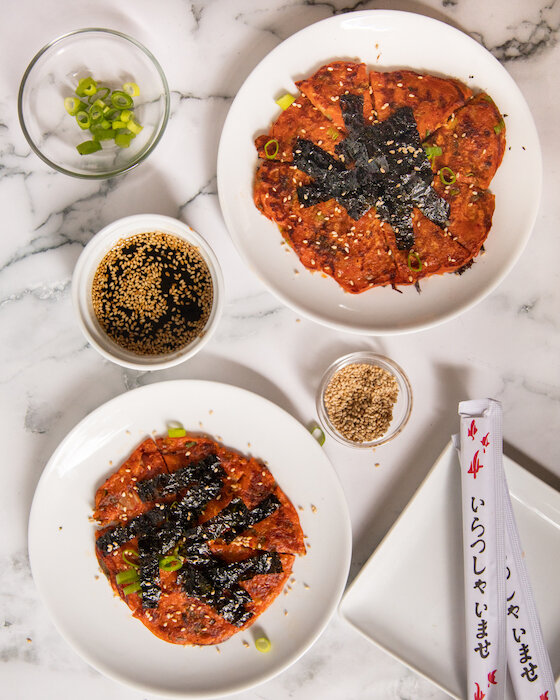
When ready, remove from heat, garnish with sesame seeds, more green onion, and dried seaweed strips.

Serve with dipping sauce.


FOLLOW ME ON INSTAGRAM @ISTHATSOH


I hope you enjoyed this easy vegan kimchi pancake recipe with dipping sauce as much as I do. If you have any comments about how to make kimchi pancakes, please leave them below and I'll be happy to answer them as soon as I can! Happy cooking!!!

PIN THIS POST

CLASSIC ITALIAN BRUSCHETTA RECIPE

italian brushcetta recipe_-3.jpg

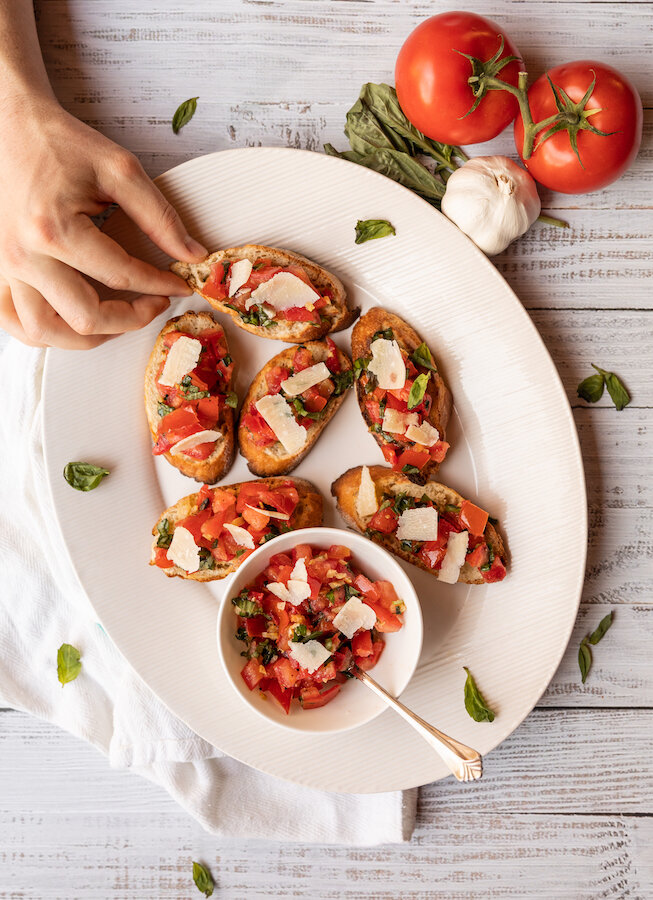
A classic Italian Bruschetta Recipe with Cheese

Italian cuisine has always been one of my favorites. When I was little my mom took my brother and I to Italy for the summer and we stayed in this villa outside the small medieval town of Montalcino, smack in the middle of Tuscan wine country. The villa was owned by a winemaker and farmer and was situated on the edge of his vast property. I remember running through the rows of grapevines, chasing sheep, and stomping buckets of grapes for fun. A child's dream playground and also the place I was first introduced to Italian cuisine (at least as far back as I can actually recall) and believe me it was love at first taste!

Bruschetta is a typical antipasto that comes before your meal and opens up your stomach for the usual large plant of pasta to follow. I am a huge fan of a classic tomato bruschetta and making it at home quite often. Not only is a classic bruschetta actually quite easy and straightforward to make but it also takes no time at all. If you are looking for an easy authentic Italian bruschetta recipe to make for your next meal, check out my bruschetta recipe below!

INGREDIENTS:

Serves 3-4 as an appetizer

1/4 Cup of Extra Virgin Olive Oil
2-3 Cloves of Garlic (if you like garlic put more... obviously) - minced
3 Tomatoes (I use vine tomatoes) - remove seeds and chop into pinkie nail size bits
1/3 Cup of Chopped Fresh Basil Leaves
Salt and Pepper to taste
French Baguette - Cut into pieces
Parmasan Cheese - optional garnish


CRAVING ITALIAN FOOD? CHECK OUT THESE OTHER DELICIOUS ITALIAN RECIPES!


HOW TO MAKE AN AUTHENTIC ITALIAN BRUSCHETTA!

In a small skillet, heat up extra virgin olive oil on medium - low heat. When ready, add in the garlic and allow to cook until aromatic and translucent (about 2-3 minutes). Remove from heat.

In a bowl, add your garlic and olive oil, chopped tomatoes, and basil. Sprinkle with salt and pepper to taste. Mix thoroughly and set aside.

italian brushcetta recipe_-4.jpg

An authentic Italian bruschetta with cheese

Cut the baguette into 1/2 inch slices and brush with olive oil on one side. Place them on a baking sheet, olive oil side up, and broil them in the oven until they start to brown (like toast). Once out of the oven dress the baguette with the bruschetta ingredients in the bowl.

Garnish with some more chopped fresh basil or parmesan cheese if you like and it is ready to serve!

italian brushcetta recipe_-2.jpg

An authentic Italian bruschetta with cheese

CHECK OUT THIS VIDEO ON HOW TO MAKE BRUSCHETTA


FOLLOW ME ON INSTAGRAM @ISTHATSOH


I hope you enjoyed this easy Italian bruschetta recipe. If you did please tell me about your experience in the comments below. If you want me to try something else I am always up for suggestions!!!!


PIN THIS POST

THC RED VELVET 'TRUFFLES' FOR VALENTINE'S DAY

Since it has been almost a year since I have had the chance to hang out with all my girlfriends, I thought it would be nice to send them something for Valentine’s Day that will not only spark joy in their life but also let them know that I am thinking of them.

I have never made THC edibles or THC candy or recipes with cannabis before, but after learning how easy it can be to incorporate them into desserts without having to worry about measuring out dosages and making them myself, it got a whole lot easier to imagine ways to use them when baking.

Since Valentine’s Day is the holiday in question, I thought a Red Velvet Cake was fitting, and much like making cake pops, coating the ‘truffle’ with chocolate also became a great way to seal in freshness, add decorative designs, and play well into my Valentine’s Day theme.

If you are looking for a fun little surprise to leave a friend or loved one this Valentine’s Day, I highly recommend this easy to make THC Red Velvet ‘Truffle‘ recipe!

* Please Note - Some links in this post may be affiliate links *

INGREDIENTS:


Makes 12 Truffles

1 Box of Red Velvet Cake Mix (I used Duncan Hines)
1 Cup of Cream Cheese (Softened)
12 THC Chocolates (Any kind that’s small enough to fit inside your desired truffle size - I used Fireside Milk Chocolate 5MG chocolates)
3 Cup of Semi-Sweet Chocolate Baking Chips
2 Cups of Melted White Chocolate (Preferably Melting Wafers)

- Optional Garnish -
Any Heart Shaped Candy

- Cooking Instruments -
Cake Tray
Baking Sheet
Wax Paper
Electric Hand Mixer
Food Processor - optional


CHECK OUT THESE OTHER GREAT GIFT RECIPES!

DIRECTIONS:

Make a Red Velvet Cake according to the instruction on the box.

Using a bowl, beat your cream cheese until it becomes soft and easily spreadable.

Next, deconstruct the cake until it’s just crumbs either using your hands or a food processor, adding it to the bowl with the cream cheese afterwards.

Mix the cream cheese in with the cake so that it becomes doughy once again.

Flatten about 1 TBSP of the cake mixture into your hand, place the THC chocolate in the middle, and roll the sides up around the chocolate (I recommend not going too thick with the mix if you don’t want them to be huge. I thought the size of my palm was plenty big). Place the rolled balls on a baking sheet covered with wax paper.

Next, using the double boiling method, melt the semi-sweet chocolate and drizzle it over each THC cake mix ball until fully coated. You may want to use a spatula to help you. Do the same with the white chocolate wafers. You can use both chocolates together to create designs as well. Don’t forget to add the garnish before the chocolate completely hardens!

Allow chocolate coating to harden on the wax paper before using a knife to trim and remove the bottom of the truffle from the wax paper and store in the fridge. If you are giving them away to a friend remember to tell them to also store them in the fridge until they are ready to be enjoyed.


FOLLOW ME ON INSTAGRAM @ISTHATSOH


I hope you enjoyed this THC edibles recipe as much as I do. If you have any comments or want me to post more cannabis recipes please let me know below and I'll be happy to answer them as soon as I can! Happy baking!!!


PIN THIS POST

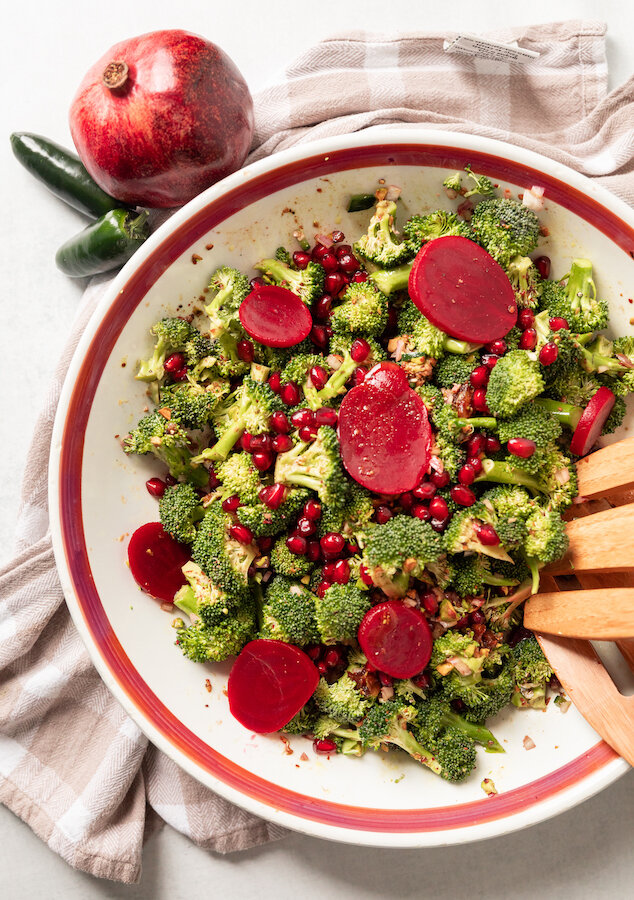
MOROCCAN BROCCOLI SALAD - GLUTEN FREE, KETO & VEGAN

Packed full of antioxidants, this delicious Moroccan raw broccoli salad is both beautiful to look at and packed full of nutrients. If you, like me, are looking for ways to eat healthier without compromising on taste, this gluten free, vegan, keto broccoli salad is perfect. Since it can be prepared a day in advance and keeps well in the fridge, it also is great for meal planning or a grab-and-go snack. Not to mention it takes only a few minutes to make!

Enjoy!

INGREDIENTS:

Serves 4

- Dressing -
6 TBSP of Grape Seed Oil
1 TSP of Ras-El-Hanout Spice
1 Garlic Clove (pressed or chopped finely)
2 TBSP of Fresh Lemon Juice
2 TBSP of Balsamic Vinegar
1 TBSP of Honey (can be substituted with Agave if you are vegan)
Salt and Pepper to taste

- Salad -
6 CUPS of Broccoli Florets
1 Shallot (chopped Finely)
1 Jalapeno (chopped finely)
1/3 CUP of Dates (pits removed and chopped finely) - reduce the amount or leave out if you want more of a keto broccoli salad)
1/4 Cup of Roasted Pistachios (chopped finely)
Salt and Pepper to taste

- Optional Garnish-
1/4 CUP of Pomegranate Seeds
5-6 Slices of Pickled Beets (use sugar-free pickled beets if you want more of a keto broccoli salad)


LOOKING FOR SOME HEALTHY RECIPES? CHECK THESE OUT TOO!


DIRECTIONS:

Remove sauce pan from heat and add in lemon juice, balsamic vinegar, and honey (or agave). Salt and pepper to taste and set aside to cool.

Next, add your broccoli, shallots, dates, jalapenos and pistachios to a large salad bowl. Dress with your ras-el-hanout dressing, toss and garnish with pomegranates and slices of picked beats. Salt and pepper once again to taste.

Cover and chill if prepared in advance otherwise enjoy!


FOLLOW ME ON INSTAGRAM @ISTHATSOH


I hope you enjoyed this gluten free, vegan, keto broccoli salad recipe as much as I do. If you have any comments please leave them below and I'll be happy to answer them as soon as I can! Happy cooking!!!


PIN THIS POST

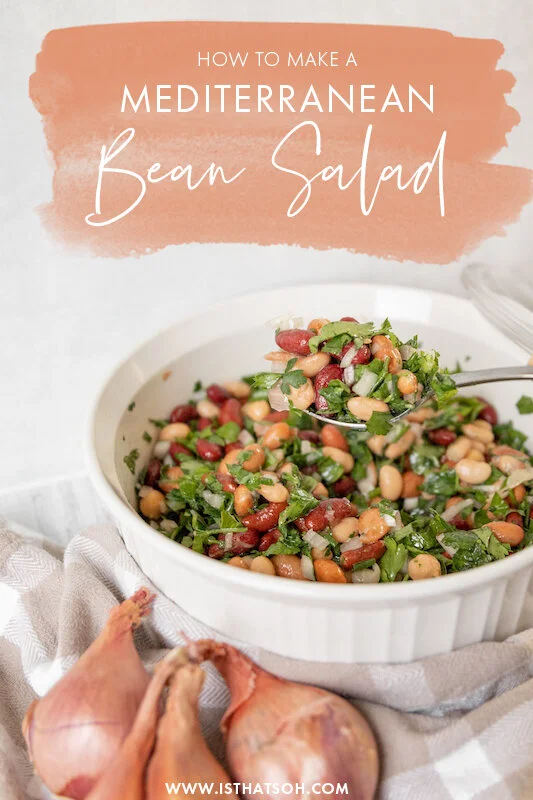
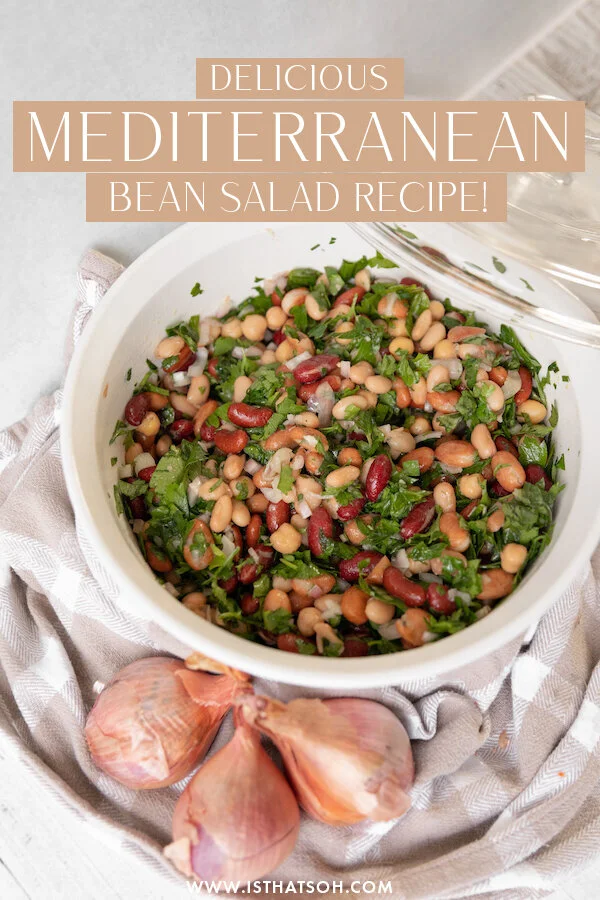
MEDITERRANEAN VEGAN BEAN SALAD!

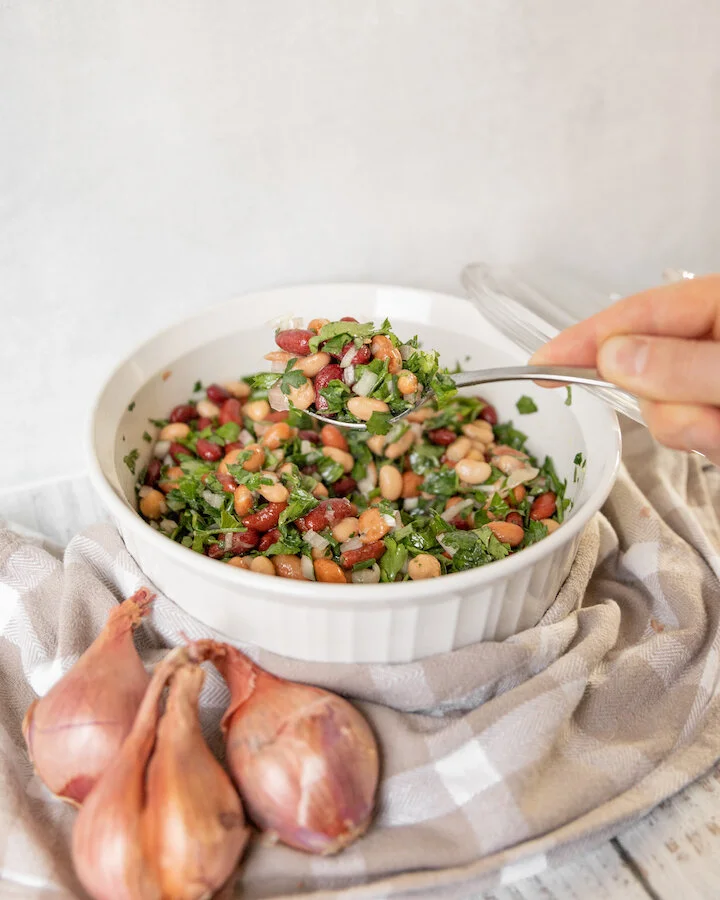
As someone who is always looking for ways to make ‘honouring my body’ easier, following a balanced diet such as the traditional Mediterranean diet makes doing so not only satisfying but undeniably more delicious! If you are looking for ways to add more protein to your diet without always gorging on meat, mix bean salad make a great substitute. Packed full of protein and carbs, this Mediterranean vegan bean salad will give you a boost of energy to help sustain you throughout the day. It has more nutritional value than a regular leafy green salad and keeps well for 3-4 days in the fridge, making it perfect for meal planning. It’s also very inexpensive to make and can be whipped up in less then 10 minutes! Regardless of your motivation, I know you’ll not only love the flavour, but feel good about eating it too!

Enjoy!

INGREDIENTS:

Serves 4-5

1 Shallot (finely chopped)
3TBSP of White Wine Vinegar
1/2 Cup of Parsley (roughly chopped)
1/4 Cup of Chives (roughly chopped)
1/4 Cup of Mint (roughly Chopped
Olive Oil
2 x 15 oz Mix Bean Medley
Salt and Pepper


LOOKING FOR VEGAN RECIPES? CHECK THESE OUT!


DIRECTIONS:

Add white wine vinegar to shallots and set aside for 5 minutes.

Next get a large bowl and add in your chopped parsley, chives and mint. Coat in olive oil. Add bean medley. Salt (generously) and pepper to taste.

Lastly add in your white wine vinegar shallots, toss and serve!


FOLLOW ME ON INSTAGRAM @ISTHATSOH


I hope you enjoy this vegan bean salad recipe as much as I do. If you have any comments please leave them below and I'll be happy to answer them as soon as I can! Happy cooking!!!


PIN THIS POST