SHAMROCK MATCHA FUDGE

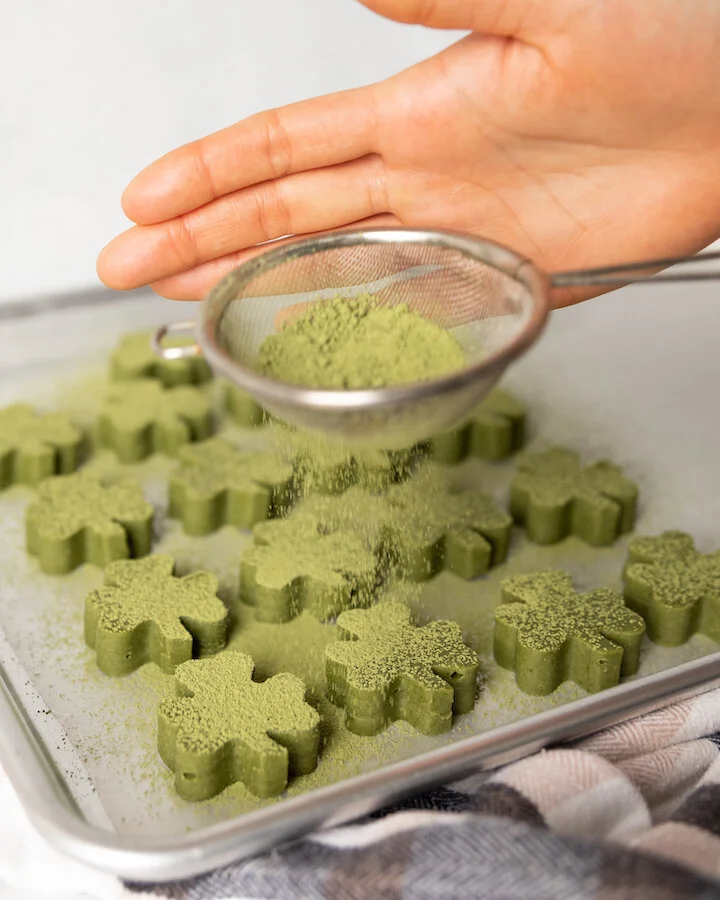
With spring now on the horizon I am looking forward to good weather and celebrating Easter and St. Patrick’s Day in March. To help me get in the festive spirit I decided to whip up some white chocolate fudge with a matcha dessert twist to help it not only turn green but become a perfect St. Patrick’s Day dessert. Although they are as delicious and can easily be cut into matcha squares, I decided to take the theme a little further using my little shamrock cookie cutter to achieve these adorable shamrock match fudge morsels. If you are a matcha lover or looking for new ways to use Matcha powder, you are going to love this St. Patrick’s Day Recipe. But don’t take my word for it, try for yourself. Enjoy!

* Please Note - Some links in this post may be affiliate links *

INGREDIENTS:

Apx 16 Shamrocks

3/4 CUP of Condensed Milk
1.5-2 TBSP of Powdered Matcha - depending on how strong you want the matcha flavour
14 oz White Chocolate
1/2 TSP of Salt
1 TSP of Vanilla Extract
1 TBSP of Matcha for decorative dusting at the end

You will also need:
1.5 Inch Shamrock Cookie Cutter
8x8 Baking Pan
Parchment Paper
A Fine Sifter
Spatula


OTHER NOTEWORTHY DESSERT RECIPES


DIRECTIONS:

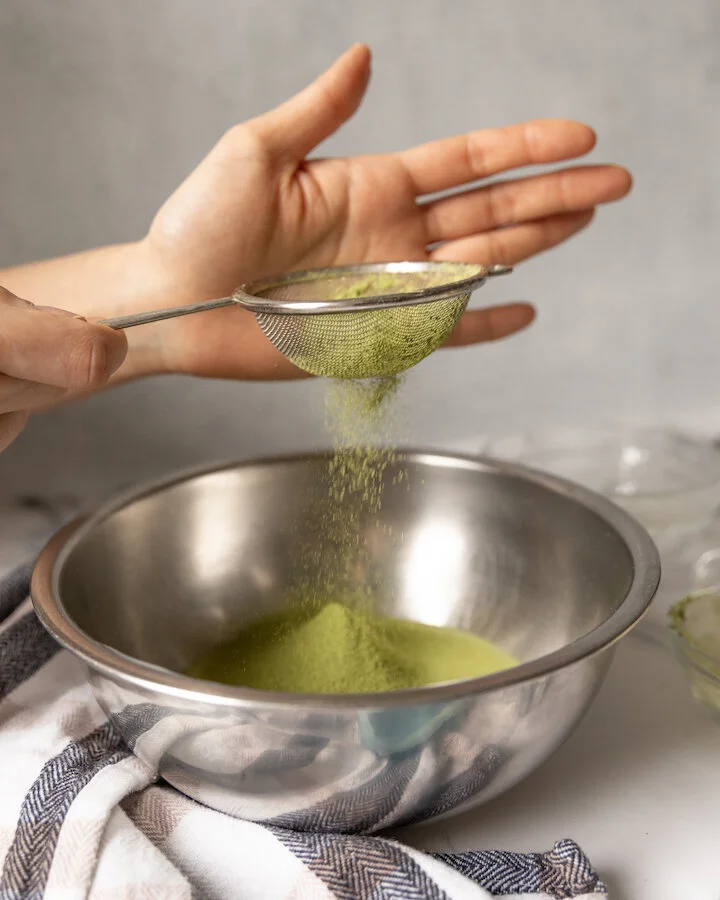
Pour condensed milk into a bowl and sift in your matcha.

Using a double boiling method, stir the matcha into the condensed milk until it is well incorporated on a medium low heat.

Next, add in the white chocolate and continue to double boil until it has melted completely and is well mixed.

Next, add in your salt and vanilla, stir.

Pour mixture into lined baking pan and store at room temperature for 15 minutes before moving to the fridge for an additional 3 hours.

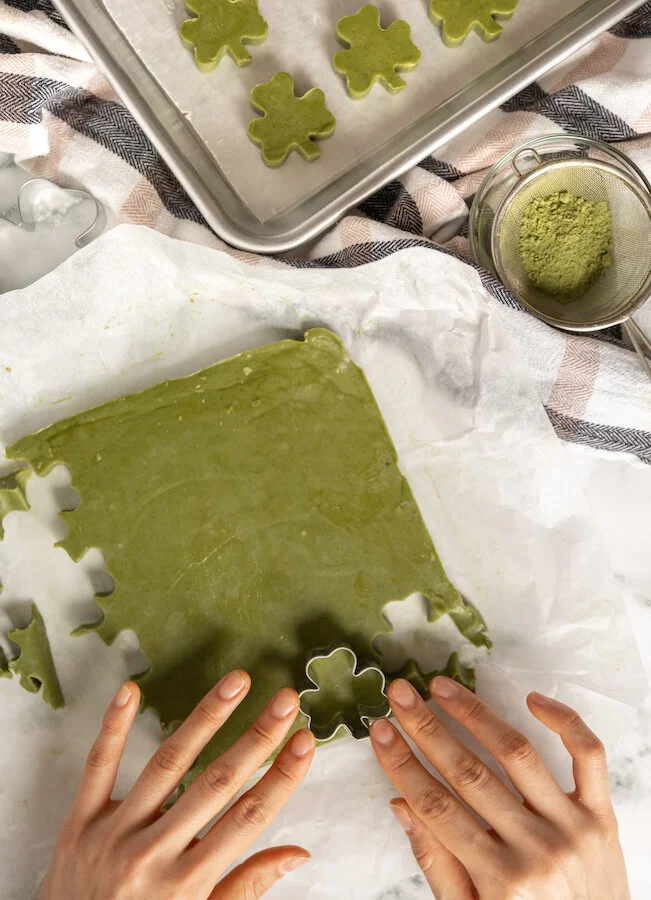
When fully cooled, cut out shamrock shapes using your cookie cutter and place on a non stick surface.

Sprinkle with more sifted matcha.

Store in fridge until you are ready to eat.

Enjoy!

These can be packaged and left in the freezer for a month.


FOLLOW ME ON INSTAGRAM @ISTHATSOH


I hope you enjoyed this recipe as much as I do. If you have any comments please leave them below and I'll be happy to answer them as soon as I can! Happy cooking!!!


PIN THIS POST

CHOCOLATE COVERED CHRISTMAS WAFER RODS

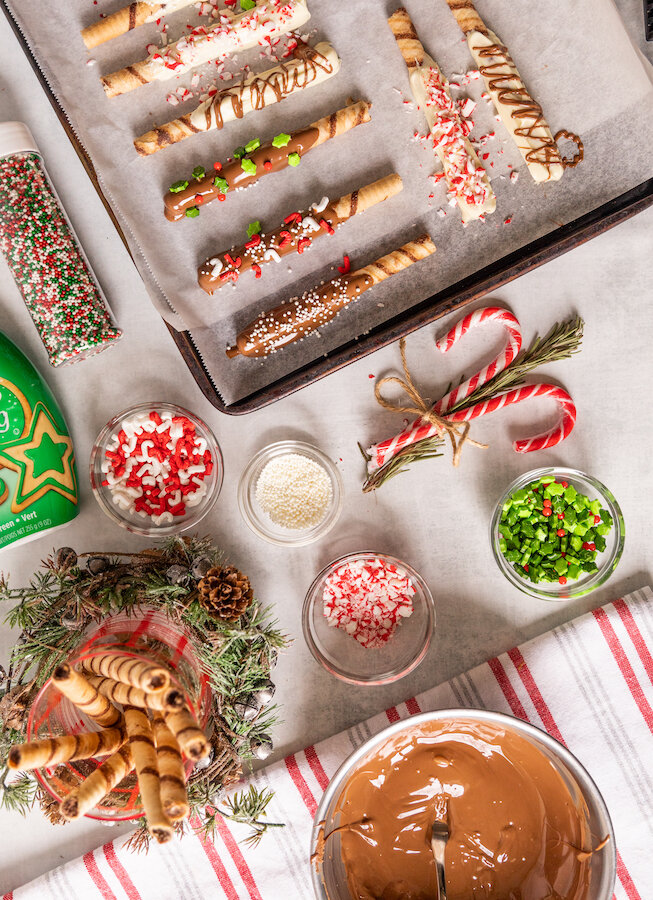
This chocolate covered Christmas wafer rod recipe is so easy to do and makes for a fun DIY you can get your nieces and nephews involved in. Plus, they are super festive and another great way to dress up the dessert table or package and added to your Christmas gifts as a personalized decoration!

Enjoy!

INGREDIENTS:


1 Can of Pirouline Wafer Rods
1 Bag of Pure White Chocolate Chips
1 Bag of Milk Chocolate Chips

- Toppings -
Sprinkles
Candy Cane - crushed
Cookie Icing

- Tools -

Wax Paper
2 Small Sauce Pans for Melting Chocolate
Piping Bag for Icing


CHECK OUT THESE OTHER FESTIVE RECIPES


DIRECTIONS:

Prepare a banking sheet by lining it with wax paper.

In a bowl, place one bag of chocolate chips and slowly melt using a double boiling method, stirring every once and a while until completely melted.

Dip wafers into chocolate or use a spoon to pour chocolate over 2/3rds of the wafer and gently shake off excess before placing on the wax paper to cool.

Immediately after, coat in sprinkles or crushed candy cane so they adhere to the chocolate-covered wafers.

If you are going to dress a few rods with cookie icing, first allow them to cool completely before adding icing and moving them to a new clean baking sheet with a new sheet of wax paper to dry.

Make sure all rods are dry before removing from the wax paper before packaging or displaying, or store in an airtight container at room temperature.


FOLLOW ME ON INSTAGRAM @ISTHATSOH


I hope you enjoyed this recipe as much as I do. If you have any comments please leave them below and I'll be happy to answer them as soon as I can! Happy cooking!!!


PIN THIS POST

LEMON BLUEBERRY POUND CAKE WITH ICING

It’s August, which means blueberry season is upon us here in Canada and since the price of one of my favorite berries has become insanely affordable, I thought it would be fun to create a few recipes using them. One such recipe that I decided to make was this lemon, blueberry pound cake which, even without icing is still sweet, light, and amazing. The best part about pound cake is that you can always make it ahead of time and freeze it to enjoy at a later date as an after-dinner dessert or alongside your morning coffee. Further, since it stores so well, you can even make it in batches as a back up for when that unexpected guest drops by and you need something quick to offer them. Either way, I know you will enjoy it!

INGREDIENTS:

- Lemon Blueberry Pound Cake -

1.5 CUPS of All-Purpose Flour
1/8 TSP Baking Soda
1/4 TSP Salt
2 TBSP of Lemon Juice
Zest from 1 Lemon (try not to get to much of the white layer under the top layer as it is bitter)
1/2 a CUP of Unsalted Butter (bring to room temperature)
1.5 CUPS of Sugar
3 Eggs
1 TSP of Vanilla Extract
1/2 a CUP of Buttermilk
1/2 - 3/4 CUP of Blueberries (depending on how much blueberries you want)

- Lemon Icing Glaze -
2 TBSP of Lemon Juice
1.5TBSP of Buttermilk
1.25 CUPS of Icing Sugar

DIRECTIONS:

Preheat oven to 325 degrees.

Butter and flour your loaf pan - mine was 9x5 inches.

Next, in a bowl, sift in your flour, baking soda, and salt before mixing in your lemon zest and stiring until well incorporated.

In a separate bowl, add in your butter and 1/2 cup of sugar and using a hand mixer cream the sugar on medium speed. Continue to add sugar 1/2 cup at a time until fully incorporated.

Next add the eggs, one at a time until well incorporated. Once all eggs are in turn the speed up to high and beat the mixture till it becomes fluffy.

Once fluffy, reduce speed back to medium and add in lemon juice and vanilla.

Once well incorporated and fluffy you can now start to add in the flour mixture and buttermilk. Start with 1/3 of a CUP of flour followed by 1/4 Cup of Buttermilk and repeat until all the flour and buttermilk is incorporated.


Next, fold in blueberries using a spatula before moving the entire mixture to your loaf pan and baking for 85-95 minutes or until a toothpick comes out clean.

Allow the pound cake to cool in the pan before moving it to a cooling rack.

At this point, you can make the icing (optional) by combining the lemon juice and buttermilk together in a bowl before slowly incorporating the icing sugar.

One loaf has cooled, drizzle the lemon icing glaze on top of the loaf. Store in the fridge to help it harden before cutting and serving or wrap and move to the freezer for storage.

Enjoy!


I hope you enjoyed this recipe as much as I do. If you have any comments please leave them below and I'll be happy to answer them as soon as I can! Happy baking!!!


PIN THIS POST

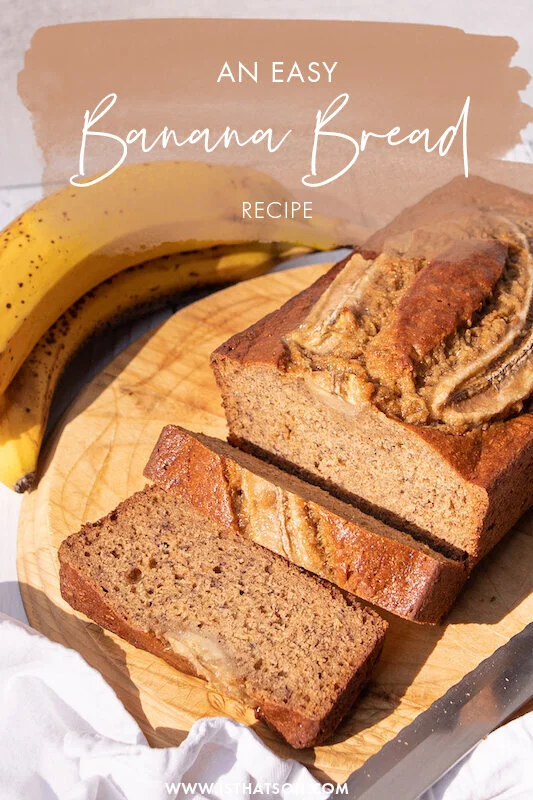
MY FAIL PROOF BANANA BREAD!

If you ever have overripe bananas, don’t throw them away! One of my favorite ways to use them is to make this glorious easy moist banana bread recipe. Even if I am on a diet that doesn't mean everyone else I know is and who wouldn't mind receiving a nice loaf of banana bread as a gift ;) Get creative... you can even add some walnuts or chocolate chips to this easy recipe if you want.

Enjoy!

INGREDIENTS:

1/3 Cup of Unsalted Butter (melted)
3/4 Cup of Brown Sugar
3 Bananas - (2 mashed and one for garnish)
1 TSP of Vanilla Extract
2 Egg (whisked)
2 Cups of All-Purpose Flour
1/4 TSP of Salt
1 TSP Baking Soda
1 TSP of Cinnamon


CHECK OUT THESE OTHER BREAD RECIPES!


DIRECTIONS:

Preheat over to 350 degrees.

Get a baking tray or loaf baking tray and butter all sides.

In a large bowl add in your butter and sugar. Blend with a hand blender until they come together.

Next, add in your banana and vanilla extract. Continue to blend.

Lastly, add in your egg and blend only until incorporated (don’t over blend).

In a second bowl add in your flour, salt, baking soda and cinnamon - whisk together until evenly mixed.

Slowly start to add in your dry ingredients to your wet ingredient bowl and mix on low with your hand blender. You may have to use a spatula to scrape the dry ingredient that build up on the side.

Once blended, scoop out your banana bread batter and place in your baking tray.

Garnish the banana bread batter with the 3rd banana before placing the tray in the oven to bake for about 1 hour (check at 50 minutes). Take a toothpick and stick it in the middle of the bread if when you pull it out nothing is on the toothpick it is ready.

Set aside to cool before cutting and serving.


FOLLOW ME ON INSTAGRAM @ISTHATSOH


I hope you enjoyed this classic banana bread recipe as much as I do. If you have any comments please leave them below and I'll be happy to answer them as soon as I can! Happy baking!!!


PIN THIS POST

BOOZY MANGO ORANGE RUM POPS!
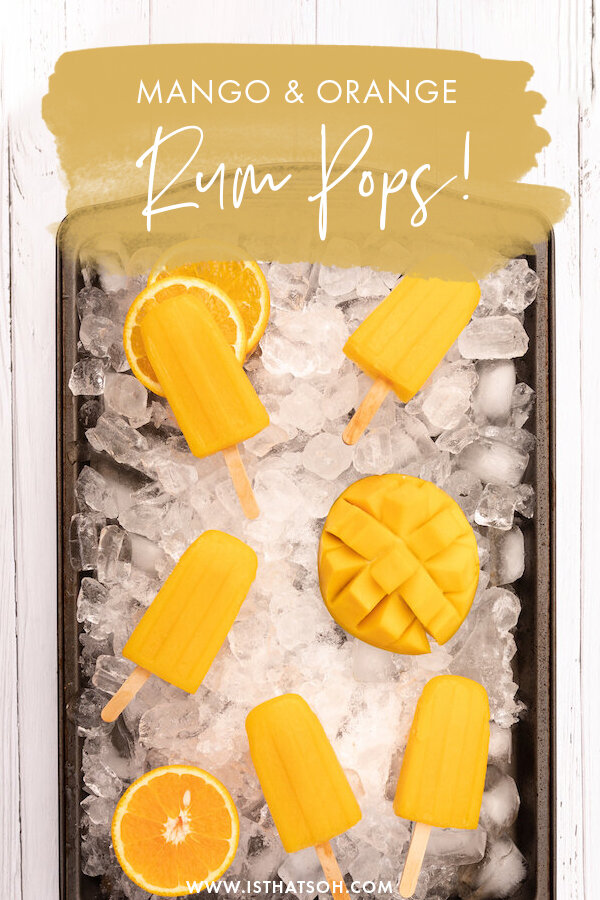
Made these boozy rum popsicles the other day while up at the cottage and I’m so glad I did because lately, we have been experiencing a big heatwave! The combination of mango, orange, and coconut go great together, and there no need to add more sugar because they are definitely sweet enough. If you are looking for a tasty vegan treat to have on those sweltering hot summer days, I highly recommend making this recipe!

INGREDIENTS:

- Makes 8 Popsicles -

- Popsical Filling -
1 Large Ripe Mangos - remove skin and pit
3/4 CUP Coconut Water
1/4 CUP of Orange Juice
2 Oz of Rum

- Molds -

NorPro Frozen Ice Pop Maker - I ordered this one off Amazon and highly recommend it!

DIRECTIONS:

In a blender add in your fresh mango and coconut water. Belnd until liquified.

Next, add in your orange juice and rum, pulse for 2 sec to mix.

Pour mixture into popsical moulds and palce in freezer for a minimum of 12 hours before you serve!

Enjoy!


If you like this recipe or have any comments/questions, feel free to leave them in the comment section below!


PIN THIS POST