BOOZY MANGO ORANGE RUM POPS!

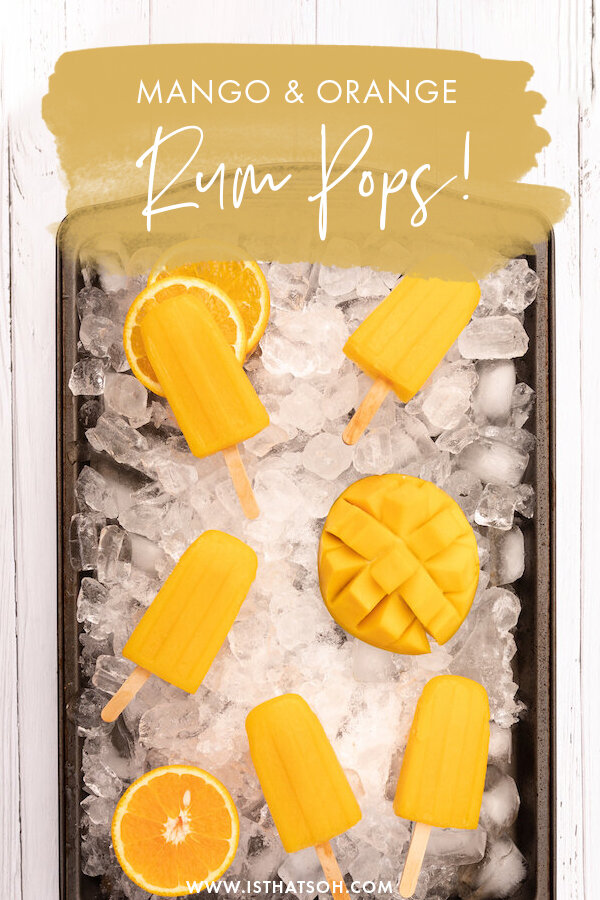
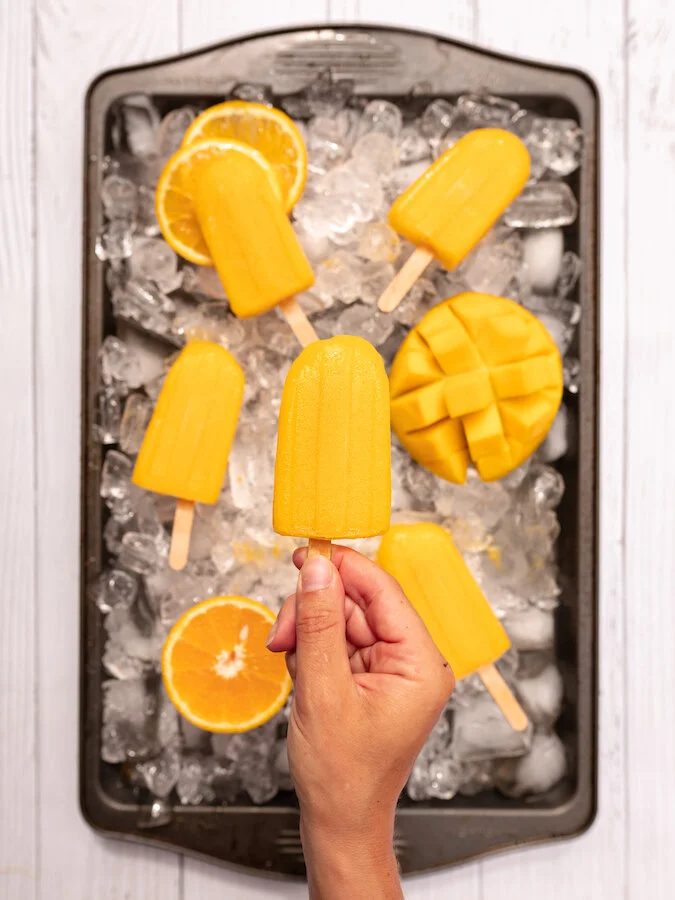
Made these boozy rum popsicles the other day while up at the cottage and I’m so glad I did because lately, we have been experiencing a big heatwave! The combination of mango, orange, and coconut go great together, and there no need to add more sugar because they are definitely sweet enough. If you are looking for a tasty vegan treat to have on those sweltering hot summer days, I highly recommend making this recipe!

INGREDIENTS:

- Makes 8 Popsicles -

- Popsical Filling -
1 Large Ripe Mangos - remove skin and pit
3/4 CUP Coconut Water
1/4 CUP of Orange Juice
2 Oz of Rum

- Molds -

NorPro Frozen Ice Pop Maker - I ordered this one off Amazon and highly recommend it!

DIRECTIONS:

In a blender add in your fresh mango and coconut water. Belnd until liquified.

Next, add in your orange juice and rum, pulse for 2 sec to mix.

Pour mixture into popsical moulds and palce in freezer for a minimum of 12 hours before you serve!

Enjoy!


If you like this recipe or have any comments/questions, feel free to leave them in the comment section below!


PIN THIS POST

ROASTED BRUSSELS SPROUTS WITH CRISPY FRIED SHALLOTS

Made this simple brussel sprout recipe with crispy fried shallots and it was amazing. Loved the saltiness of the shallots against the dense Brussel sprouts drizzled in lemon. Delicious, salty, and perfect as a low carb veggie side for any meat dish you are cooking, I would also recommend making a little bit of extra fried shallots so you can have them with your meat as well. Further, Cassava flour is a keto-friendly flour making this a perfect side for any low carb diets but if you don’t have access to that flour, normal white flour makes a great substitute.

Enjoy!

INGREDIENTS:

- Serves 2-3 people

1.5 LBS of Brussels Sprouts - washed, remove steam and top layers, and cut into halves
6 TBSP of Olive Oil - Split into 2 portions, one 2.5 TBSP and 3.5 TBSP
Sea Salt and Pepper
3-4 Shallots - sliced Into onion rounds
1/4 Cup of Cassava Flour
Sea Salt
Freshly Squeezed Lemon

DIRECTIONS:

Set oven to 400 degrees.

Toss brussels sprouts in 2.5 TBSP of olive oil until evenly coated and sprinkle with salt and pepper.

Place brussels sprouts on a baking tray lined with aluminum foil and allow to bake in the oven for 30 or so minutes until tender.

While brussels sprouts are in the oven chop up shallots and place in a bowl. Add 1/4 Cup of Cassava flour and 1/4 TSP of salt, mix until the shallots are evenly coated.

Heat up 3.5 TBSP of olive oil in a skillet on medium-high. Once ready, reduce heat to low - medium and sprinkle in your floured shallots. Toss them every 3-5 minutes to make sure they don’t burn. Once nicely golden and crispy, set aside.

When the brussels sprouts are getting close to finished you can broil them for the last two minutes if you want them extra crispy.

When ready, plate brussels sprouts, add crispy shallots on top and drizzle with fresh lemon juice.

Serve while hot and enjoy!

burssels sprouts-4 copy.jpg

If you like this recipe or have any comments/questions, feel free to leave them in the comment section below!


PIN THIS POST

FRIED EGGPLANT AND CHICKPEA MASALA - VEGAN, VEGETARIAN, SOY AND GLUTEN FREE

I have made this plant-based, Indian-inspired eggplant masala ( similar to brinjal masala) dish twice now and both times there have been no leftovers. Friends and family just can’t get enough of this curried eggplant recipe. Although frying the eggplant at the beginning does tack on quite a bit of time, once you get the hang of it this isn't that complicated of a dish. Best of all, it’s totally worth the effort in learning a new Indian eggplant recipe and is so healthy for you. If you are looking for an easy vegetarian, plant-based recipe to try, I highly recommend giving this curry eggplant dish a shot!

Enjoy!

INGREDIENTS:

- Serves 4 People with No Leftovers!

2lbs Eggplant (Italian)
Olive oil
Sea Salt
1 large White Onion (halved and diced)
2 Garlic Cloves (minced)
1.5 teaspoons garam masala
1/2 teaspoon paprika
1/4 teaspoon black pepper
1/4 teaspoon cayenne
2 Cups Tomato (diced)
1 15oz can of Chickpeas (drained and washed)

- Optional Base -

Basmati Rice


CHECK OUT THESE OTHER VEGETARIAN RECIPES!


DIRECTIONS:

Cut the eggplant into 1/4 inch pucks and salt on both sides.

Lightly cover a frying pan in olive oil and fry the eggplant pucks (medium heat) until they are soft and until both sides are browned. The eggplant will suck up the oil like no other and it will be tempting to add more olive oil but as the eggplant softens it will also release a bit of the oil back into the pan so don't overdo it. This step will take the longest time so you can prepare everything else as you do this. Once the eggplant is fried remove it from the frying pan and place it on a baking sheet.

Next, add some oil to the pan and fry up the onions.

When they become soft and golden (about 10 minutes) add the garlic and cook for another 4-5 minutes.

Next, add in your spices and mix it all up for a minute or two. CAN YOU SMELL THE GOODNESS??

Finally add the tomato, the chickpeas, and about 2 tablespoons of water. Turn the heat up a little to medium-hot, partly cover, and let simmer for 15 minutes.

If you are going to make basmati rice, start making it now so that both will be ready at the same time.

After 15 minutes I usually add a pinch more of garam masala, paprika, and cayenne (if you like it spicy) and mix it in.

After another five minutes, I add in the eggplant that we previously fried up and let that continue to cook for an additional 10 minutes. The eggplant should breakdown and really thicken up the dish.

Remove from heat and serve on a bed of basmati rice!

Enjoy!


FOLLOW ME ON INSTAGRAM @ISTHATSOH

Gallery Block
This is an example. To display your Instagram posts, double-click here to add an account or select an existing connected account. Learn more

If you like this curry eggplant masala recipe or have any comments/questions, feel free to leave them in the comment section below!


PIN THIS POST

TRADITIONAL ITALIAN HOMEMADE FOCACCIA (SO EASY)

Is there anything better than the smell of fresh bread?

Especially when it’s covered in all your favorite focaccia toppings?

My Achilles heel, sun dried tomato focaccia is one of those traditional Italian appetizers that I can never turn down. As soon as I spot it (usually across the room), you know I’m right there, having a slice - okay 2, maybe 3….

While in self-isolation I had time to perfect this amazing homemade focaccia dough recipe I learned while in Italy and I must say, it stands the test of time! The dough always turns out perfect - fluffy and doughy with a crisp bottom and golden crust. Oh, and did I mention it’s also a vegan focaccia!

I can’t wait for you to enjoy it too!

FOCACCIA BREAD INGREDIENTS:

Serving: 8-10 Servings

-Focaccia Dough-
1 3/4 Warm water
1 Package of Yeast
1 TBSP of Sugar
5 CUPS of All-Purpose Flour
1 TBSP of Kosher Salt
1 CUP of Olive Oil - Spilt in two halves

-Optional Focaccia Toppings-
Coarse Sea Salt
Cherry Tomatoes
Kalamata Olives
Basil
Capers
Rosemary
Garlic


HERE ARE SOME OTHER BREAD RECIPES YOU MAY LIKE!


FOCACCIA RECIPE DIRECTIONS:

The first thing you need to do is activate the yeast so you will need to combine the warm water, yeast and sugar in a bowl. Stir and let it sit for 10-15 minutes until it starts bubbling and becomes very aromatic.

When ready, in a mixer using the hook attachment, combine the flour, salt, half a cup of the olive oil, and the yeast mixture on the lowest speed. After it is well mixed, increase the speed to three (low/medium) until it becomes smooth.

Once smooth, remove the dough from the mixer and place on a floured surface. Kneed the dough by hand until the dough stops being sticky. If you need to sprinkle more flour to help it along, do so.

When ready, form a ball with the dough. Using the mixing bowl you used before, coat the sides of the bowl with some oil and place the dough once again inside. Coat the dough with a little bit of oil as well before covering it with a cloth or plastic wrap, and place somewhere warm for about an hour until it doubled in size.

Take your cooking sheet or jelly roll pan (pan with lip) and cover with parchment paper (including the sides). Put a heavy coat of olive oil on the parchment paper before putting the dough on top. Focaccia is a heavily oiled bread so be generous with the olive oil.

making a FOCACCIA RECIPE

Place the dough on the pan and stretch out with your fingers, flipping the dough over to allow the olive oil on the tray to coat both sides. Use your fingers to stretch the dough the full length of the pan and create finger holes so as to give it an uneven texture. Place the stretched dough in a warm place until it once again doubles in size (approximately one hour).

When dough is close to ready, preheat oven to 450.


If you want to add toppings to your focaccia you can do so at this point. If you want it plain you should still liberally sprinkle it with coarse sea salt.

When ready, bake until the top is golden brown, about 25-30 minutes. Remove from the oven and allow to cool before serving to your guest.

focaccia bread recipe

Buon Appetito!


FOLLOW ME ON INSTAGRAM @ISTHATSOH


If you like this vegan focaccia dough recipe or have any comments/questions, feel free to leave them in the comment section below!


PIN THIS POST FOCACCIA BREAD RECIPE

ITALIAN Focaccia recipe.jpg

VEGAN PUMPKIN SOUP WITH @INSPIREDBYNICK!

Oh Hello There!

Welcome back to my blog!

I know it’s been a hot minute since I have posted anything on the ‘Food and Drink’ section of Soheila Online, but let me assure you that this was completely intentional. As I grow my brand I am also evolving and changing the direction of certain aspects of my blog. And although I love food (I mean, this girl loves to eat!) I wasn’t sure if recipe posts were where I wanted to concentrate my time and efforts. That doesn’t mean I won’t be sharing pretty food pictures with you anymore! It just means, instead of focusing my efforts on sharing my recipes, I want to share my food experiences with you in a different way - like through collaborations with my favourite food influencers!

So in the spirit of new beginnings I am back on the blog today to share a little festive autumn collaboration with my dear friend @Inspiredbynick! If you are guys are not familiar with Nick Joly he is a vegan food blogger based in Toronto that aims to promote healthier lifestyle habits and delicious vegan recipes. If you aren’t following him on Instagram already I definitely recommend you do!

@InspiredByNick and I at Downey’s Farm

@InspiredByNick and I at Downey’s Farm

Nick and I first met a couple months ago through our mutual friend Krystle (@dineandfash) and really hit it off. Since our first introduction over lunch at Cubano Restaurant I have been following Nick’s progress and really admire his positive attitude, health lifestyle habits, all round hustle, and drool-worthy vegan food pics! That is why a couple week ago I asked Nick if he wanted to collaborate with me on a little project I was planning for fall.

Usually not the biggest fan of letting go of summer, this year I wanted to embrace autumn by celebrating its cuteness in all its glory. For me this meant a little content creation road trip up to the pumpkin patch would need to happen, and I knew Nick would be the best partner in crime to collaborate with. So off we went to Downey’s farm in Caledon (a short 45 min drive from downtown Toronto).

Our plan for the collaboration was to go early, take a couple lifestyle photos, grab some picture perfect pumpkins, head back to Nick’s house to make a vegan recipe he had in mind, and style some Pinterest worthy photos. We were so prepared for our little road trip and for our food styling and pumpkin patch photos session that everything went off without a hitch. Nick had purchased mini pumpkins and ingredients ahead of time and I showed up with a red wagon (the perfect pumpkin patch photo prop) and a bag full of dollar store decorations for food styling. Together we took some super cute photos and created perfect autumn themed content. 

Nick of course being the master cook in this collaboration has shared the recipe to the Vegan Pumpkin Soup we (but really he - I just played with the dogs) made -> http://bit.ly/2CC1ATS on his blog while I get to share the cute pictures of us from the pumpkin patch with you here. Although I won’t be posting as many recipes anymore I really feel like there are so many talented foodies out there like Nick who’s Instagram could benefit a lot of people and instill more positive habits in everyone’s life - vegan or not. That is why I wanted to collaborate with Nick on my first post back and share his amazing platform with you as a way to find inspiration and positive reinforcement for your everyday life. Food after all is ment to be shared and Nick just does it so well!


I hope you enjoyed this recipe as much as I do. If you have any comments please leave them below and I'll be happy to answer them as soon as I can! Happy cooking!!!


PIN THIS POST