TRADITIONAL ITALIAN HOMEMADE FOCACCIA (SO EASY)

Is there anything better than the smell of fresh bread?

Especially when it’s covered in all your favorite focaccia toppings?

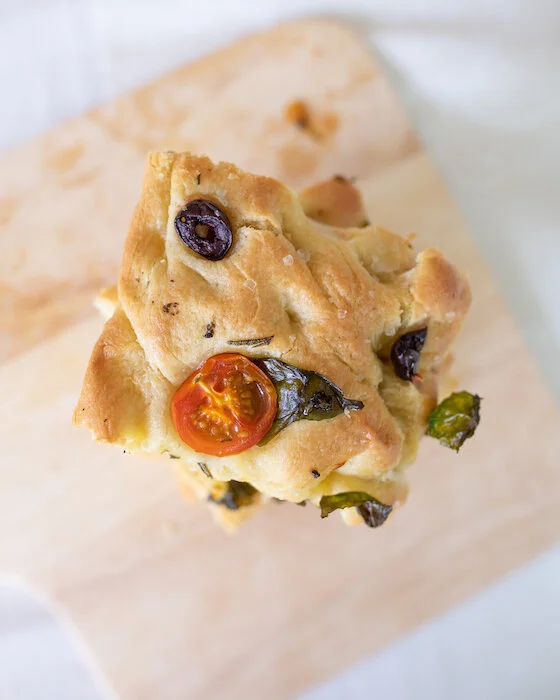
My Achilles heel, sun dried tomato focaccia is one of those traditional Italian appetizers that I can never turn down. As soon as I spot it (usually across the room), you know I’m right there, having a slice - okay 2, maybe 3….

While in self-isolation I had time to perfect this amazing homemade focaccia dough recipe I learned while in Italy and I must say, it stands the test of time! The dough always turns out perfect - fluffy and doughy with a crisp bottom and golden crust. Oh, and did I mention it’s also a vegan focaccia!

I can’t wait for you to enjoy it too!

FOCACCIA BREAD INGREDIENTS:

Serving: 8-10 Servings

-Focaccia Dough-
1 3/4 Warm water
1 Package of Yeast
1 TBSP of Sugar
5 CUPS of All-Purpose Flour
1 TBSP of Kosher Salt
1 CUP of Olive Oil - Spilt in two halves

-Optional Focaccia Toppings-
Coarse Sea Salt
Cherry Tomatoes
Kalamata Olives
Basil
Capers
Rosemary
Garlic


HERE ARE SOME OTHER BREAD RECIPES YOU MAY LIKE!


FOCACCIA RECIPE DIRECTIONS:

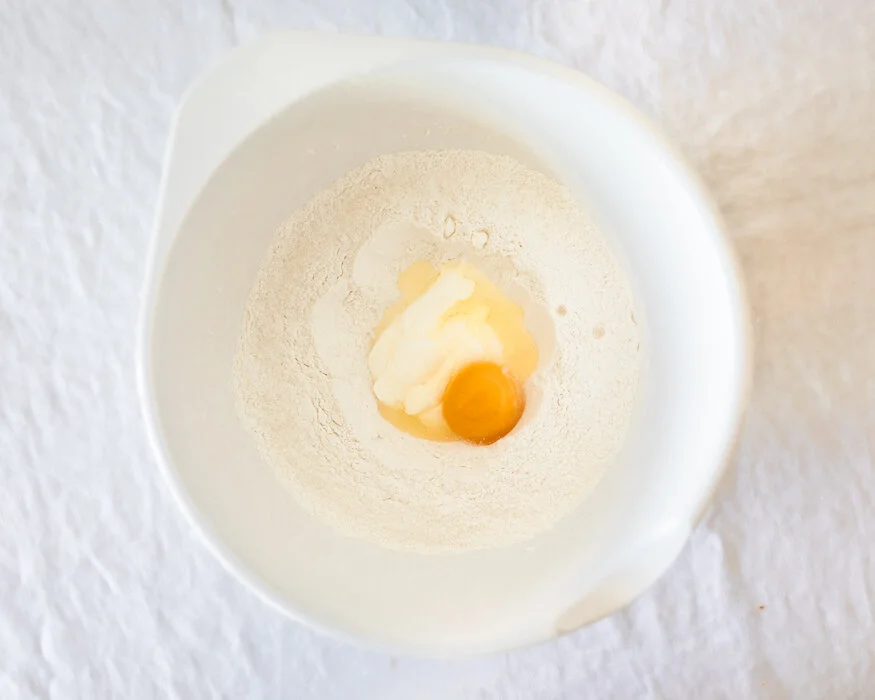
The first thing you need to do is activate the yeast so you will need to combine the warm water, yeast and sugar in a bowl. Stir and let it sit for 10-15 minutes until it starts bubbling and becomes very aromatic.

When ready, in a mixer using the hook attachment, combine the flour, salt, half a cup of the olive oil, and the yeast mixture on the lowest speed. After it is well mixed, increase the speed to three (low/medium) until it becomes smooth.

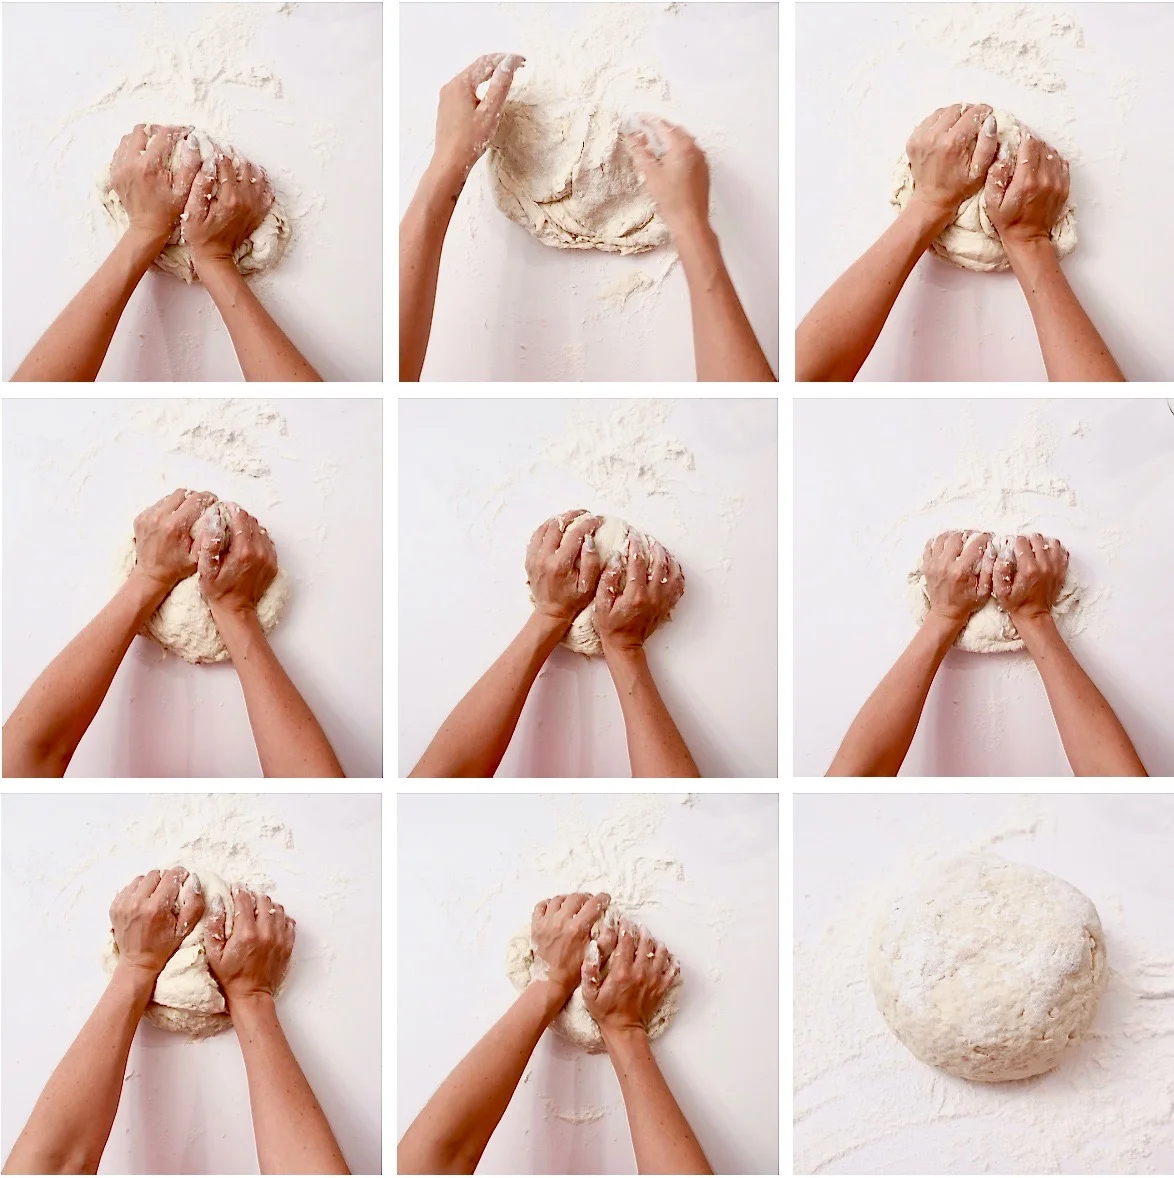
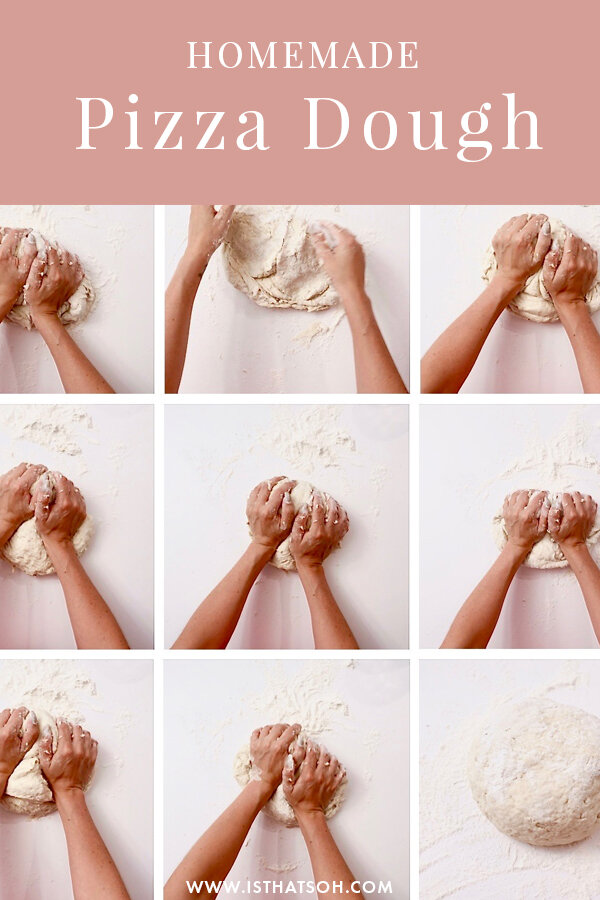
Once smooth, remove the dough from the mixer and place on a floured surface. Kneed the dough by hand until the dough stops being sticky. If you need to sprinkle more flour to help it along, do so.

When ready, form a ball with the dough. Using the mixing bowl you used before, coat the sides of the bowl with some oil and place the dough once again inside. Coat the dough with a little bit of oil as well before covering it with a cloth or plastic wrap, and place somewhere warm for about an hour until it doubled in size.

Take your cooking sheet or jelly roll pan (pan with lip) and cover with parchment paper (including the sides). Put a heavy coat of olive oil on the parchment paper before putting the dough on top. Focaccia is a heavily oiled bread so be generous with the olive oil.

making a FOCACCIA RECIPE

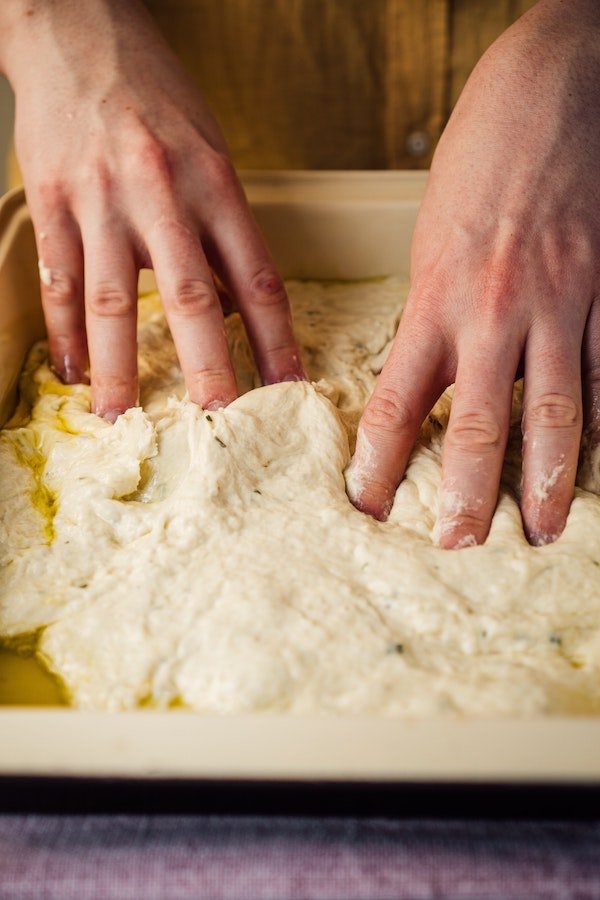
Place the dough on the pan and stretch out with your fingers, flipping the dough over to allow the olive oil on the tray to coat both sides. Use your fingers to stretch the dough the full length of the pan and create finger holes so as to give it an uneven texture. Place the stretched dough in a warm place until it once again doubles in size (approximately one hour).

When dough is close to ready, preheat oven to 450.


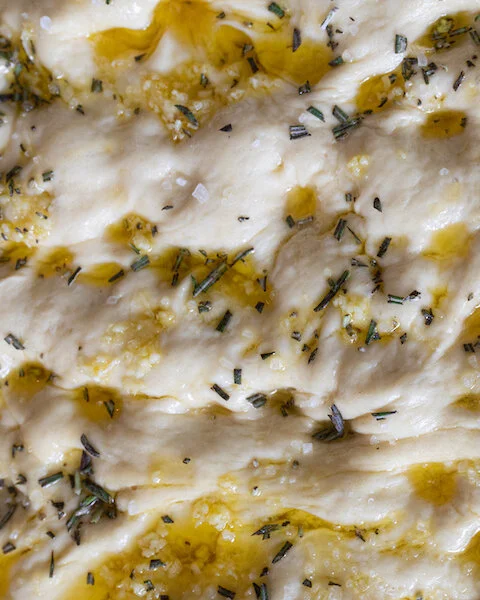
If you want to add toppings to your focaccia you can do so at this point. If you want it plain you should still liberally sprinkle it with coarse sea salt.

When ready, bake until the top is golden brown, about 25-30 minutes. Remove from the oven and allow to cool before serving to your guest.

focaccia bread recipe

Buon Appetito!


FOLLOW ME ON INSTAGRAM @ISTHATSOH


If you like this vegan focaccia dough recipe or have any comments/questions, feel free to leave them in the comment section below!


PIN THIS POST FOCACCIA BREAD RECIPE

ITALIAN Focaccia recipe.jpg

HOMEMADE PEROGIES FROM SCRATCH!

“Food is our common ground, a universal experience.” –James Beard

Life hasn’t been all sunshine and rainbows lately. I know this global pandemic raging over the world has taken away everyone’s ability to move freely and enjoy the comforts we once took for granted, dining out included. For me personally, I feel like I am in a constant state of limbo unsure of what the future may hold or when self-isolation and social distancing will end. Turning to comfort foods that both keeps my mind busy and nourish my soul has been a great escape from this new reality.

Perogies for me are one of those comfort foods that take time and patience to prepare but always manages to soothe the mind and soul. They are also great if you want to batch make something to keep in your fridge so you can enjoy them over the course of a week or want something relatively inexpensive to give to someone in need. During this time we must all be a little bit kinder to ourselves and to others, and giving someone a home-cooked meal is a great way to show you still care even when you can’t be there physically. Whatever your purpose for making them, I hope they bring you the same happiness and enjoyment as they have brought me. Stay well!

INGREDIENTS:

Serving: 6 People @ 5 Perogies Each,

- Cheese and Potato Perogies: Filling-
1 1/2 LBS of Russet Potatoes (typically around 2-3 potatoes should suffice) - peeled and chopped into 1-inch squares
2 TSP of Olive Oil
1/2 a CUP of Onion (diced)
1 Clove of Garlic (minced)
1/2 CUPS of Cream Cheese
1/2 TSP of Salt
Pepper to taste

- Dough For Perogies -
2 1/2 CUPS of All-Purpose Flour
1/2 TSP of salt
1/4 CUP of Sour Cream
1 Egg
2/3 CUP of water

-What To Serve With Perogies - Optional Toppings -
Bacon
Chives
Sourcream
Caramelized Onion


CRAVING COMFORT FOOD? CHECK OUT THESE OTHER RECIPES!


HOW TO MAKE PEROGIES:

First, we need to make the filling.

Put your cut up potatoes in a pot with lukewarm water, add salt and bring to a boil.

In a pan, drizzle a little bit of olive oil and allow it to heat up on medium. Once hot, add in your chopped onions and allow them to cook until they become translucent. This may take 3-5 minutes and you may want to reduce the heat to ensure they don’t burn.

Add in your garlic to the onions when they are close to being done (garlic cooks faster than onion).

Once the potatoes are ready, strain the water out and place the cooked potato back in the pot before starting to mashing them into a smooth texture. To help you make them creamier, add in your cream cheese.

When onions and garlic are ready, add them to the potato pot as well, mix until well incorporated, salt and pepper to taste, and set aside to cool down to room temperature.

Dough For Perogies

Next, we need to make the dough.

Add flour and salt into a large bowl and mix until well combined.

Make a well in the middle and add in your eggs, water, and sour cream. Using a fork or spoon start to mix it together starting from the inner circle and working your way toward the outer edges. You may need to eventually switch to using your hands.

Once the dough starts to form, use a countertop to knead it till it isn’t powdery and has a smooth texture. Place dough back in the bowl, cover with a cloth and let sit for 10 minutes.

After 10 minutes, flour a working station and roll out 1/3 of the dough till it is 1/8’ in thickness. Cut out circles using a circle cookie cutter with a 4’ diameter. You can also use a lip of a cup as a stencil and a pizza cutter if you don’t have a circle cookie cutter! Feel free to get creative! If you don’t have a 4’ wide diameter cup you can always roll out the dough a little thicker, use a 3’ wide diameter cup and then roll them out a little thinner after to spread out the dough wider. It doesn’t have to be perfect.

Set dough pancakes aside on a floured surface and cover with a cloth. Once you have a few cut out, fill the middle with about a tablespoon of the mashed potato filling and fold the dough over, pinching the sides to create a seal. If the seal doesn’t hold use a little water along the edge to help. Secure the seal by pressing the prongs of a fork along the dumpling edge and making indents into the dough.

How To Cook Perogies & How Long To Boil Perogies

Once you have a few complete, boil a pot of water. Once boiled, add salt and drop in 3-4 dumplings. You will need to stir the water at first so they don’t stick together. Eventually, after 3-5 minutes the Perogies, will float to the surface of the water, when that happens, allow them to cook for an additional 30-45 seconds before taking them out of the water and setting them aside on an oiled tray or casserole dish. As you add more cooked perogies to the oiled tray or casserole dish, make sure they are covered in olive oil to avoid them sticking to one another. You can store them like this for a few days in the fridge if you don’t want to eat them right away.

I like my perogies fried so typically I will heat up some butter in a pan on medium and once hot, place a few of these finished, pre boiled perogies in the plan flipping them as they become nicely browned. When ready, remove them from the pan, add a dollop of sour cream, chives, and bacon bits and serve!

Pierogies in Air Fryer

You can also air fry pierogies in an air fryer if you have one! It usually only takes 4-5 minutes to get them crispy and golden brown but I have found that each air fryer I have tried them with is a little different so just keep an eye on them. Typically 4-5 minutes though is good!

Enjoy!


FOLLOW ME ON INSTAGRAM @ISTHATSOH


If you like this recipe for perogies with bacon or have any comments/questions about how to make homemade perogies or suggestions as to what to serve with perogies, feel free to leave them in the comment section below!


PIN THIS POST

HOMEMADE PEROGIES FROM SCRATCH.jpg Perogies - how to make perogies, homemade perogies

PEEK-A-BOO SHORTBREAD LINZER COOKIES

The Best Shortbread Linzer Cookie Recipe

It's not always easy to keep up financially with the holidays. Although I love giving people gifts and putting a smile on my friends and family members faces, my thoughtful nature can get quiet expensive if I'm buying everyone gifts. That is why during the holidays I love to bake! Putting your efforts towards spreading holiday cheer through making something can often be the perfect gift to share with loved ones. One of my go - to holiday gifts this year are these super cute peek-a-boo shortbread snowflakes. I filled mine with my favourite jam, Bonne Maman but you can use Nutella, Dulce De Leche, or whatever filling you like! Enjoy!


FOLLOW ME ON INSTAGRAM @ISTHATSOH


Peek a boo jam filled shortbread snowflakes

INGREDIENTS FOR SHORTBREAD LINZER COOKIES:

1 CUP of unsalted softened butter
3/4 Cup of Icing Sugar
1/2 TSP of Vanilla Extract
1/4 TSP of Salt
2 Cups of All Purpose Flour
1/2 Cup of your favorite jam!

*you can dust the cookies with icing sugar at the end for extra effect!

STRAWBERRY JAM

LOOKING TO DO SOME HOLIDAY BAKING? CHECK OUT THESE OTHER FUN RECIPES!


HOW TO MAKE SHORTBREAD LINZER COOKIES:

In a mixer or by hand place softened butter, sugar, vanilla, and salt in a bowl and mix until well incorporated. 

Add in your all-purpose flour bit by bit till a dough starts to form. (TIP: If it is too sticky you can always add a little bit more flour at the end)

Once the dough is formed wrap in plastic wrap and place in the fridge for 20 minutes.

Once ready, preheat oven to 325 degrees.

Roll out dough between two pieces of wax paper! Use snowflake cut out to make your desired shape and place on a baking tray lined with a cookie sheet or wax paper. Half of these will become 'Peek-A-Boo' tops to the cookie (TIP: Once on the baking tray it is easier to make the smaller inside 'Peek-A-Boo' cut-outs using a smaller snowflake and extracting the inside cut out with a toothpick!)

When ready place in the oven for 20 minutes or until cookies become golden on the edges. Rotate the trays halfway (about 10 minutes).

Let cool before sandwiching a layer of jam between the bottom full shortbread cookie and the 'peek-a-boo' cut out top shortbread cookie!

Enjoy!


If you like this Shortbread Linzer Cookie recipe or have any comments/questions, feel free to leave them in the comment section below!


PIN THIS POST

BEST HOMEMADE PIZZA DOUGH RECIPE!

Pizza Dough Recipe

I have always been a bit of a carb lover but a couple of summers ago I got a pizza stone as a gift and I became a full on pizza addict. There is nothing better than fresh pizza right out of the oven and a pizza stone is a definite game changer. If you like that crispy bottom typically associated with thin crust gourmet pizzas from restaurants I definitely recommend you pick up a stone. I have even gone as far as having pizza parties which I find is quite an interactive way to host and entertain guests. Anyways what inspired this post was that I recently came across this recipe for pizza dough by Matt Rotenberg and tried it out this past weekend and loved so much I had to share! It was so easy and really quite delicious it would be selfish of me to keep it all to myself - so enjoy!

Makes about 3-4 Personal Sized Pizzas

INGREDIENTS:

2.5 Cups of Flour
1 Pack of Fleischmann's Quick Rise Instant Yeast
1/4 TSP of Salt
1 Cup of Lukewarm Water
2 TBSP of Olive Oil
1 TBSP of honey

DIRECTIONS:

In a bowl mix flour, salt and yeast together with a fork.

Add lukewarm water, olive oil, and honey into a bowl and continue to mix with a fork until the dough starts to form,

Sprinkle flour on the counter and kneed dough. If the dough is sticky sprinkle with flour and continue to kneed until it becomes smooth.

Place ready dough in a bowl, drizzle a little bit of olive oil on top to help keep the dough moist and cover with a cloth. Let it rise for 10 minutes before moving it to the fridge.


TIP: Prepare dough within 2 hours of use otherwise it will continue to rise!

My pizza stone was from William and Sonoma - link HERE *

*I am not affiliated so I dont make commission just wanted to recommend my stone if you are looking to purchase one

NEED PIZZA TOPPING INSPIRATION?


PIN THIS POST

HOMEMADE PUFFED RICE GRANOLA WITH SMARTIES!!!

If you like to cook and get creative like me sometimes you end up with a lot of left over ingredients filling up all the space in your pantry. The great thing about homemade granola bars are that you can really use whatever you have on hand. If you want to make them naturally sweet use more dried fruit. Not worried about calories - sweeten with chocolate or caramel! Granola is a great way to create something out of what you've got while still tasting good and satisfying those cravings in a healthy way. Today I made puffed rice granola with walnuts, pine nuts, shredded coconuts and even some crushed smarties! If you are interested in making granola bars at home I have included the recipe below! ENJOY!

INGREDIENTS:

1/3 cup of brown sugar
1/4 cup of honey
1/4 cup of unsalted butter
1 tsp of vanilla extract
1/4 tsp of salt
2.5 cups of rice puffs
1/3 cup of shredded coconut
1/4 cup of crushed walnut
1/4 cup of pine nuts
1/4 cup of crushed smarties

DIRECTIONS:

In a small sauce pan on medium heat melt the brown sugar, honey and butter together. Stir until completely liquefied. Remove from heat, add in your vanilla extract and salt before setting aside.

In a large bowl mix in your puffed rice, shredded coconut, walnuts, pine nuts and crushed smarties - mix up that goodness!!!

Once the melted sugar, butter mixture has cooled a little (dont want it to melt your chocolate) add it to the big bowl of puffed rice and mix until fully incorporated.

Take a deep flat dish and line with aluminum foil before pouring in granola mixture. Spread around using a spatula and let chill for at least 2 hours in the fridge before chopping in granola bars!!! 


I hope you enjoy this recipe as much as I do. If you have any comments please leave them below and I'll be happy to answer them as soon as I can! Bon Appetite!!!


PIN THIS POST