HOW TO PAINT MELAMINE CABINETS - A SMALL BATHROOM MAKEOVER DIY

BATHROOM MAKEOVER DIY - PAINTING MELAMINE CABINETS

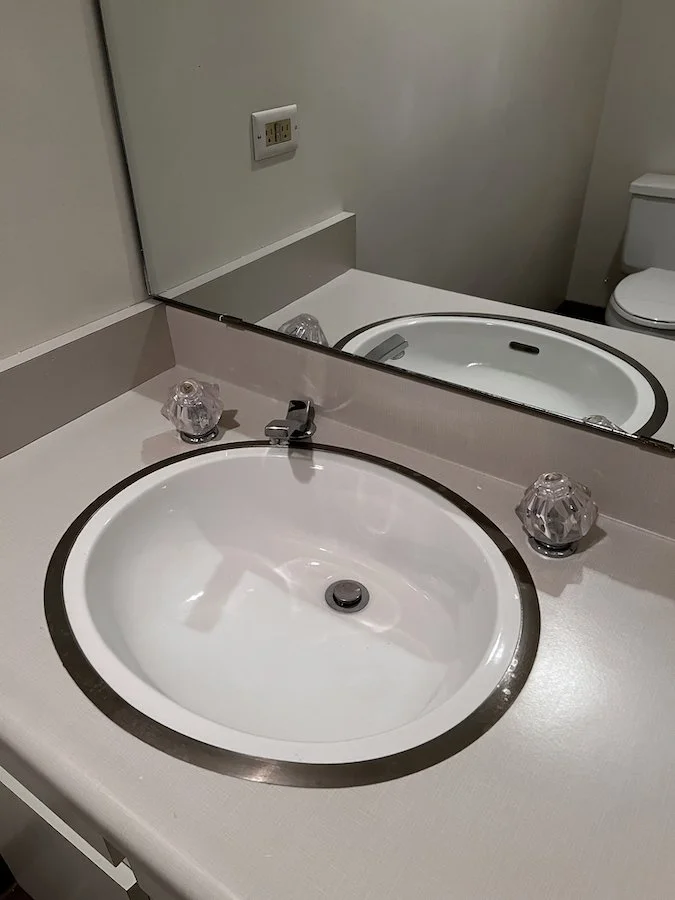
So I was at my mom’s house the other day and she asked if I could help her with her powder room. Essentially the powder room in her basement is so out of date it’s practically screaming for help. It has had the same melamine counter top and vanity since the house was built over 30 years ago. To make it worse, it also has a super gross drop-in sink and old acrylic faucet knobs that need to go!

In order to update this bathroom I decided to upgrade the counter top and faucet with something nice but keep the melamine vanity as is and just give it a fresh coat of paint.

For the counter top I went with white quarts with an under-mount sink already installed from a local fabricator. The counter top and sink cost me under $400. The faucet I got at Canadian Tire was simple and in chrome. It was on sale and was under $100 so I was really happy about that. I also got my paint brush, a small foam roller, a painter tray, and some painters tape while at Canadian Tire, which was another $30-ish.


FOLLOW ME ON INSTAGRAM @ISTHATSOH


Can You Paint Melamine?

When it comes to the melamine vanity, I had plans to paint it. Painting melamine cabinets is actually super easy it just takes awhile because you have to let the paint dry in between coats. Before you paint any melamine surfaces it is important to roughen up the surface before applying a primer though so that the colour paint adheres properly to the melamine.

Bathroom Vanity Makeover - Before Photos

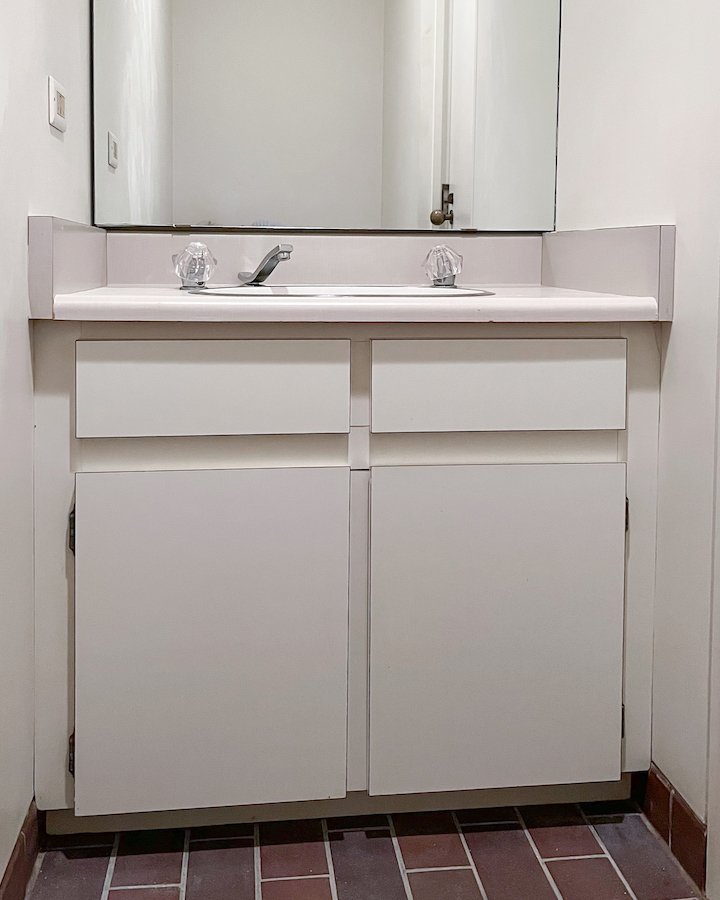
When you are starting a project like this the first thing to do is prep your space. I like to put some cardboard down to protect the floor and remove any hardware. In this case both the hinges and doors needed to be removed. I tried to remove the fake drawers as well but the sink was in the way and I was unable to get in there to remove the screws, so I just left them attached.

MELAMINE CABINET MAKEOVER

Home DIY Projects - Bathroom Makeover DIY - Painting cabinets

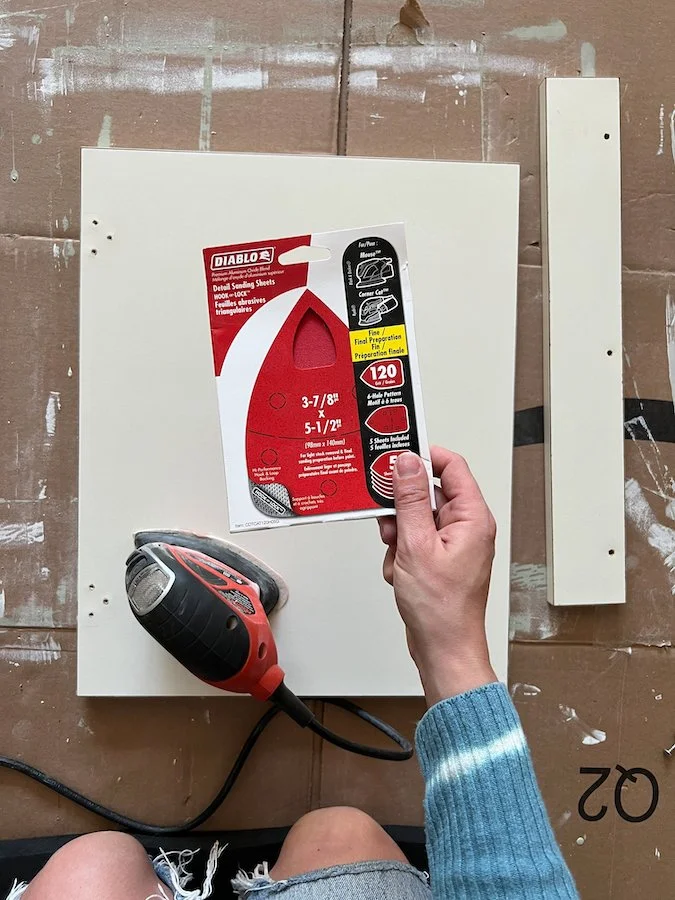
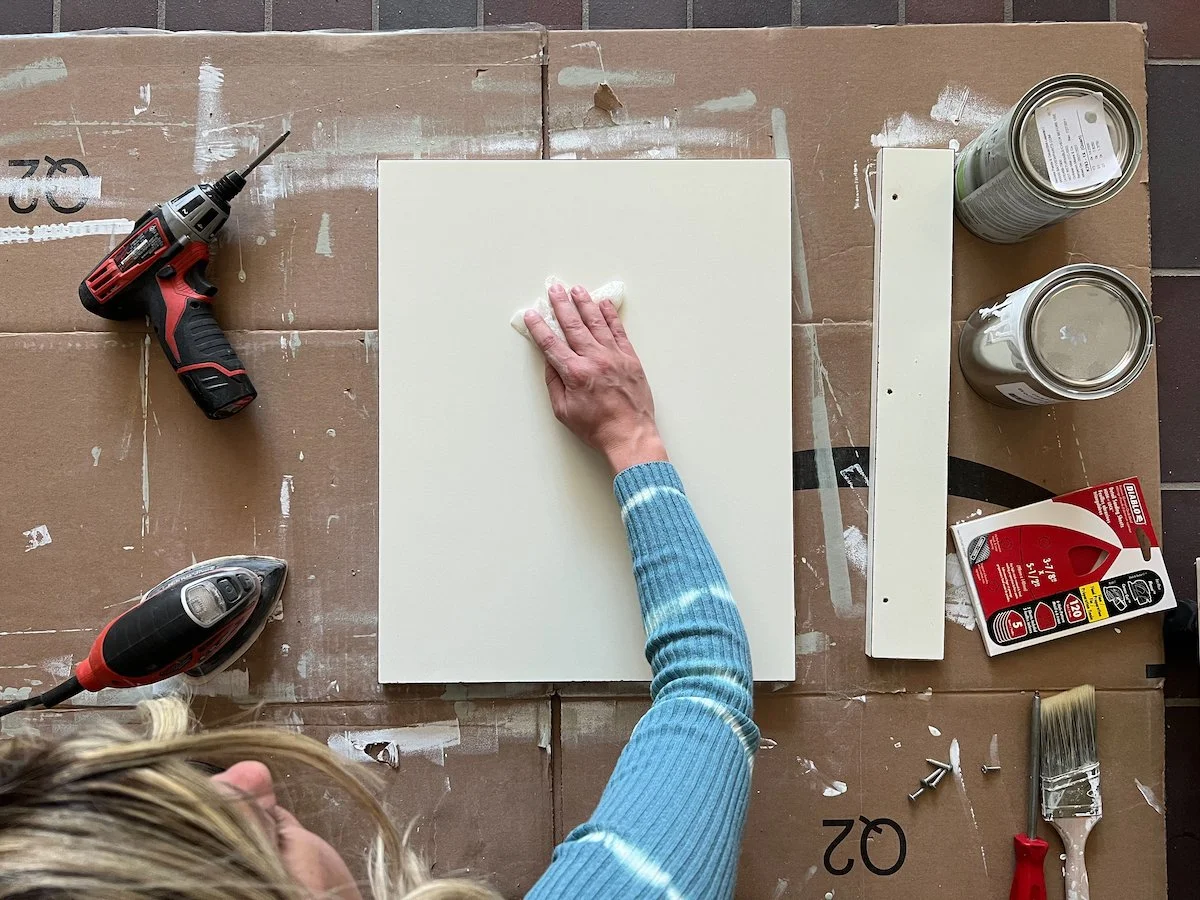
Next I sanded the melamine vanity down using 120 grit sandpaper and my sanding mouse.

NOTE: You want to roughen up the surface so that the primer paint adheres well to it but you don’t want to over sand it to the point you start to dull corners or ruin the surface.

In places that I couldn’t get into with my sanding mouse I went in by hand with some sanding paper.

After you are done sanding take a damp cloth and wipe the whole vanity down.

While the vanity dries, repeat those three steps with the doors making sure to sand down and wipe the sides of the vanity doors.

PAINTING CABINETS

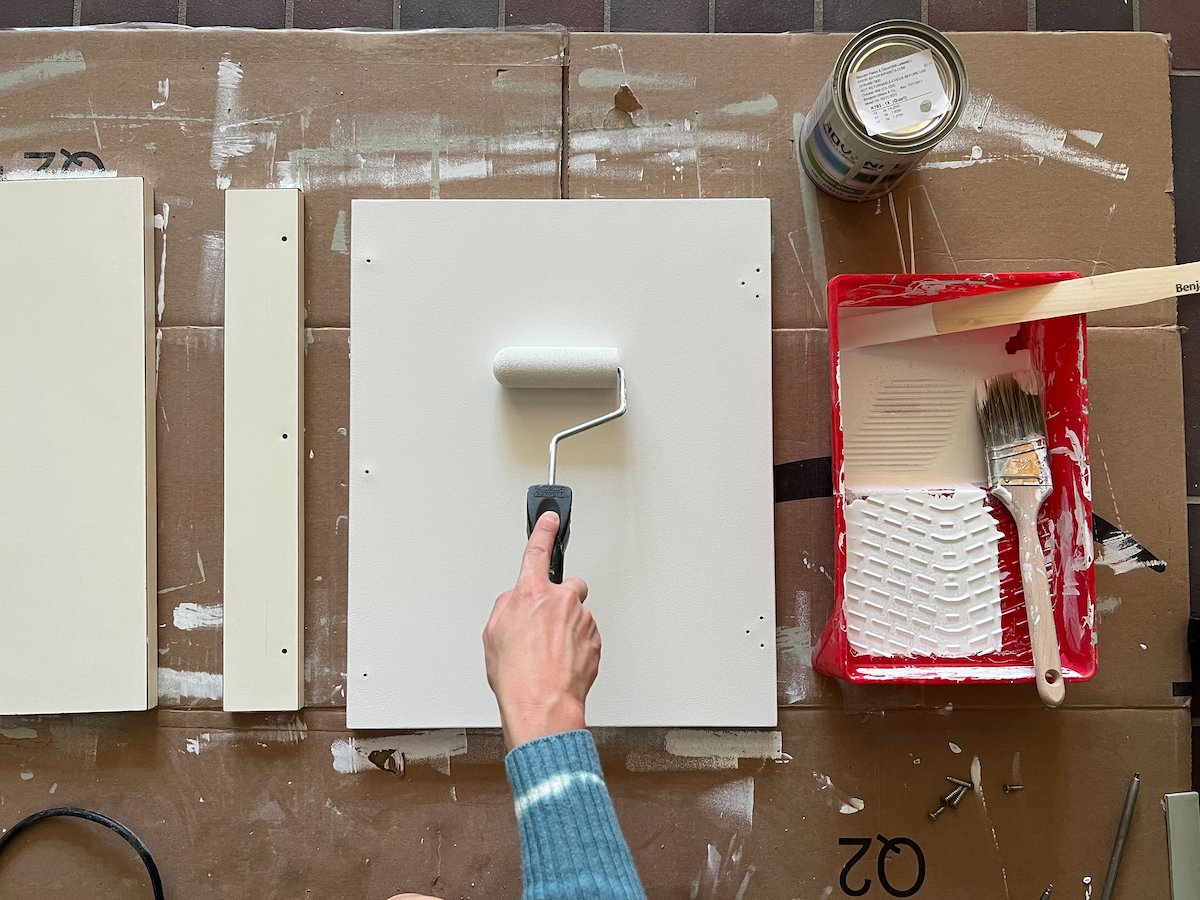
Once everything is dry you can start painting the melamine cabinets with your first coat of primer. I like to paint one side and 3 of the 4 edges of each door first then let it dry for 12 hours before returning and doing the opposite side and final edge.

I used a small foam roller on the doors and a mix of roller and brush on the vanity.

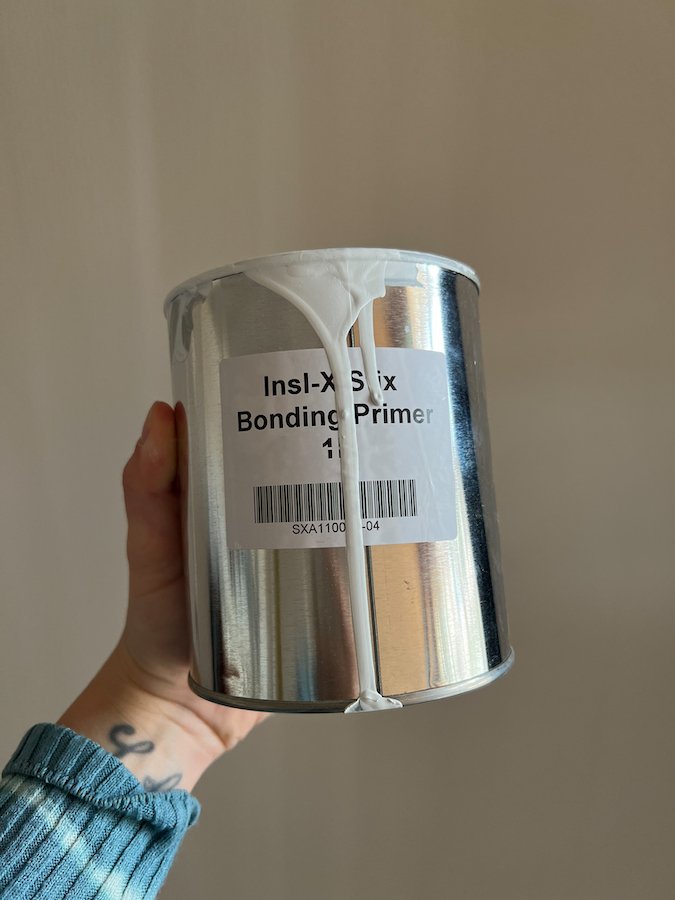
I purchased 1 quart of Benjamin Moore Stix® Waterborne Bonding Primer for this project and it was more than enough.

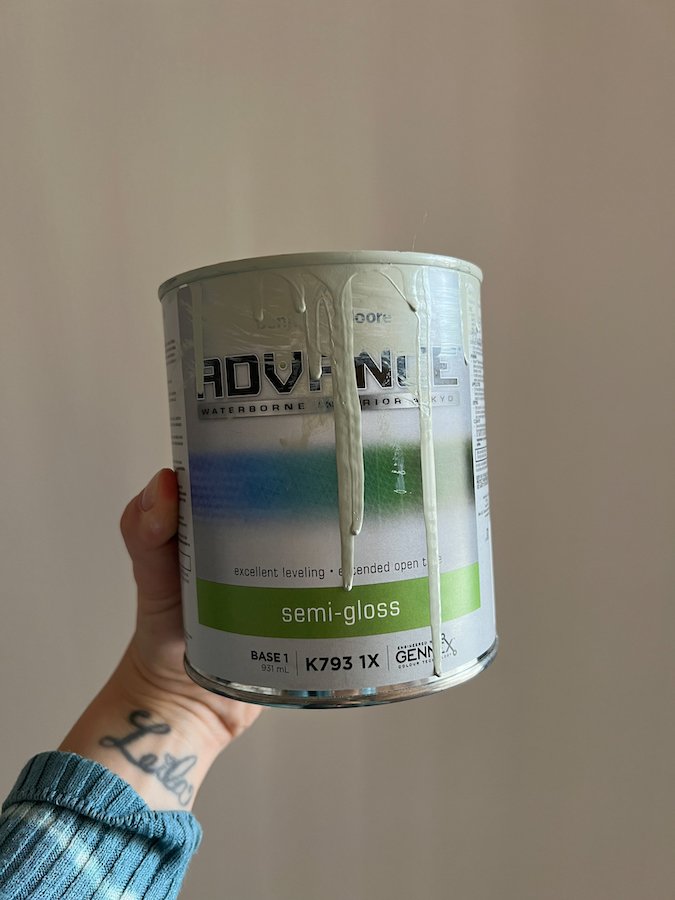
After both sides have been primed and given time to dry, I then did two coats of Benjamin Moore ADVANCE Interior Paint- Semi Gloss in ‘October Mist’ which is this beautiful sage green colour that is so popular right now and one of my favourites.

Home DIY Projects - Bathroom Makeover DIY - painting a vanity

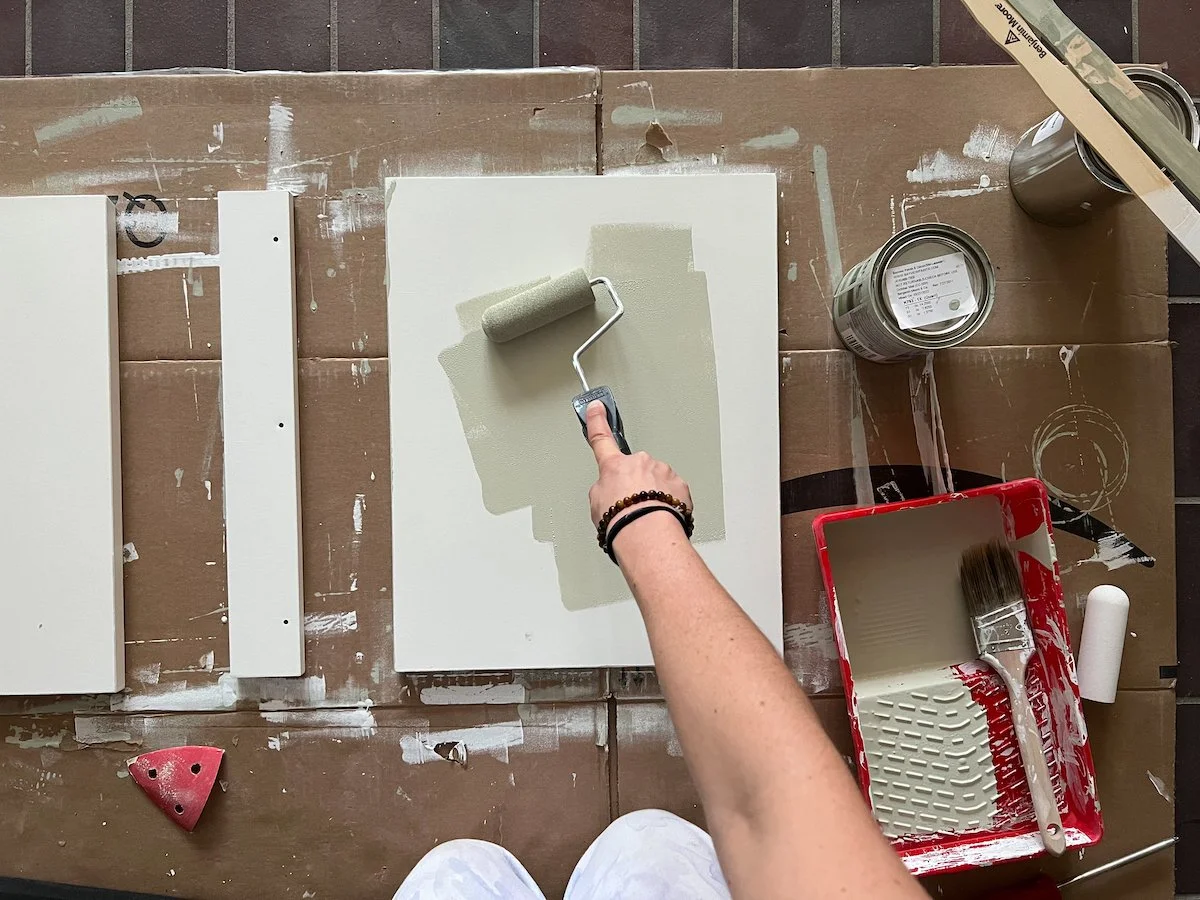
I used the Benjamin Moore colour ‘October Mist’ for this bathroom vanity makover

As for the doors I used the same technique of painting one side and 3 of the 4 edges before leaving that to dry for 12 hours and returning to do the other side and last edge.

Once you get two colour coats on both the vanity and doors, and everything has fully dried, you can go ahead and reinstall your doors.


ENJOYING THIS POST? CHECK OUT THESE OTHER LIFESTYLE POSTS!


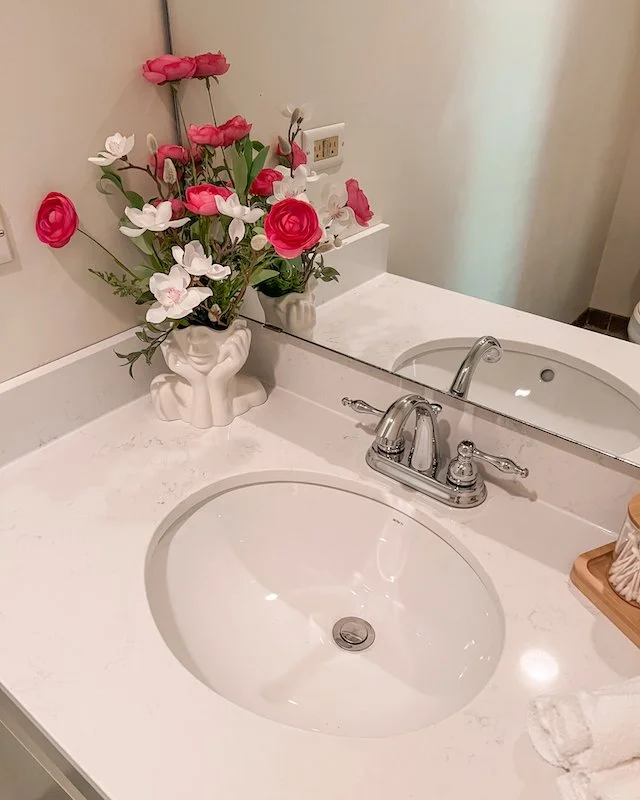
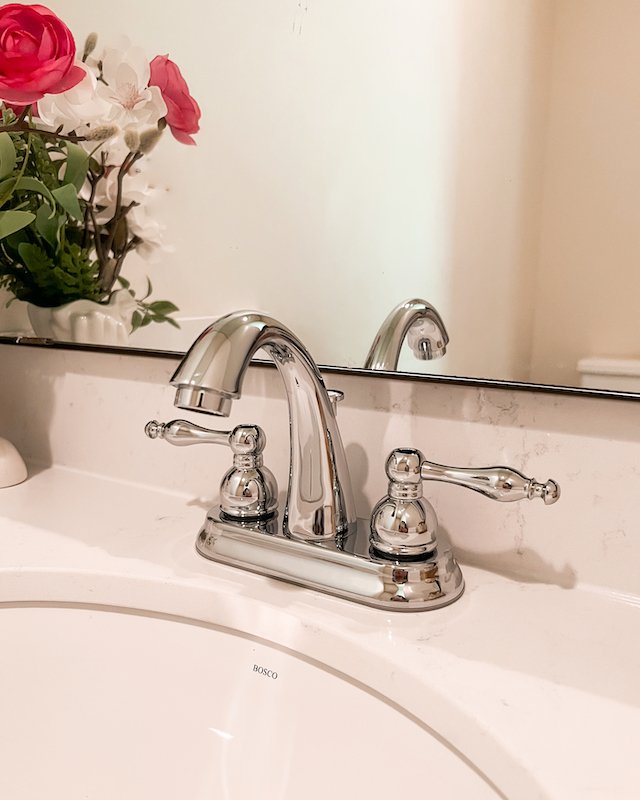
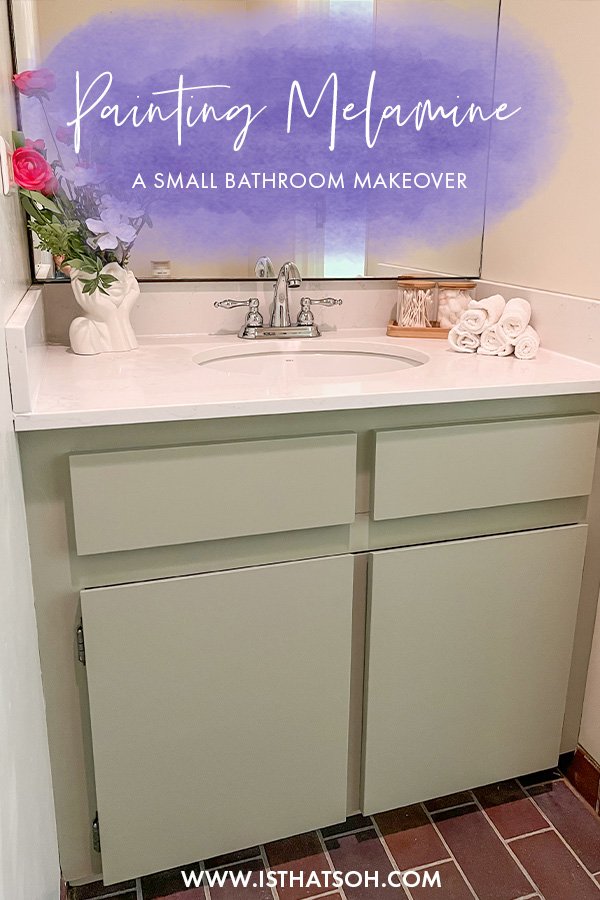
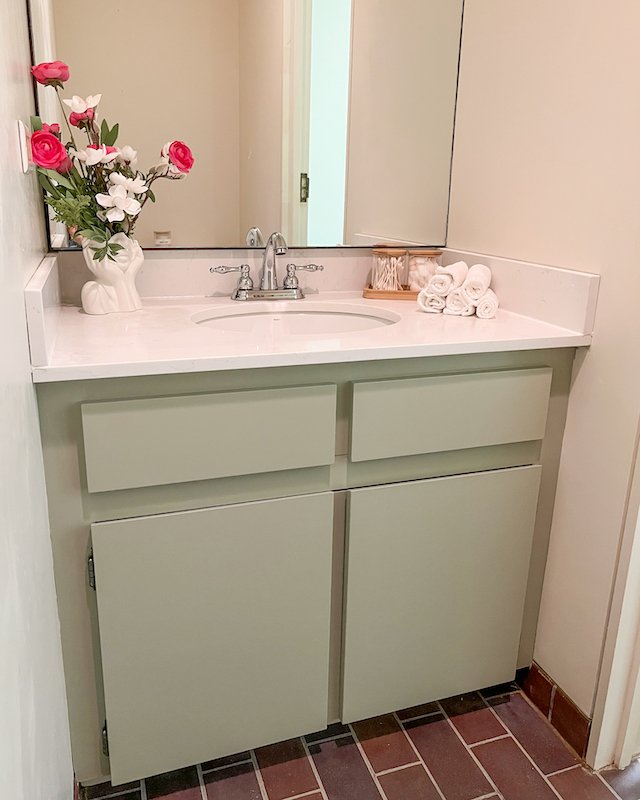
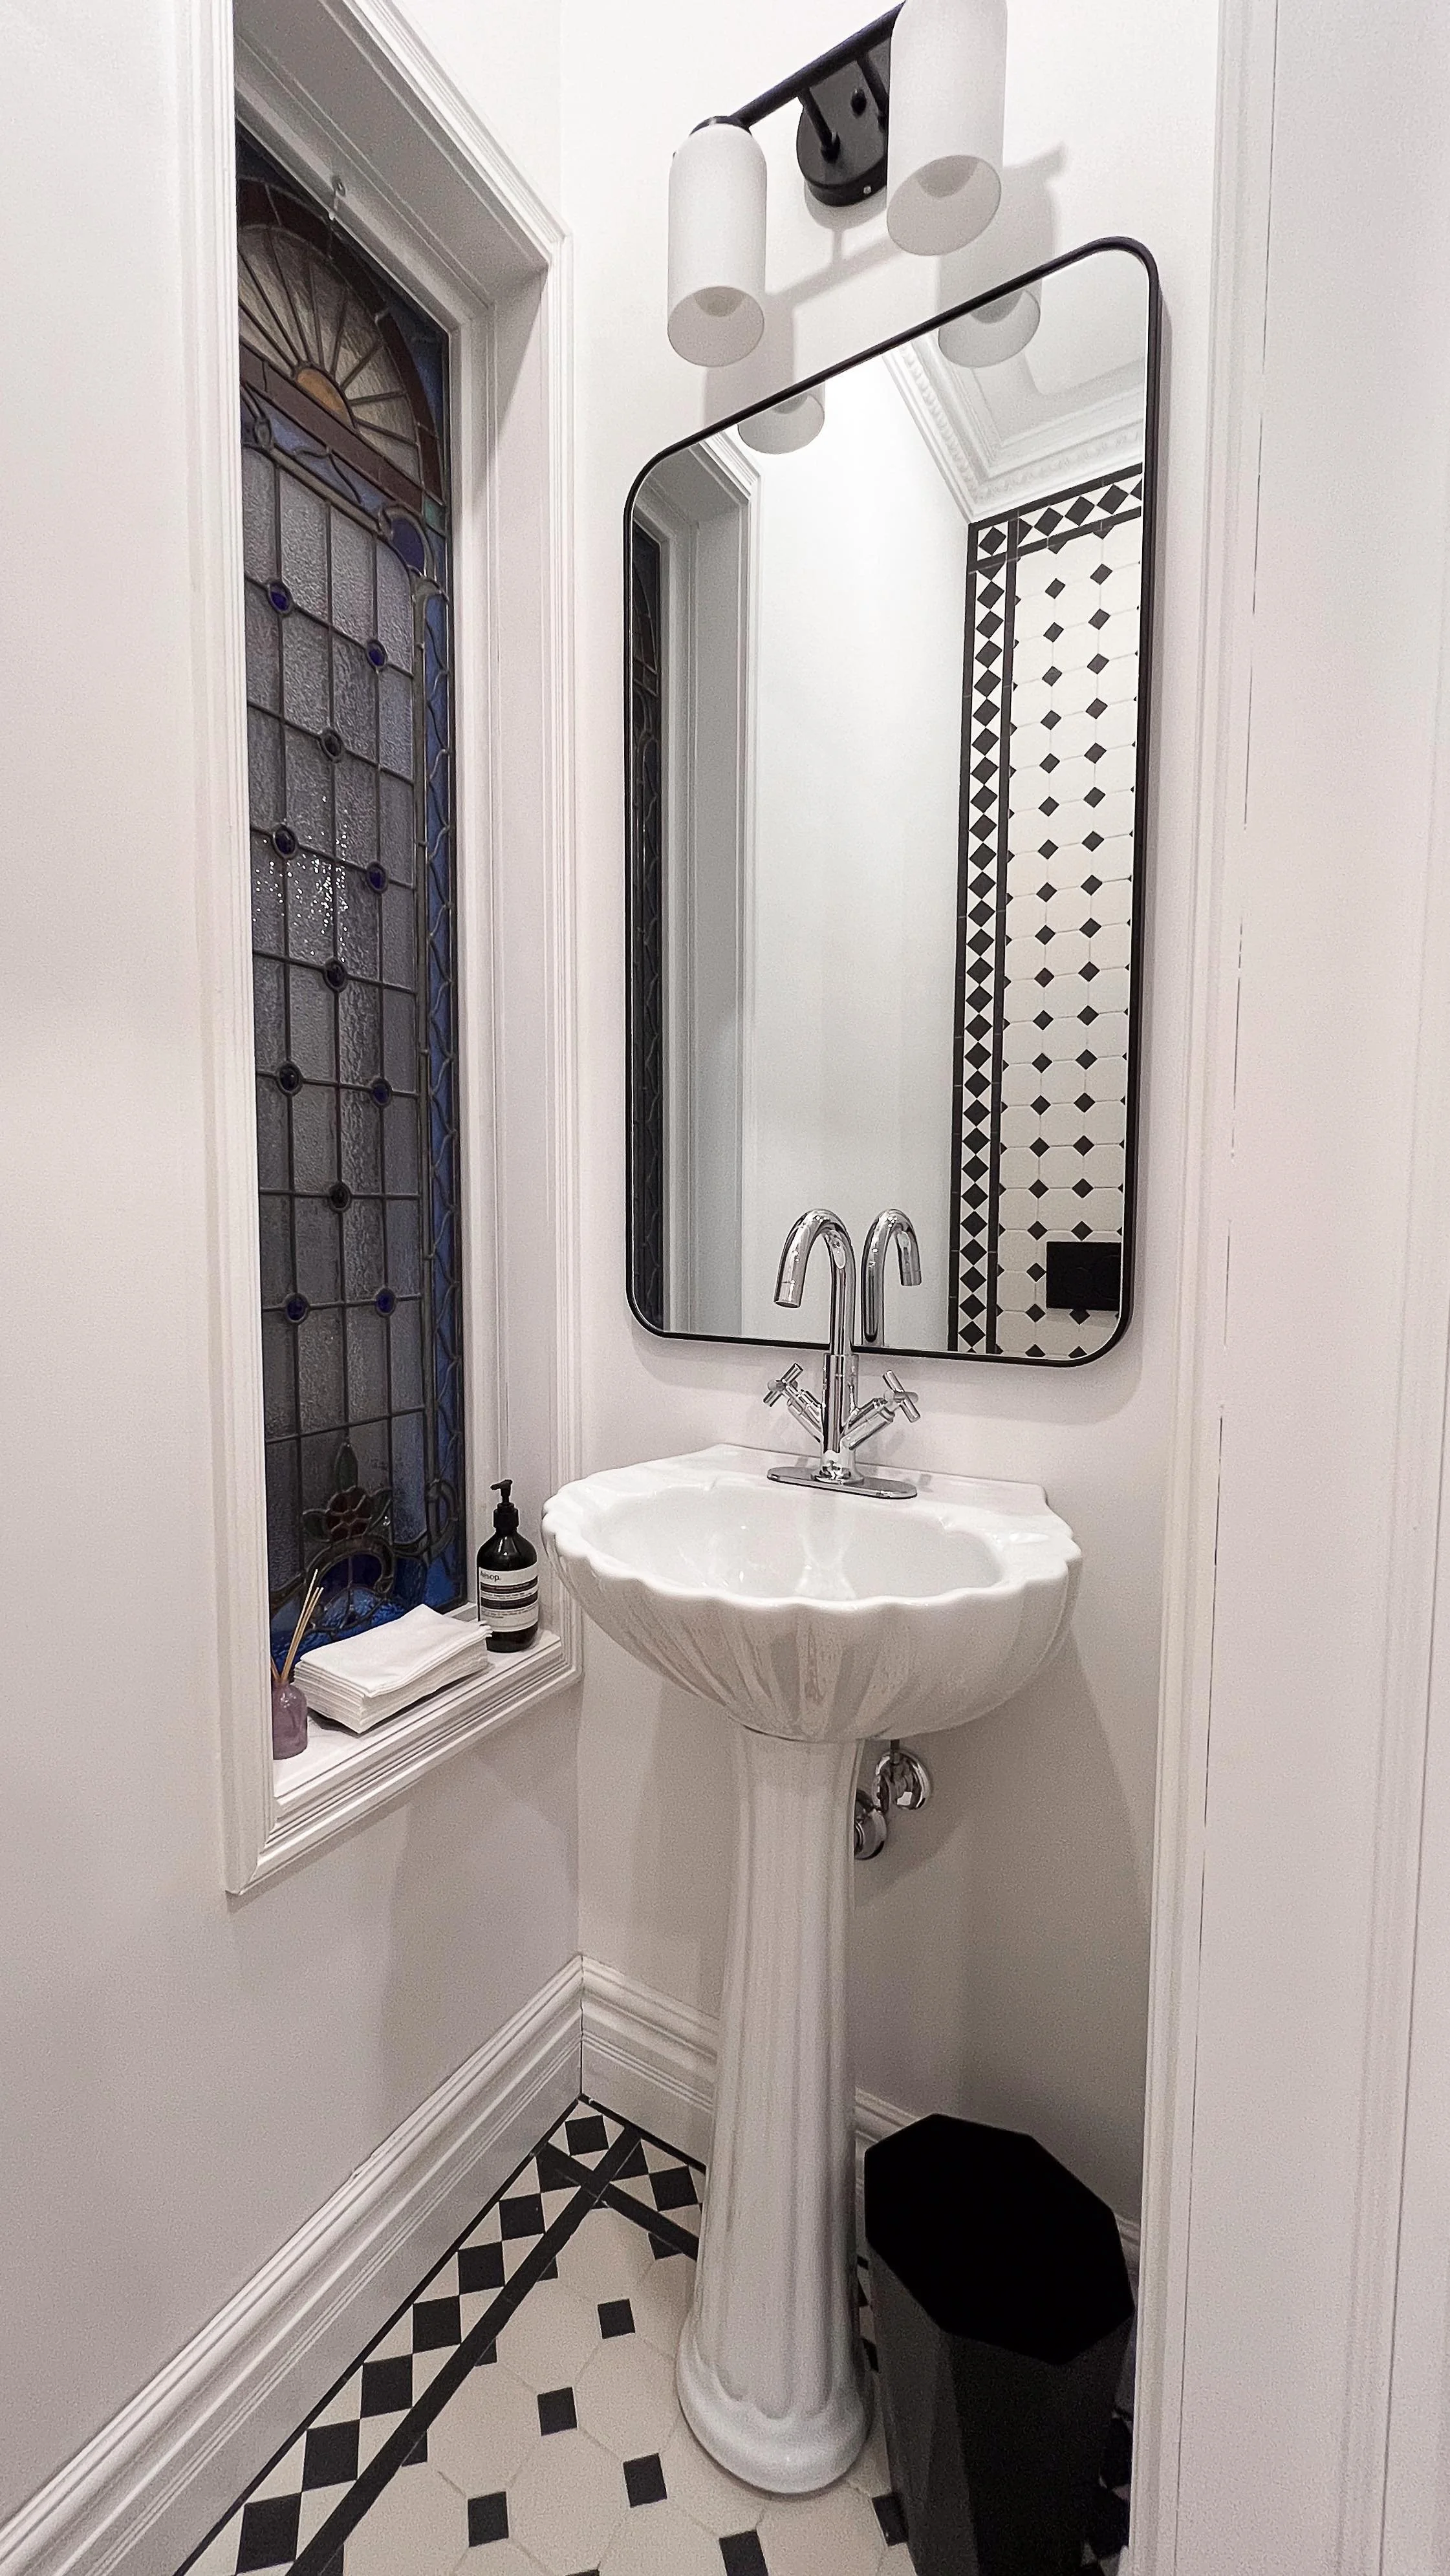
After I finished painting the vanity, the new quarts countertop with an undermount sink went in along with my new faucet from Canadian Tire and voila, my bathroom makeover is complete!

Home DIY Projects - Bathroom Makeover DIY - painting melamine

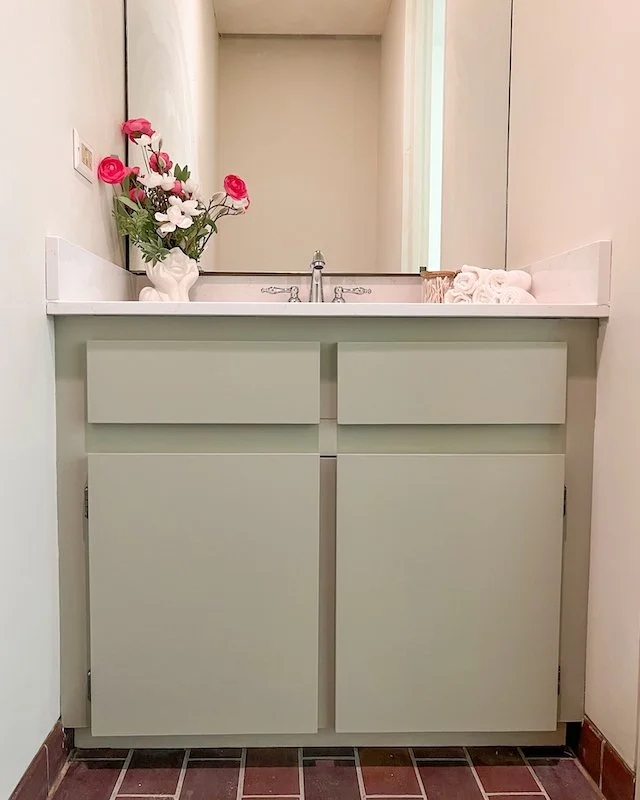
My Small Bathroom Makeover DIY After Painting Melamine Cabinets


Thank you for joining me today as I shared this bathroom vanity makeover with you. I hope enjoyed this bathroom makeover DIY and found painting melamine cabinets to be easy too. If you have any questions about this bathroom makeover on a budget or have any questions regarding home DIY projects or painting a vanity, feel free to leave them in the comment section below!

Until next time!

-S


PIN THIS POST

DIY WREATH FOR SPRING!

Wreath for front door spring - front door wreath for spring

My floral wreath for spring!

DIY WREATH FOR SPRING

After a cold winter, spring is a time of revival. A time to reinvigorate your life and for new beginnings. A time where evidence of dormant plants begins to appear and hibernating animals awake from their slumber. Much like the outside world, I too awaken in the spring with a new sense of energy to create, decorate and prepare for warmer days, but this year things felt different. More purposeful. More rewarding.

Since moving into our new Toronto Victorian home last August, each season has been a completely new experience and opportunity to decorate. In the fall, I used pumpkins to dress up my front step. In the winter, I added festive garlands, planters and ribbons to add holiday cheer. Now with spring upon us I have the urge to add decorations once again, but this time I thought an outdoor spring wreath for the front door would be a perfect accessory. Outdoor spring wreaths are a great way to add a pop of colour to any entrance way and a great way to excite those who see it of warm days ahead.

Having never made a wreath for spring before I wasn’t sure how this project was going to turn out but after a quick trip Michael’s to pick up a grapevine wreath base and a few additional supplies, I was excited to begin creating.

As it turns out, creating an outdoor spring wreath isn’t hard at all! It’s actually super fun, easy to do and took me maybe 40 minutes max. I think the most difficult part of the whole experience was deciding what colour palette I wanted to use and which artificial flowers I was going to buy.


FOLLOW ME ON INSTAGRAM @ISTHATSOH


HOW TO MAKE A WREATH FOR SPRING

To help me get inspired, I went over to Michael’s spring crafting section which had a bunch of pre-made spring outdoor wreaths ready to go. I paid attention at the colours used, the flowers chosen, and how they were constructed before cross referencing with a photo of my front door. Doing this allowed me to confidently pick a colour palette that would not only suit my home but help me determine the size of wreath I wanted and how I would hang it.

Once I decided on the colour palette, I returned to the artificial flower section to make my selection. Since lavender is one of my favourite colours and a popular Easter colour, I knew I wanted to stick to a cool tone palette, so I picked a variety of stems that added a variation of size, texture and colour with this in mind. To help me narrow down the options, I would lay them down on the wreath visualizing how they would go together and their placement. In the end I bought a total of 8 stems which ended up being the perfect amount.

Upon returning home, I laid all my flowers out on my crafting table along with a sharp pair of scissors and some floral wire I had also purchased. Using my hands, I started to manipulate one of the stems around the grapevine wreath, tying it into place by wrapping wire generously around both it and the grapevine. Once secure, I cut off the unsightly bottom of the stem and repeated the process with my largest flower, a faux hydrangea. After the first stem (my base) and largest flowers (my anchor) were securely tied to the grapevine, I was then able to start using my scissors to cut off the other flowers from their stem and just push them into the small crevices within the grapevine wreath to secure them. Between the tightness of the wire and the density of the grapevine, all additional flowers stand in place without requiring additional wire or glue to secure them which ended up making the rest of my DIY outdoor spring wreath progress very fast. It also made placement of the flowers forgiving as I was able to try different positions easily.


CHECK OUT THESE OTHER FUN DIY’S


HOW TO MAKE A BOW FOR A WREATH

In addition to flowers, adding a bow to your wreath is another great way to add variety and dimension to your design. Making a bow can easily be done at home and doesn’t take much time at all. If you are unsure of how to make one yourself or have a hard time remembering, here are two easy tutorials that demonstrate how to make a bow for a wreath.

HANGING YOUR OUTDOOR FLORAL SPRING WREATH

Once I finished placing all my flowers onto the wreath, I now needed to figure out a way to attach it to the door. Using my floral wire I created a small loop around my fingers and fastened it to the grapevine by twisting it around both the loop and grapevine. Doing so allowed me to create a small hanging loop for my now completed wreath that fit perfectly over a small nail already protruding from my front door.

In the end, my DIY wreath for spring turned out amazing and I am so happy with the results. If you are thinking about creating an outdoor spring wreath for your home and have any further questions about how to make a wreath that I did not answer in this blog post, feel free to leave them in the comment section below!

Happy crafting!


PIN THIS POST

DIY CHRISTMAS DECORATIONS: PAPER SNOWFLAKES!

DIY CHRISTMAS DECORATIONS: PAPER SNOWFLAKES!

There is nothing like a little Christmas crafting to get you and your space into the holiday spirit! Am I right?!

Since moving into our new Toronto Victorian home a few months ago, I have been so focused on getting our first floor renovations started that I didn’t expect to be able to celebrate Christmas in our new home. Perhaps overly ambitious on my part, I expected to be in the throws of renovations, unable to host festive soirees this year with friends and family but instead, I was given the gift of time. Time to slow down, settle in and savour the season.

So yesterday, I popped out to the store to grab some crafty materials to create these super cute paper snowflake to jazz up my space for the holiday season. I love how each paper snowflake has its own unique shape and look, and how impactful this inexpensive Christmas decor DIY can have on your space!

If you are looking for a fun and craft way to get into the holiday spirit, you are going to love this simple DIY Christmas decoration and new paper snowflake hack!


FOLLOW ME ON INSTAGRAM @ISTHATSOH


ITEMS YOU WILL NEED FOR THIS SIMPLE CHRISTMAS DECOR TUTORIAL

Makes 1 Snowflake

MATERIALS:
8-10 Paper Lunch Bags - I purchased a variety of colours and sizes from the store
A Hot Glue Gun
1 Glue Sticks - this is plenty and more then enough for making one paper snowflake
Scissors
Tape or String to use for hanging/fastening the snowflake to the wall

Additional Optional Fun Materials:
Spray Paint - I spray painted some of mine silver and it looked really cute
Glitter
Adhesive Pearl Stickers

SIMPLE CHRISTMAS DECOR THAT MAKE A BIG IMPACT!

In the shape of a ‘T’, add hot glue to the backside of a paper bag before sticking another paper bag on top.

Repeat until you have done this for all 8-10 bags.

Using your scissors, cut a unique shape into the bag - it doesn’t have to be even or symmetrical.

Open and glue ends together to reveal your unique snowflake which is now ready to be taped to the wall, or added to your space!

Check out this video below for further clarification!


CHECK OUT THESE OTHER FUN DIY HOME DECOR IDEAS


I hope you enjoyed making these super cute DIY Christmas decorations as much a did. If you have any questions about this simple, paper snowflakes Christmas decor hack, feel free to share them in the comment sections below.

Happy crafting!


PIN THIS POST

UPCYCLED DIY FAUX CERAMIC VASES


Oops I did it again! I’m back with another awesome DIY tutorial that has been trending on Tik Tok - DIY painted vases using upcycled old wine and alcohol bottles! I love the look of these DIY ceramic vases and the way they dress up a space. Doing this DIY honestly made me so excited to decorate my new place (whenever we find it) and when topped off with some dried flowers, a tapered candle or fresh flowers, they bring a whole new level of cuteness to home decor. Creating the DIY ceramic coating is so easy and only requires one ingredient other than your paint to achieve. Not to mention it adheres so well to glass so you really only need two coats to get the full effect. If you want to create a beautiful but cheap vase centerpiece for your home I highly recommend giving this little DIY of mine a go!

* Please Note - Some links in this post may be affiliate links *

MATERIALS:

Makes 1 Vase

A Up-Cycled Bottle - I used a Don Julio and Cointreau bottle
Air Dry Clay
Wax Paper
Acrylic Paint - mix to colour of choice
Baking Powder
Paint Brushes
A Mixing Utensil - I used the end of a plastic fork

Extras:
Goo Gone
A Takeout Container - to be used as base that you can easily rotate


CHECK OUT THESE OTHER FUN DIY’S


INSTRUCTIONS:

Remove labels from bottle and any additional stickers. If you have trouble I recommend using Goo Gone. Allow to air dry until completely dry.

Next, we will create the clay rings for the neck of the bottle. Roll out clay until you reach a uniform width and cut desired amount of pieces into equal lengths making sure that they are long enough to go around the neck of the bottle.

Grab one piece of clay at a time and wrap it around the neck of the bottle sealing the ends together with a little water. Continue this process the whole way up the neck. Once finished, set aside to dry for minimum 1 hour.

Once the clay has dried, place it on a pedestal (I used a takeout container). This will make it easier to rotate when painting so you dont have to touch the bottle.

On a palette (I used a paper plate), mix your acrylic paint to desired colour using a mixing utensil (I used a fork). Make sure you have enough for the entire bottle (better to have more than not enough as it will be difficult to get the same colour). Add in baking powder, 1/2 a teaspoon at a time until you reach your desired consistency. I used 2 tablespoons of paint to 1 Teaspoon of baking powder. Mix until baking powder is well incorporated.

Using a brush, paint the bottles with your paint mixture. Paint as many coats as necessary until necessary until the bottle is fully coated. Set aside to dry for 24 hours before use.

Happy Crafting!


FOLLOW ME ON INSTAGRAM @ISTHATSOH


I hope you enjoyed this DIY as much as I do. If you have any comments please leave them below and I'll be happy to answer them as soon as I can! Happy crafting!!!


PIN THIS POST

DIY MACRAME COASTERS & PLACEMATS HACK


Macrame home decor has been super trendy for some time now and I love the bohemian, natural element they bring to a space. As I look for a new home, I find myself fantasizing about how I plan to decorate it and welcoming people over once we are able to entertain again. I love the idea of incorporating nudes and natural elements into my kitchen and dining room and recently learned about this DIY Macrame hack that can be used for pretty much anything from a coffee coaster to a fruit bowl placemat to chargers on your dinner table. You don’t even need to make it round as the same steps apply to any shape you choose. If you’re really into the trend as well and are looking for a new macrame project to try, you are going to love this easy macrame DIY and my step-by-step macrame how-to tutorial below!

* Please Note - Some links in this post may be affiliate links *

MATERIALS:

Makes 1 Coaster

Heat Resistant Base
Macrame Thread
Really Sharp Scissors - if you have fabrics scissors I would use those!
Hot Glue Gun and Glue
Comb


CHECK OUT THESE OTHER FUN DIY’S


INSTRUCTIONS:

Fine the center of the heat resistant base and glue a small loop onto it using the end of the string.

Working quickly, glue down the string in a spiral direction, until the base is completely covered. Cut cord leaving a few inches at the end.

Next, take the cord and measure the circumference of the finished base, adding an extra inch or two for safe measure before cutting.

Next, you will need to cut out 5 inch pieces of cord in order to make the tassel knots. The number you will need will vary depending on the length of the cord you just measured for the circumference.

Tie each piece of 5 inch string to the circumference cord using a cow hitch knot. Repeat until the entire length of cord is covered in knots. Make sure to tie the knots tightly and as close together as possible.

Next, unravel the fibers of each tassel and or using a comb, brush the tassels so they come undone and fray nicely.

When done, glue the tassel cord to the circumference of the base so that it is flush to the base.

In order to add further stabilization, flip base over an glue in the gaps between the tassel cord and the base.

Using sharp scissors, cut the tassels so they are even in length to your desired length.

Trim off excess glue and loose fibers.


FOLLOW ME ON INSTAGRAM @ISTHATSOH


I hope you enjoyed this DIY macrame placemat and coster tutorial as much as I do. If you have any comments please leave them below and I'll be happy to answer them as soon as I can! Happy crafting!!!


PIN THIS DIY MACRAME POST