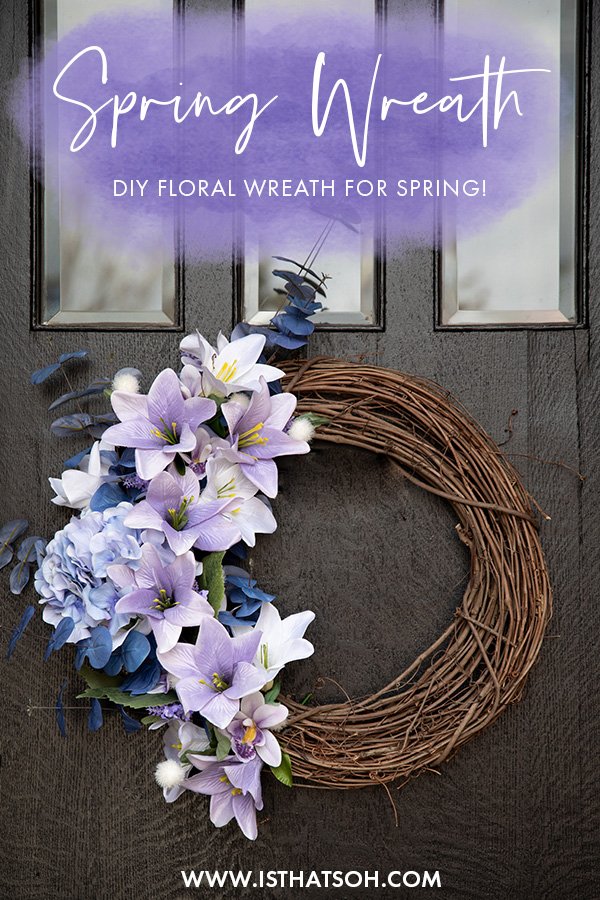
My floral wreath for spring!
DIY WREATH FOR SPRING
After a cold winter, spring is a time of revival. A time to reinvigorate your life and for new beginnings. A time where evidence of dormant plants begins to appear and hibernating animals awake from their slumber. Much like the outside world, I too awaken in the spring with a new sense of energy to create, decorate and prepare for warmer days, but this year things felt different. More purposeful. More rewarding.
Since moving into our new Toronto Victorian home last August, each season has been a completely new experience and opportunity to decorate. In the fall, I used pumpkins to dress up my front step. In the winter, I added festive garlands, planters and ribbons to add holiday cheer. Now with spring upon us I have the urge to add decorations once again, but this time I thought an outdoor spring wreath for the front door would be a perfect accessory. Outdoor spring wreaths are a great way to add a pop of colour to any entrance way and a great way to excite those who see it of warm days ahead.

Having never made a wreath for spring before I wasn’t sure how this project was going to turn out but after a quick trip Michael’s to pick up a grapevine wreath base and a few additional supplies, I was excited to begin creating.
As it turns out, creating an outdoor spring wreath isn’t hard at all! It’s actually super fun, easy to do and took me maybe 40 minutes max. I think the most difficult part of the whole experience was deciding what colour palette I wanted to use and which artificial flowers I was going to buy.
FOLLOW ME ON INSTAGRAM @ISTHATSOH


HOW TO MAKE A WREATH FOR SPRING
To help me get inspired, I went over to Michael’s spring crafting section which had a bunch of pre-made spring outdoor wreaths ready to go. I paid attention at the colours used, the flowers chosen, and how they were constructed before cross referencing with a photo of my front door. Doing this allowed me to confidently pick a colour palette that would not only suit my home but help me determine the size of wreath I wanted and how I would hang it.
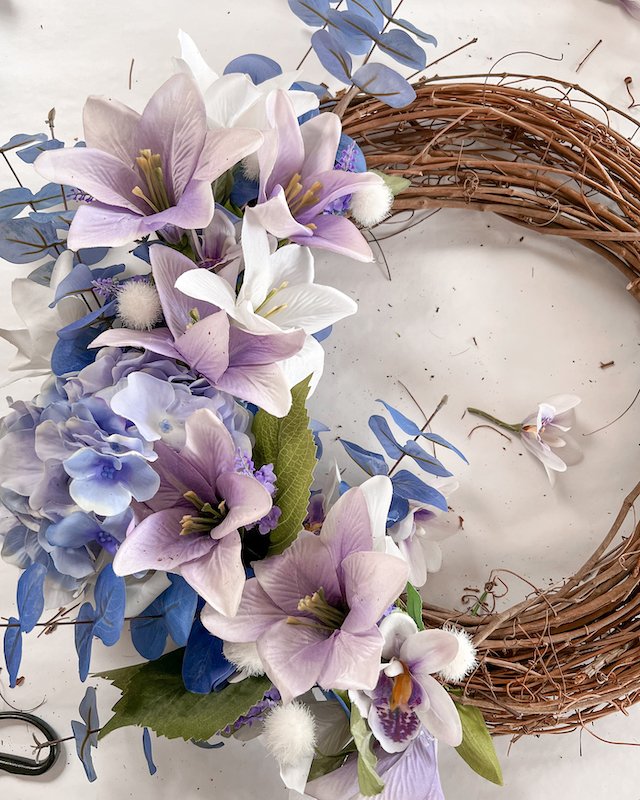
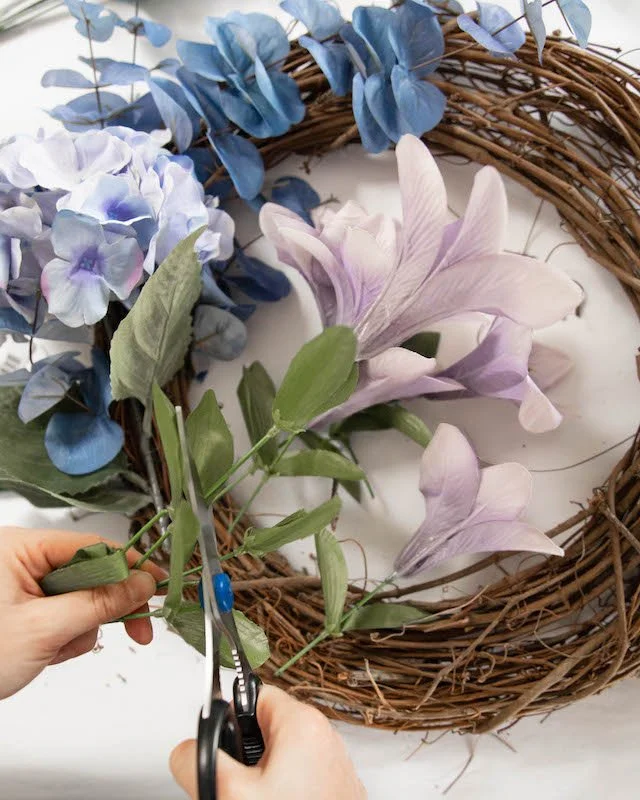
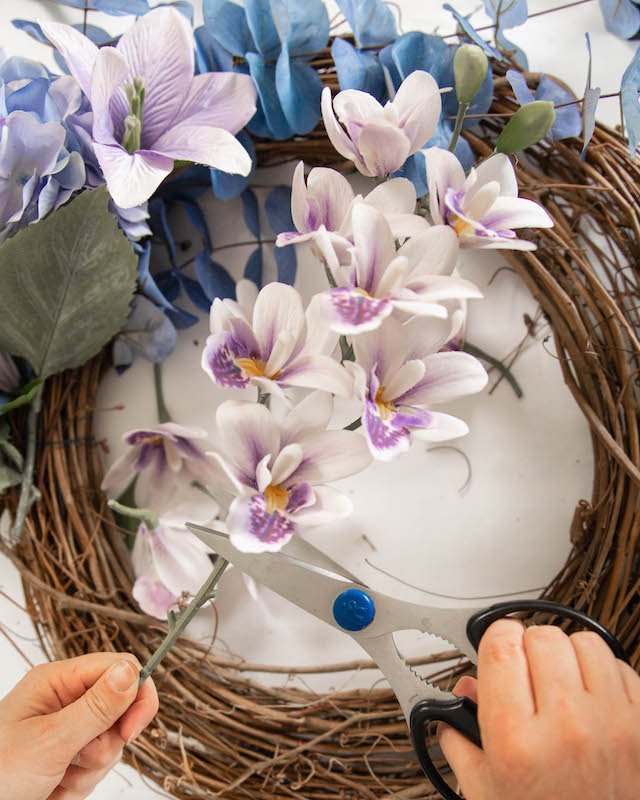
Once I decided on the colour palette, I returned to the artificial flower section to make my selection. Since lavender is one of my favourite colours and a popular Easter colour, I knew I wanted to stick to a cool tone palette, so I picked a variety of stems that added a variation of size, texture and colour with this in mind. To help me narrow down the options, I would lay them down on the wreath visualizing how they would go together and their placement. In the end I bought a total of 8 stems which ended up being the perfect amount.

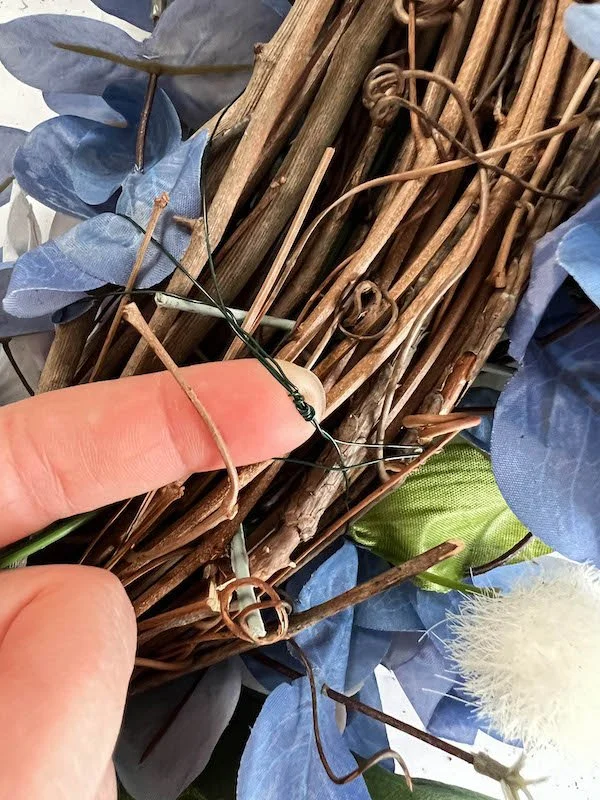
Upon returning home, I laid all my flowers out on my crafting table along with a sharp pair of scissors and some floral wire I had also purchased. Using my hands, I started to manipulate one of the stems around the grapevine wreath, tying it into place by wrapping wire generously around both it and the grapevine. Once secure, I cut off the unsightly bottom of the stem and repeated the process with my largest flower, a faux hydrangea. After the first stem (my base) and largest flowers (my anchor) were securely tied to the grapevine, I was then able to start using my scissors to cut off the other flowers from their stem and just push them into the small crevices within the grapevine wreath to secure them. Between the tightness of the wire and the density of the grapevine, all additional flowers stand in place without requiring additional wire or glue to secure them which ended up making the rest of my DIY outdoor spring wreath progress very fast. It also made placement of the flowers forgiving as I was able to try different positions easily.


CHECK OUT THESE OTHER FUN DIY’S


HOW TO MAKE A BOW FOR A WREATH
In addition to flowers, adding a bow to your wreath is another great way to add variety and dimension to your design. Making a bow can easily be done at home and doesn’t take much time at all. If you are unsure of how to make one yourself or have a hard time remembering, here are two easy tutorials that demonstrate how to make a bow for a wreath.
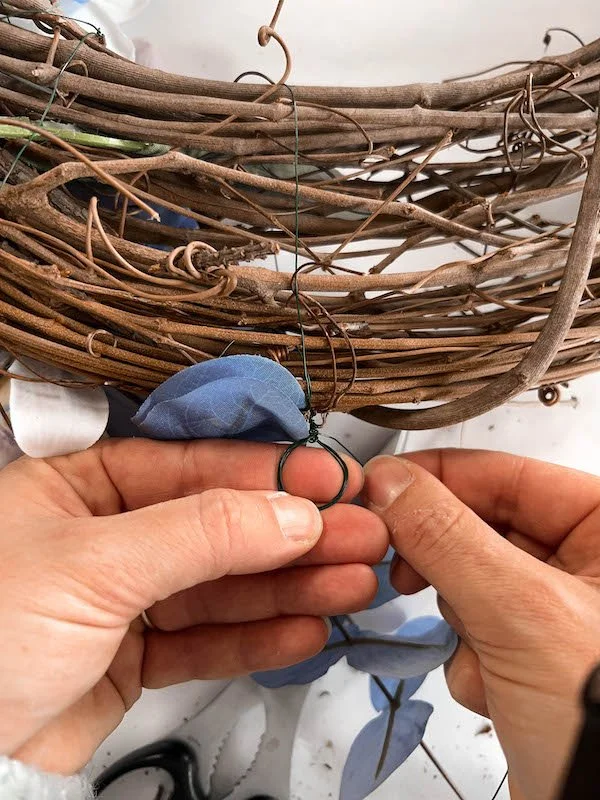
HANGING YOUR OUTDOOR FLORAL SPRING WREATH
Once I finished placing all my flowers onto the wreath, I now needed to figure out a way to attach it to the door. Using my floral wire I created a small loop around my fingers and fastened it to the grapevine by twisting it around both the loop and grapevine. Doing so allowed me to create a small hanging loop for my now completed wreath that fit perfectly over a small nail already protruding from my front door.
In the end, my DIY wreath for spring turned out amazing and I am so happy with the results. If you are thinking about creating an outdoor spring wreath for your home and have any further questions about how to make a wreath that I did not answer in this blog post, feel free to leave them in the comment section below!
Happy crafting!