*PLEASE NOTE: SOME LINKS IN THIS ARTICLE MAY BE AFFILIATE LINKS*
When I started my journey of learning photography I actually started with film and would develop my film and process my photos in a dark room by soaking them in chemical baths. These days, it’s so much easier to get started especially since most smartphones are equipped with cameras and you can start taking photos right away without having to invest hundreds of dollars into equipment or learning the art of developing film (although, if you enjoy digital photography you may eventually want to experiment with film).
Today, I have three main cameras, a Canon 5D Mark IV (my primary DSLR camera that I splurged on when I started to get lots of sponsored campaigns), a point and shoot Sony RX 100 M4 (a great compact camera that is both powerful and inconspicuous - I started my YouTube channel with this camera), and my iPhone camera (which has been upgraded over the years as I upgraded my phone). I would be lying if I didn’t say each camera has its own set of benefits but really, what makes a photographer or their photo great isn’t the equipment but the subject matter and keen eye.
Learning photography is not only fun but it makes for a great creative outlet and can become a fantastic skill to master. That is why I wanted to create this blog post on tips for photography for beginners so that anyone, with any kind of camera, can improve their photography skills and enjoy this creative outlet too!
TIPS FOR PHOTOGRAPHY BEGINNERS
1) CLEAN YOUR LENS
Such a basic tip, I know but you would be surprised how many people unintentionally compromise the quality of their photo because there is a smudge or some dust on their lens. If you are taking photos on your phone, you’re probably caring it in your pocket or purse and touching it frequently with your hands and face. The camera lens is bound to collect dust, lint, or even begin to get covered in smudge marks due to the oil on your hands and face. No matter what kind of device you are using, carrying around a microfiber lens cleaning cloth and giving your lens a whip before you use it is one simple and easy way to ensure your photo quality is not being compromised and is basic 101 when it comes to Iphone photography tips.
2) ACTIVATE YOUR GRID LINES
When it comes to all art, not just photography, knowing some basic composition theory can really improve the impact of your images.

The Golden Ratio
The Golden Ratio - If it’s good enough for Leonardo Da Vinci, it’s good enough for me! The Golden ratio is used across many art forms to create divine proportion and movement within an image that is appealing to the human eye. If you want to fosters organic and natural looking compositions that are aesthetically pleasing, consider paying attention to how your eye moves around the image and use your grid lines to activate the golden ration via the rule of thirds.
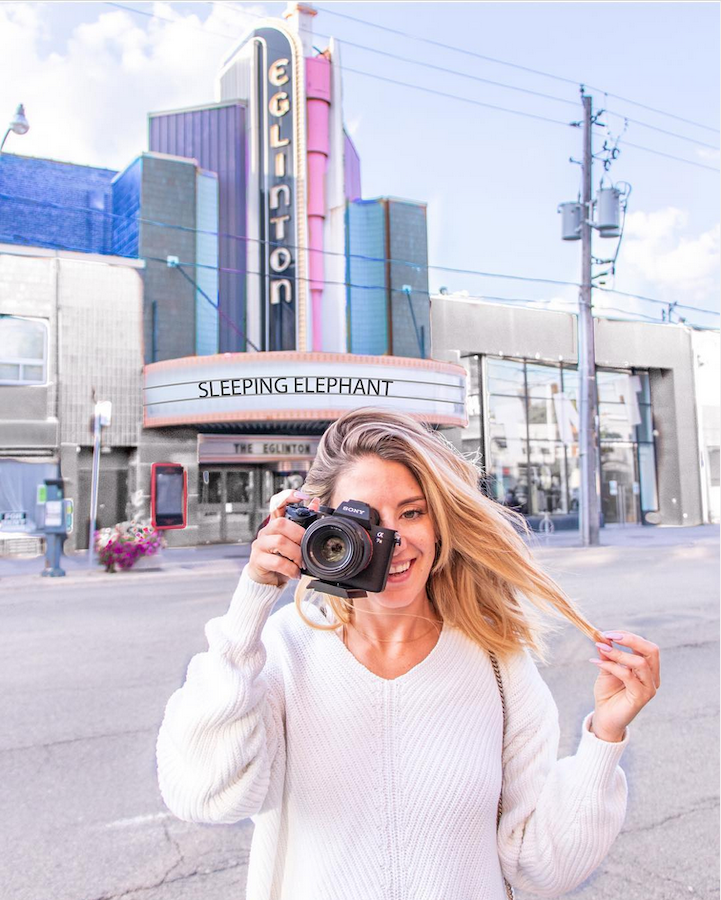
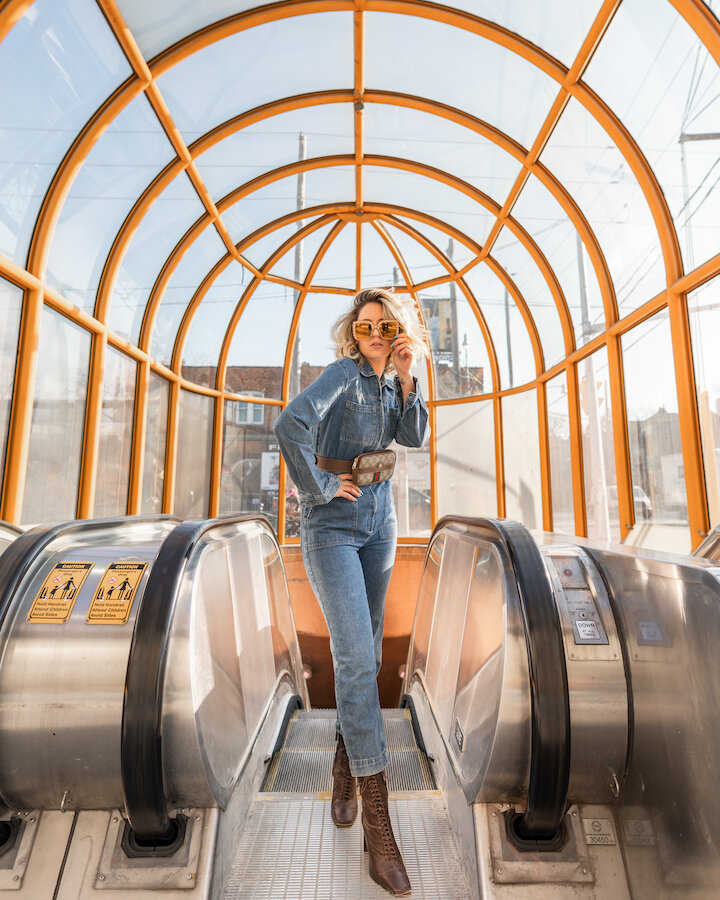
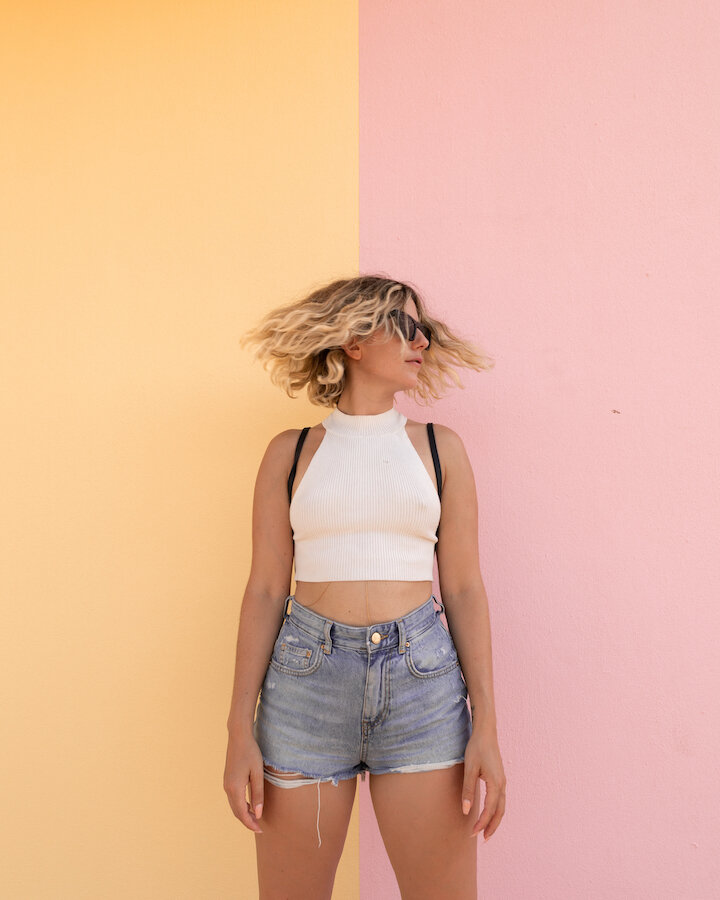
The Rule of Thirds - An easy way to make your photos appear more dynamic is by following the rule of thirds which favors off-center composition. When utilizing your 3×3 grid, which equally divides the image into nine parts, placing your subject matter in one third or on one of the horizontal grid lines, is a simple way to give structure to photographs and make them more appealing. Of course, when it comes to photography, your subject matter and the effect you are trying to create will determine whether to utilize or break this rule but many professional photographers use this composition technique and it is a good rule to know regardless and one the oldest tips for photography.
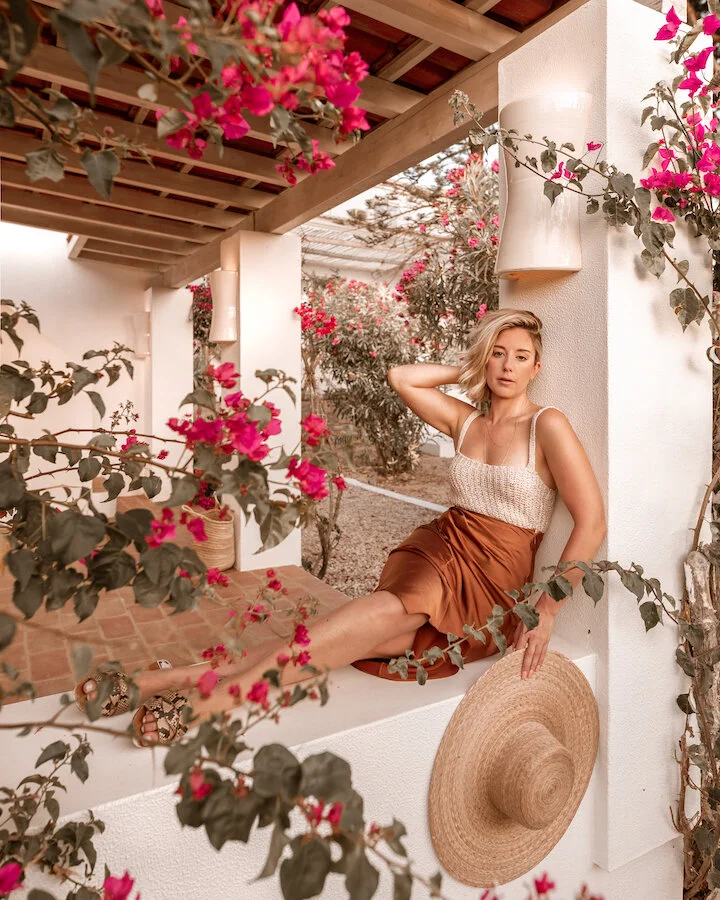
I asked Adam to place me in the right third when taking this photo and to position the flowers in a way to frame me
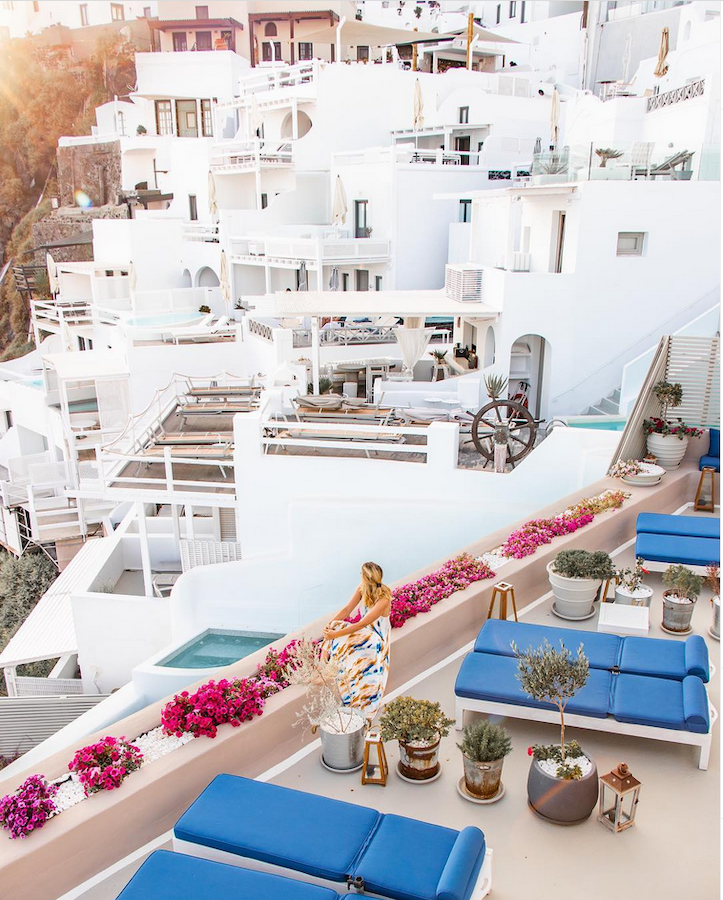
Leading Lines - Leading lines are a great way to move the viewer’s eye around the photo or towards the main subject matter and ls also a great way to add depth to your images. Lining leading lines up with your grid lines can help you make sure they are equal/balanced on the same horizontal axis or appear on your desired angle

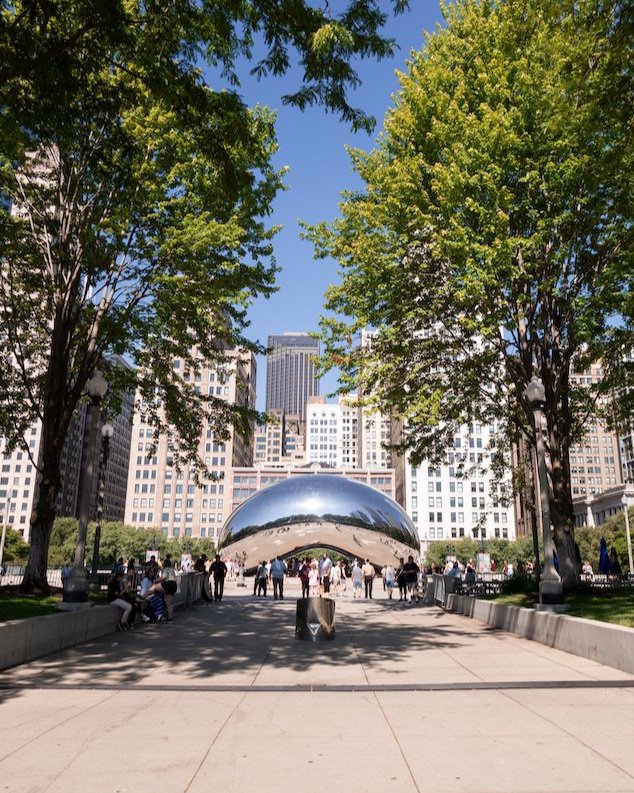
The leading lines in this photo pull you into the environment and fill you with desire to walk down the beach
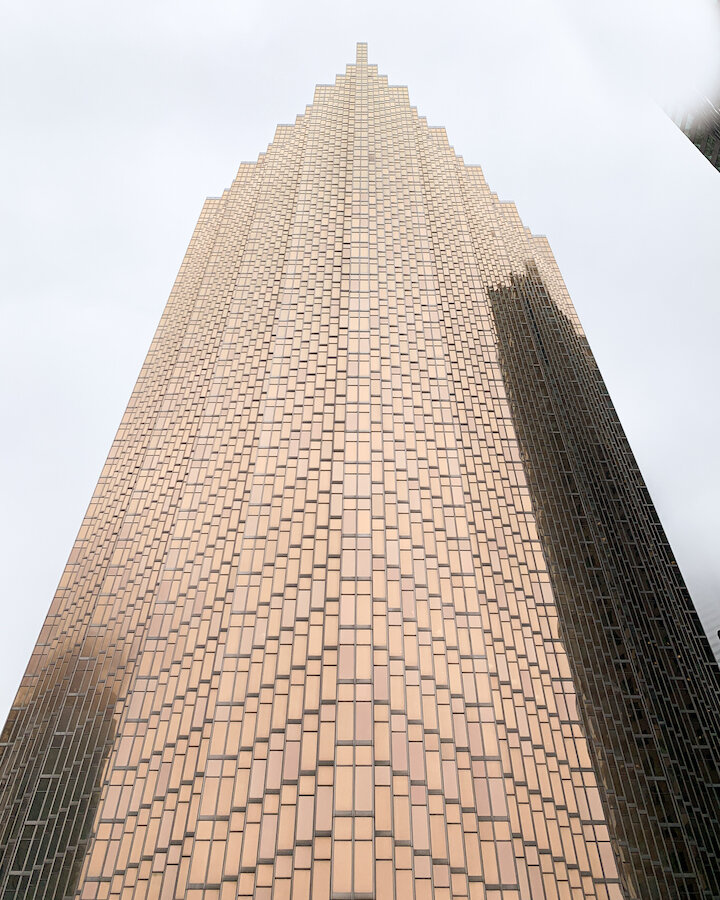
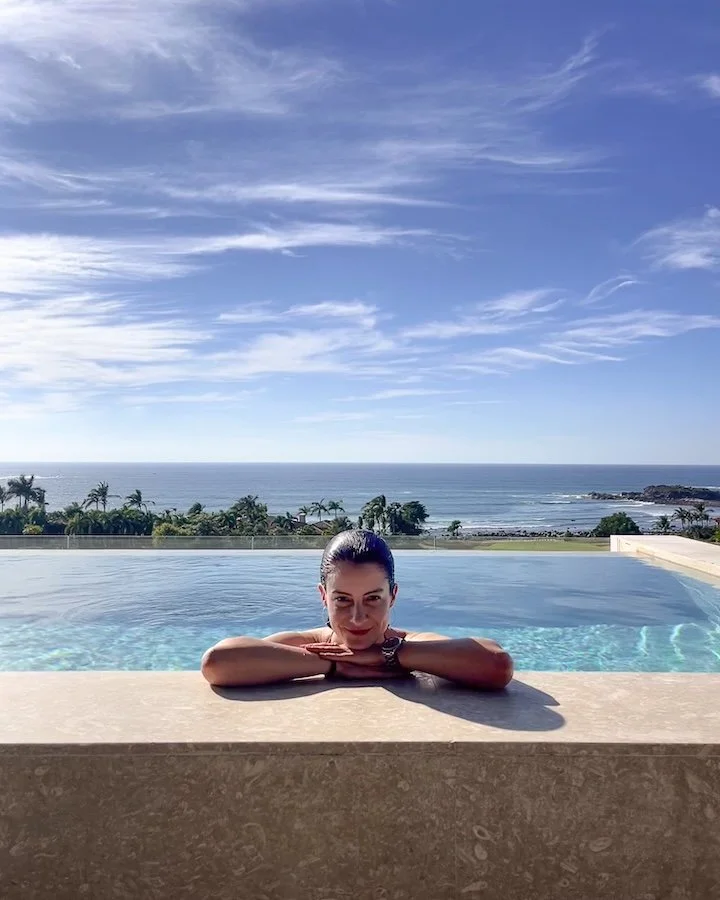
Looking for Symmetry - There is something innately pleasing to the eye about symmetry and a photographer can easily increase the strength of their work/subject matter by trying to create a sense of harmonious and beautifully balanced proportions. You may not realize it now but symmetry can be found everywhere in nature, like when cutting an onion in half, examining a leaf, or looking at a piece of honeycomb. Incorporating symmetry into your photos by taking advantage of a reflection on a calm lake and lining your subject matter up to balanced proportions with the help of your grid lines is an easy way to improve your composition.
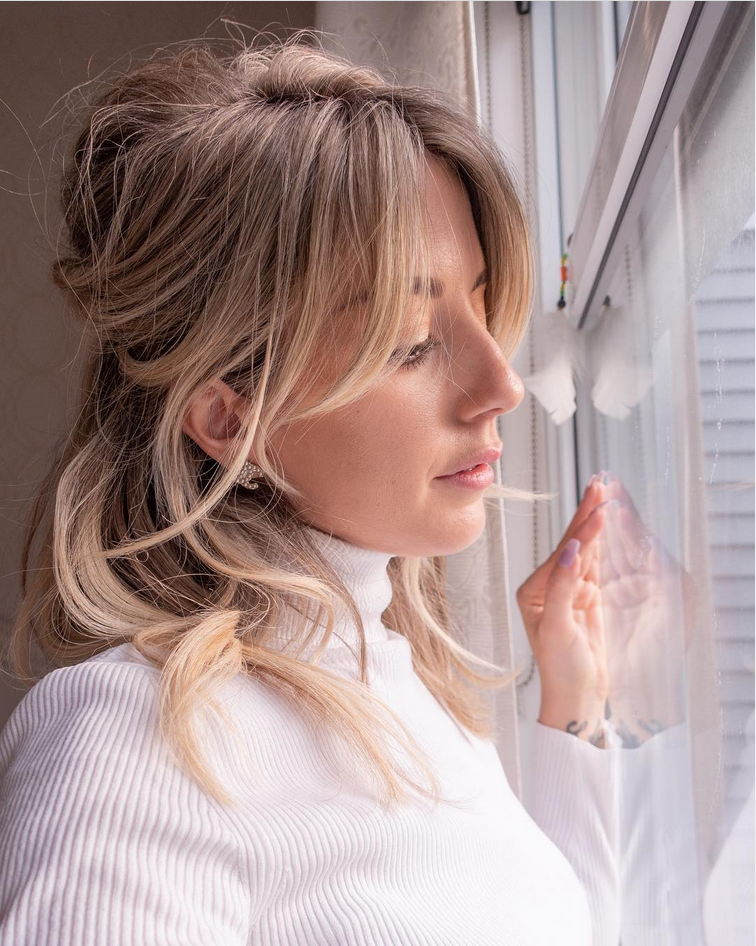
3) PLAY WITH LIGHT
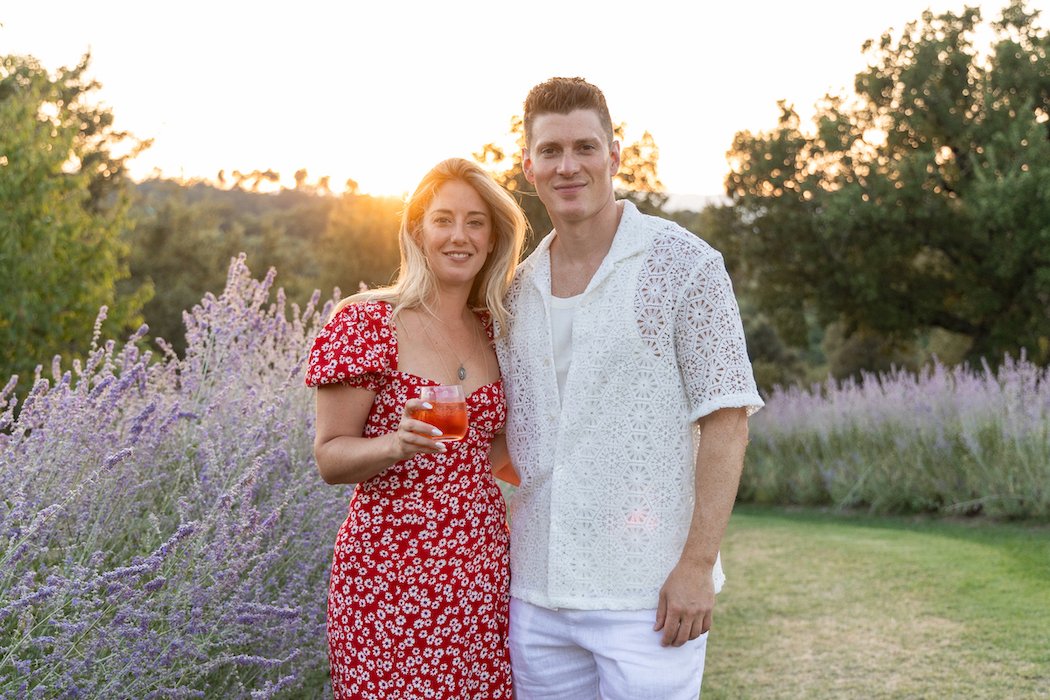
I could write a whole blog post about this one tip but the short and sweet of it is that when it comes to lighting, I will always prefer natural light. This is because not only is it incredibly versatile but it’s also free! Unless you have the money to pay for big studio lighting, I would recommend using natural light as much as possible when taking your photos. My rule of thumb is to try and utilize cloudy days or low light (early morning or afternoon light) to take photos because that’s when the light is the softest. The harsher the light the more contrast a photo will have and the more obvious imperfections will be. Soft light, on the other hand, helps hide imperfections and makes lighting across the image more even.
That isn’t to say you can’t take photos at noon when the sun is at its highest. As a matter of fact, I take photos at all times of the day by moving the subject into the shade or indoors where there is naturally less direct light, and even at night with the help of a tripod and a slow shutter speed.
One thing I like to pay attention to that helps me distinguish whether the light is getting softer or harsher, is by paying attention to the subject’s shadow. If the shadow is getting longer/taller then the subject, the light is getting softer and if the shadow is getting shorter, or smaller then the subject, it is getting harsher.
HACK: if the subject is being lit primarily on one side and you want to create less contrast, use a white piece of paper to bounce light off of and illuminate the opposite side for more even lighting.
Lighting is not only a great way to evoke emotion but it can be used to add fun sun flares and silhouettes to your photos by shooting into the light/sun (placing the light source anywhere from 10-2 o’clock) vs. having it behind you at 3-5 o’clock or 7 -9' o’clock (depending on where you want YOUR shadow to fall). NOTE: please pay attention to YOUR SHADOW and make sure it’s not directly over your subject unless that is the effect/emotion you are going for.

Shooting into the sun can cause beautiful silhouette and sun flare effects on your photos
LIKE MY TRAVEL PHOTOS? CHECK OUT MY LATEST TRAVEL BLOG POSTS BELOW!

Further, using light to create an illusion is also a great way to make your photos appear more dynamic. I have seen people use a colander or a piece of cardboard with punched holes in it to fracture light and create an interesting shadows or effects on the subject.
There are, of course, certain situations where you won’t be able to get away with NOT artificially illuminating your subject matter like in the middle of a restaurant, however, there are a couple of workarounds that you could use to help you out, like request a seat by the window or asking your dinner mate if you can use the ‘flashlight’ feature on their phone and draping a white dinner napkin over their light to soften the harshness.

I asked Adam to shoot me from top down on the staircase and we played with the artificial light coming from below
4) PLAY WITH YOUR ENVIRONMENT
A photographer can find great inspiration by simply paying attention to their surroundings and keeping an eye out for interesting subject matter. This can be done by focusing on smaller elements like a close up of raindrops sliding down window glass, or using their environment to create context like morning fog on the water. You can even try creating a frame within a frame by shooting a photo of outside through a doorway or window frame.
One of my favorite ways to make a photo feel more appealing and lively is to create movement using wind! If there is no wind that day you can also make the subject move by having them shake their head, dance, play with the skirt of their dress or run. Further, paying close attention to elements that give something character, like wrinkles or a smile, and making that the focus versus the whole body can also make a photo more attractive. The possibilities are endless and how you want to use what you have around you can make all the difference when taking photos.

5) FILL YOUR FRAME
If you really love a photo but feel as though it appears very busy, try cropping in so the subject matter fills more of the frame and there are less busy background elements that could distract from the subject matter. I do this on Instagram sometimes when I have lots of similar photos but want to create a different, more intimate look. Instead of focusing on a whole outfit and posting a similar photo, I’ll crop into just my jewelry and allow that to be the focus and subject matter of the image.
Getting up close and personal can create a feeling of intimacy
6) PLAY WITH YOUR ANGLES
Playing with camera angles is an effective way to make an image more powerful. When a photo is taken at eye level, it can feel very natural and ordinary. When you take a photo of someone from below it gives the appearance that they, THE SUBJECT, are more superior or ‘godly’ and creates the appearance of dominance. Inversely, if you take a photo from a higher angle, looking down at the subject matter, THE VIEWER then feels like they are the dominant one and the subject is the submissive/less significant aspect of the photo.

Further, looking at objects from a different angle then that at which you primarily see them can also contribute to more interesting photos.
HACK: When taking a photo of your favorite furry friend, get down to their level and take the photo from their eye level or lower as opposed to taking a photo while you’re standing looking down at them, for a more interesting shot!

I got down to Sophie’s point of view so we can experience and understand her world more clearly
Photos taken from top-down are called ‘Flat lays’ and styling them can often become an art within itself. Popular in food photography and photography of inanimate objects, flat lays are a great way to show off a lot of subject matter.

An example of a flatlay - Bibimbap - A crispy cauliflower rice Korean dish I made for my blog - if you want the recipe click HERE
7) THE RULE OF ODDS
Another rule to consider when thinking about composition, especially for food photography, is the rule of odds which states that having an odd number of objects in a photo is more appealing than having an even amount. This means having 3 plates in frame vs 4 will produce a more interesting, and more visually pleasing composition. Of course, that isn’t to say your photos won’t be as good if there are an even number of objects. If you can’t leave one object out, I’d suggest bunching an odd number of items together at one end of the frame and leaving the fourth item on the opposite side of the frame for an uneven effect.

Even when plating food you can use the rule of odds - Pictured here, Chorizo Potato Tacos - Click here for the recipe
8) EXPERIMENT WITH YOUR FOCUS
Focus and depth of field (your aperture) can play a huge role in evoking emotion. When you want to single out something in a photo, shortening your depth of field to only that subject and having everything around it blurry can create a feeling of isolation and importance whereas having a larger depth of field can highlight a feeling of expansive space and unimportance.
Further, in photography, there is something called ‘Bokeh’ which is a very aesthetically pleasing effect you can create by using a small depth of field to create a blurry background that is out of focus. The light in the background is then softened to a point that it becomes very aesthetic pleasing with a blur quality that actually enhances the beauty of the subject matter that is in focus.

Look how creamy the colors are of everything that is out of focus is and how stunning the champagne looks against them. Also you can see small amounts of Bokeh on the left hand side by the window above the champagne glass.
Playing with your focus could also mean splaying with your shutter speed (this applies more traditional cameras/DSLR). The longer your shutter speed is open, the more light is allowed to register on your sensor. When you have very little light you need a slower shutter speed and when you have a lot of light you need a faster shutter speed. For example, if you are trying to take photos of stars at night, you will need a longer or slower shutter speed. In order to make sure you don’t create blur by your body’s natural tremors, I recommend putting your photo on a tripod for stability. On the other hand, if you want to capture a vivid image of someone riding by on a bike, you need a shutter speed fast enough to avoid creating a blur due to the subject matter moving.
HACK: Sometimes you may want to have blurry motion as an effect for your photo like when photographing a quickly moving stream. In order to do so, place your camera on a tripod and slow your shutter speed down so that it creates a smooth liquefying effect.
9) DON’T CUT OFF LIMBS
Another important thing to be cognizant of while taking photos of people or animals is to make sure all their limbs are in the frame. When you cut off a person’s foot or arm, it makes them look smaller and can make the photo overall less attractive. If you have to cut off someone’s legs because let’s say you are going for a closer portrait shot, my rule of thumb is to not cut them off at the joint but instead higher up or lower down as it makes the subject appear less stumpy if that makes sense. The same goes for an animal, chopping off a little of their ear by not getting it in the frame can take away from the animal’s beauty or symmetry, so pay attention to what’s in the frame and what you’re cutting off.

I had a few of these photos so to make this one appear different I cropped in just above my knee so as to avoid making me appear shorter.
10) PAY ATTENTION TO YOUR FOREGROUND
Every photo has a foreground, a middle ground, and a background. The foreground is the space at the bottom of your photo, the middle ground is the space the subject takes up and the background is everything behind the subject. Having too much foreground can really take away from the strength of an overall photo so pay attention to how much foreground you are allowing in the frame and the ratio of it compared to the middle and background. For example, say you are standing on a rock taking a photo of a girl in the sunset. If the rock takes up half the frame and the girl take up another quarter, and the sunset and sky only get the last 1/4 it won’t be as dramatic of a shot as if the rock only took up 1/8 of the frame, the girls took up 1/4 and the sunrise and sky took up the rest of the frame. Paying attention to these proportions can really improve the quality of photos and can further enhance your subject matter so make sure you take it into consideration when setting up your shot.
11) AIM TO HAVE THE HIGHEST QUALITY OF PHOTO POSSIBLE
When it comes to photography, having the highest quality and sharpest image/subject matter possible is always key. In order to do this, when shooting with a phone or digital device that doesn’t have a zoom lens, I would actually avoid digitally zooming into an object using your fingers to expand the frame because it actually decreases the quality and sharpness of the photo. Instead, if I can, I would move closer to the subject matter itself or take a photo and crop the image in later using an editing application.
Additionally, if you have the option to take higher quality photos on your digital DSLR or point and shoot camera (via your camera settings) I would do so and compromise with a larger SD card that can hold and process larger photos quickly.
12) MAKE YOUR PHOTOS POP BY EDITING THEM
Learning to edit your photos can not only help you correct photography mistakes but it can allow you to invent your own style, make and sell your own presets, and even digitally add elements to your photo after the fact. I typically edit photos on my computer using Adobe Lightroom (my favorite) and Adobe Photoshop (to a lesser degree) but in the past, if I need to edit on the go using my phone a few phone friendly programs that I have used include Enlight, Snapseed, Facetune, ColorStory, and Cinemagraphy Pro.

13) COLLECT AND USE PROPS
Incorporating props into a photo is a great way to make your photo prettier, more interesting, make your subject more comfortable (if it is a person), or enhance your overall subject matter. Collecting nice plates or cutlery, or incorporating flowers into your food photography are all great ways to add style to your shot. Further, providing a nervous person with an instrument or a hat can put them at ease by getting them to look and hold the object or play with it (ie throwing a hat towards you or in the air) instead of focusing on the camera. A few items you can start collecting to use as props include:


14) INVEST IN BACKDROPS
I recently started to collect backdrops and highly recommend investing in some if you want to take your photography on the road and need a specific type of aesthetic. I use mine for food photography and it allows me to ensure I have a clean looking environment to shoot with where ever I go. I often shoot outdoors but it looks like I am shooting inside someone’s kitchen. Further, since I have 4-5 different backdrops I can change up the ‘setting’ and make it look different each time if I want. Choosing the right backdrop can also enhance the colors of a dish and by playing around with different backdrop colors you can really make a dish come alive. For example, if the dish has vibrant rich colors, using a white backdrop can be an easy way to enhance them. If my dish has light pale colors, using a dark backdrop can enhance them. Since I am shooting outside I also have to really pay attention to the light and often find myself shooting in the late afternoon during dinner time when the light is the softest, but when you invest in backgrounds they are so versatile you can use them for lots of different types of photography like infant photography and portrait photography.
15) COLLECT INSPIRATION
I love using platforms like Pinterest or Instagram to collect inspiration on numerous subject matter or to follow photographers that I love. You can learn a lot and get inspired by what others are doing by creating collections of photos and examining how they use the above pointers, tips, and rules to create their photos. If you don’t have a collection of photos yet, I highly recommend creating one!


Thank you for visiting IsThatSoh.com and for spending some time with me. I hope you enjoyed this blog post on beginners photography tips and tips for Iphone photography, and walked away with some useful insights. If you have any questions or comments or your own tops for beginner photography that you want to share, feel free to leave them in the comment section below and I’ll try and answer them as soon and as best as I can!
Take care friends!