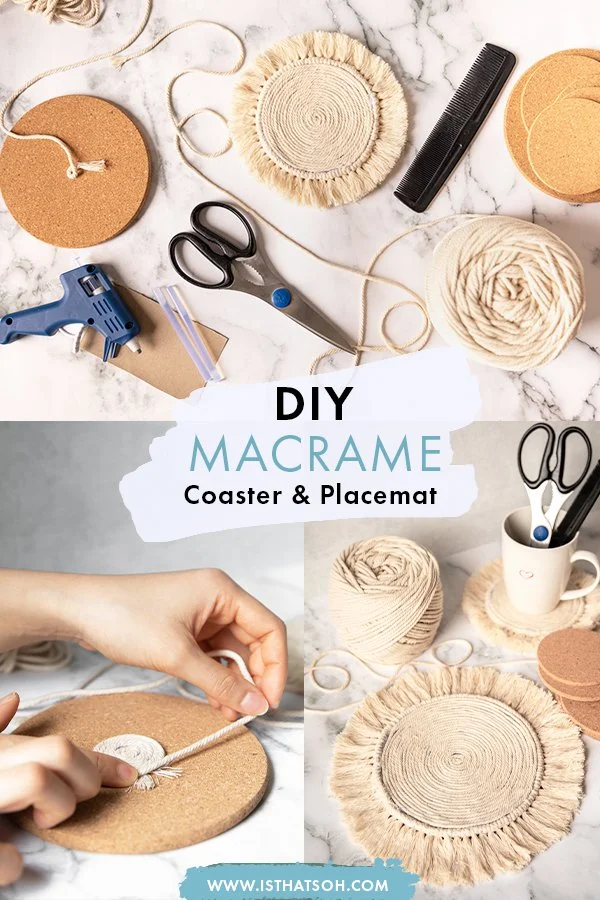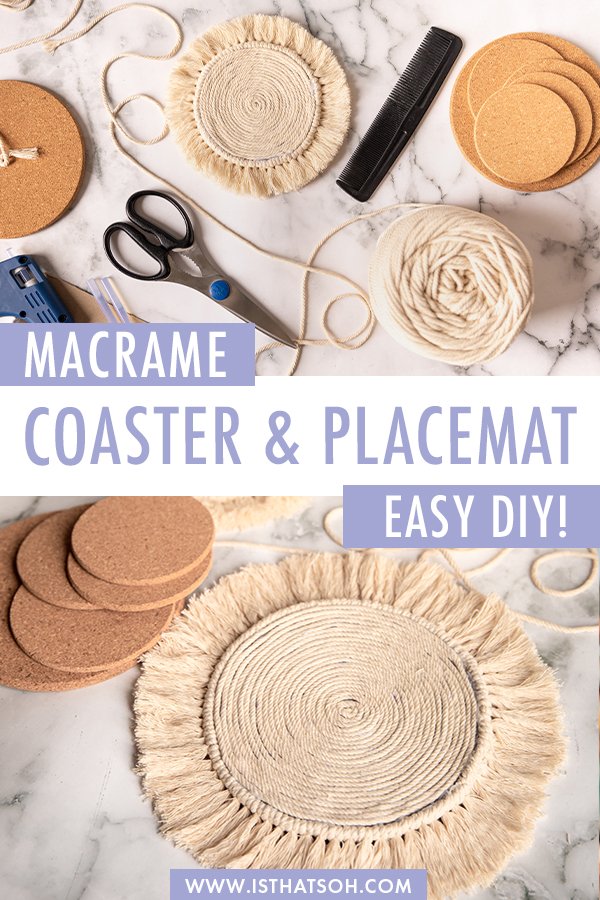
Macrame home decor has been super trendy for some time now and I love the bohemian, natural element they bring to a space. As I look for a new home, I find myself fantasizing about how I plan to decorate it and welcoming people over once we are able to entertain again. I love the idea of incorporating nudes and natural elements into my kitchen and dining room and recently learned about this DIY Macrame hack that can be used for pretty much anything from a coffee coaster to a fruit bowl placemat to chargers on your dinner table. You don’t even need to make it round as the same steps apply to any shape you choose. If you’re really into the trend as well and are looking for a new macrame project to try, you are going to love this easy macrame DIY and my step-by-step macrame how-to tutorial below!
* Please Note - Some links in this post may be affiliate links *
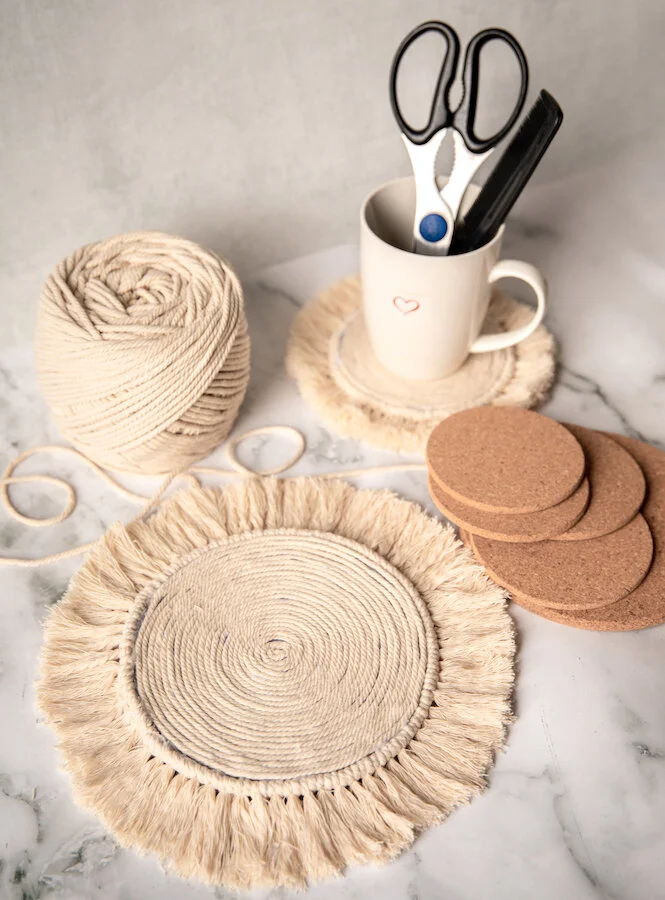
MATERIALS:
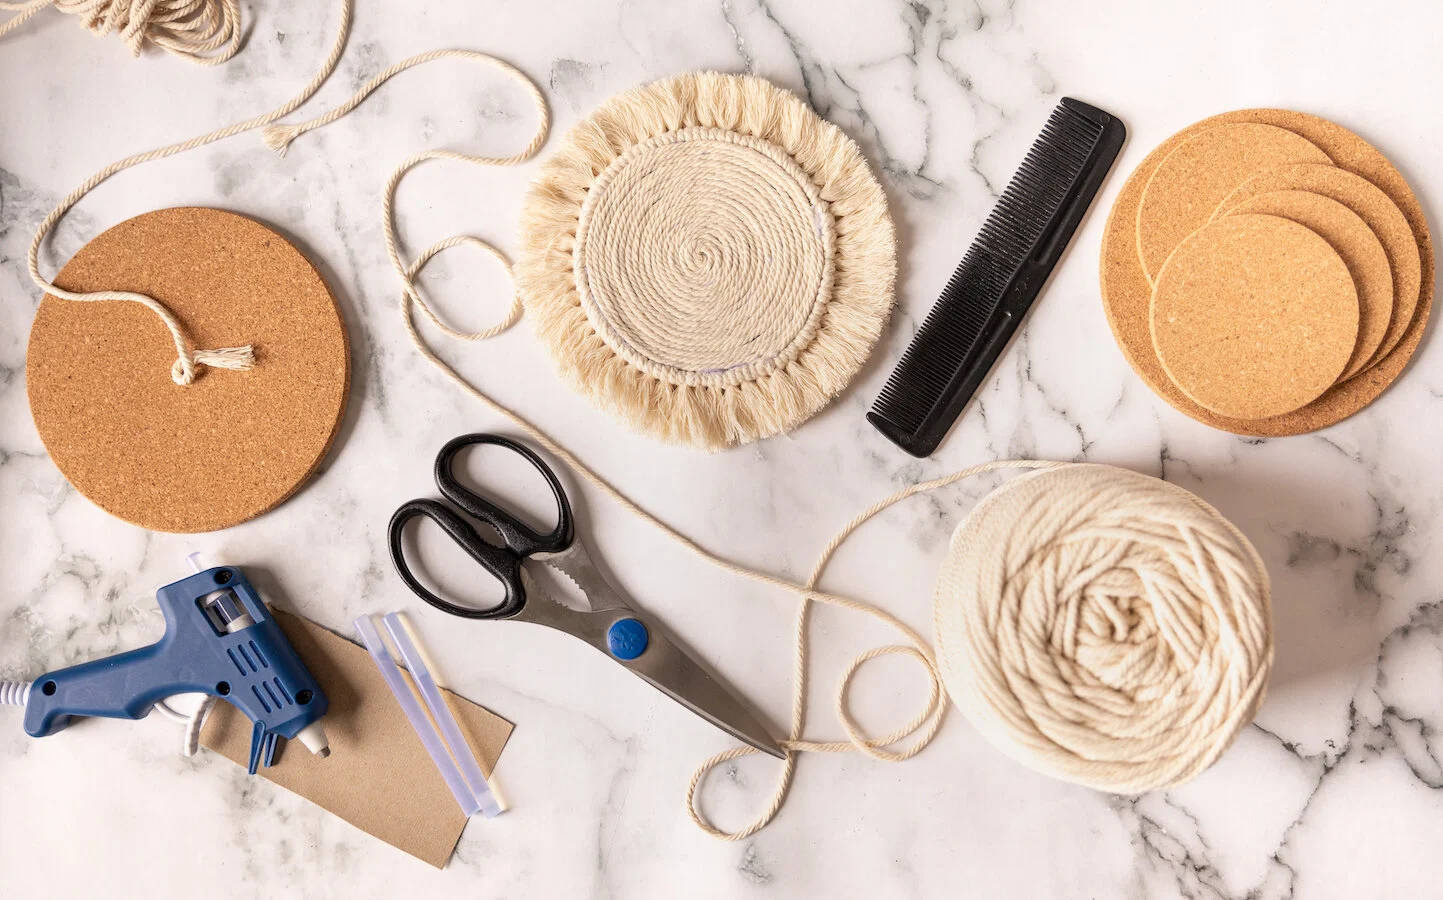
Makes 1 Coaster
Heat Resistant Base
Macrame Thread
Really Sharp Scissors - if you have fabrics scissors I would use those!
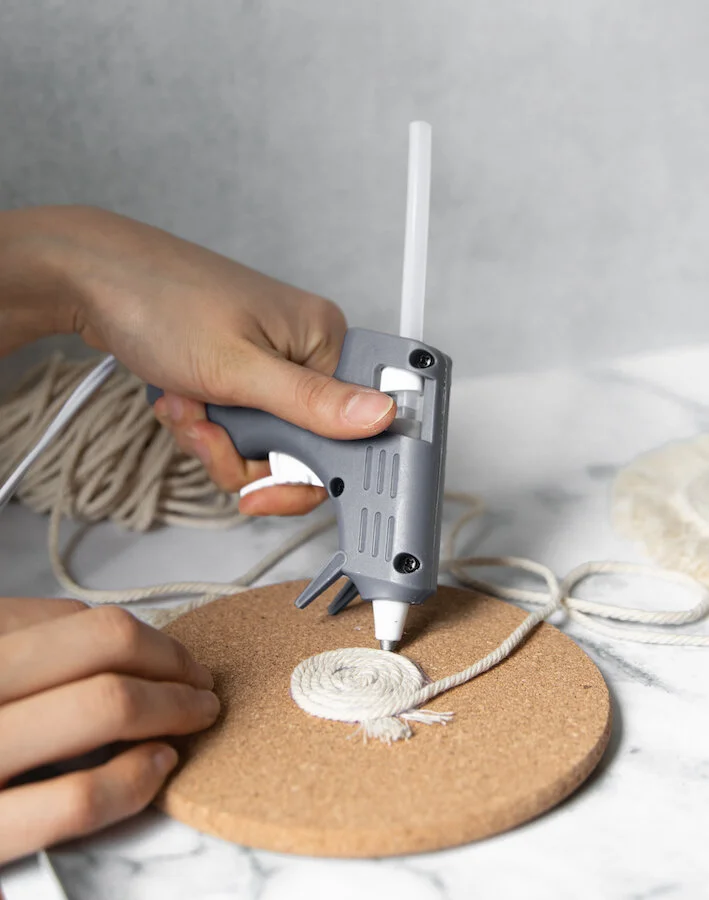
Hot Glue Gun and Glue
Comb
CHECK OUT THESE OTHER FUN DIY’S


INSTRUCTIONS:
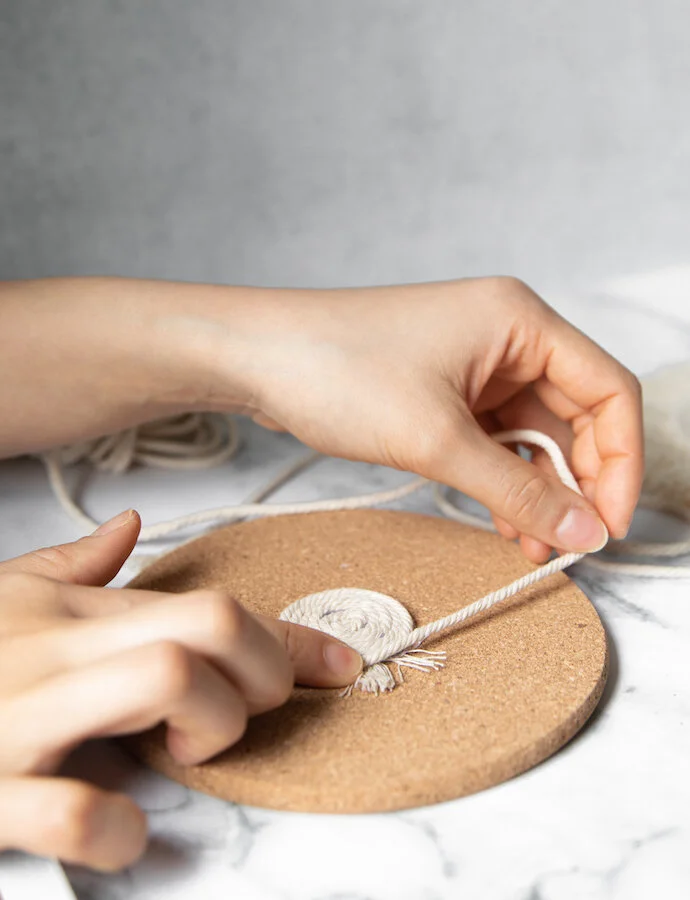
Fine the center of the heat resistant base and glue a small loop onto it using the end of the string.
Working quickly, glue down the string in a spiral direction, until the base is completely covered. Cut cord leaving a few inches at the end.
Next, take the cord and measure the circumference of the finished base, adding an extra inch or two for safe measure before cutting.
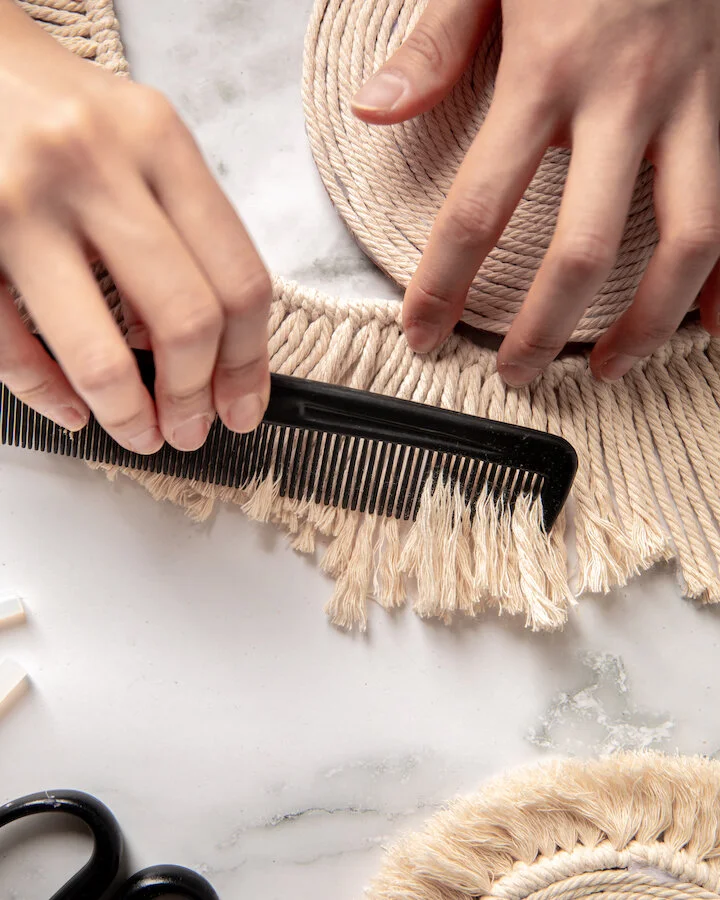
Next, you will need to cut out 5 inch pieces of cord in order to make the tassel knots. The number you will need will vary depending on the length of the cord you just measured for the circumference.


Tie each piece of 5 inch string to the circumference cord using a cow hitch knot. Repeat until the entire length of cord is covered in knots. Make sure to tie the knots tightly and as close together as possible.
Next, unravel the fibers of each tassel and or using a comb, brush the tassels so they come undone and fray nicely.
When done, glue the tassel cord to the circumference of the base so that it is flush to the base.
In order to add further stabilization, flip base over an glue in the gaps between the tassel cord and the base.

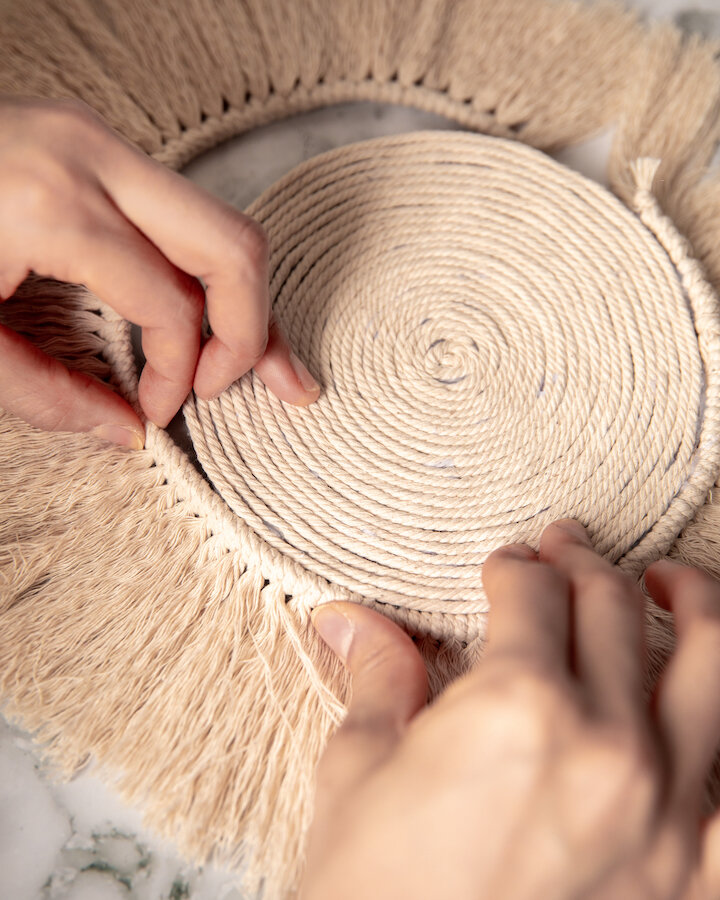


Using sharp scissors, cut the tassels so they are even in length to your desired length.
Trim off excess glue and loose fibers.
FOLLOW ME ON INSTAGRAM @ISTHATSOH


I hope you enjoyed this DIY macrame placemat and coster tutorial as much as I do. If you have any comments please leave them below and I'll be happy to answer them as soon as I can! Happy crafting!!!