3D GINGERBREAD CHRISTMAS TREE

* Please Note - Some links in this post may be affiliate links *

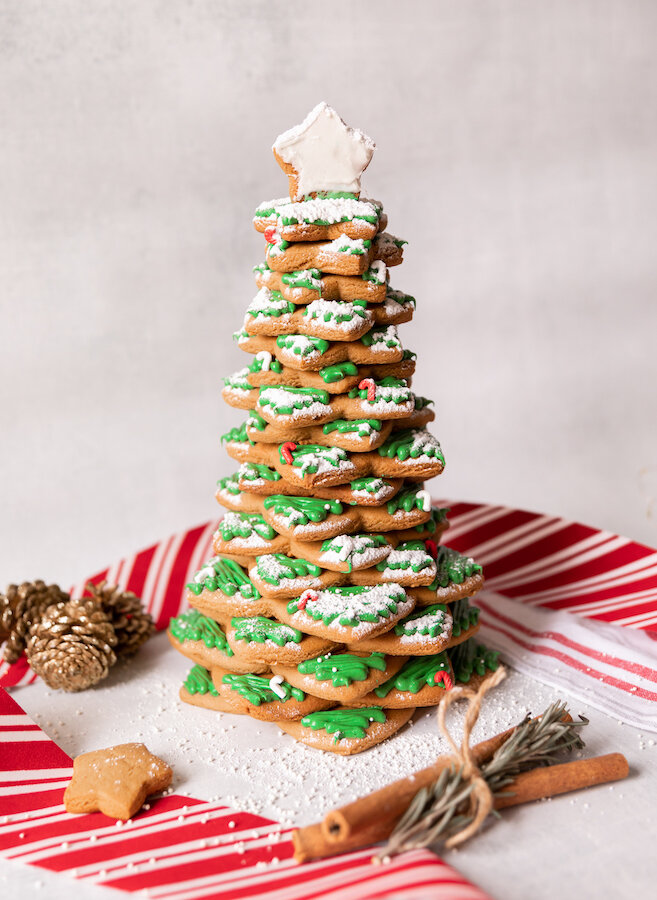
Level up your dessert table this year with this 3D Gingerbread Christmas Tree! It is not only so fun to make but it is also the perfect centerpiece at Christmas dinner. If you are looking for something to do that not only fill the house with the best smell (HELLO GINGERBREAD COOKIES!!) but is also a great activity the whole family can get involved in, this is it!

Happy Holidays my friends!


FOLLOW ME ON INSTAGRAM @ISTHATSOH!


INGREDIENTS:

Makes 1 Christmas Tree

- Gingerbread Cookie Recipe -
2/3 of a CUPS of Butter (unsalted) - softened
2 CUPS of Granulated Sugar
2 Large Egg - at room temperature
2/3 of a CUP of Fancy Molasses
5.5 CUPS of Flour (All Purpose)
3 TSP of Ginger
2 TSP of Cinnamon
1 TSP Baking Soda
1/2 TSP Ground Cloves
Large Pinch of Salt

- Decorations -
Cookie Icing - White, Green, Red are traditionally used
Sprinkles
Icing Sugar

- Tools -
10 PC Christmas Star Cookie Cutter - I found mine on Amazon and it arrived in 2 days! *Please note I did not use all 10 stars, I started from the smallest and worked my way larger. If you want to use all 10 stars (and have a massive tree) you will need to double your gingerbread cookie ingredients)
Wax Paper
Parchment Paper
Baking Tray
Icing Piping Bag and Decorative Tips


CHECK OUT THESE OTHER FESTIVE RECIPES

DIRECTIONS:

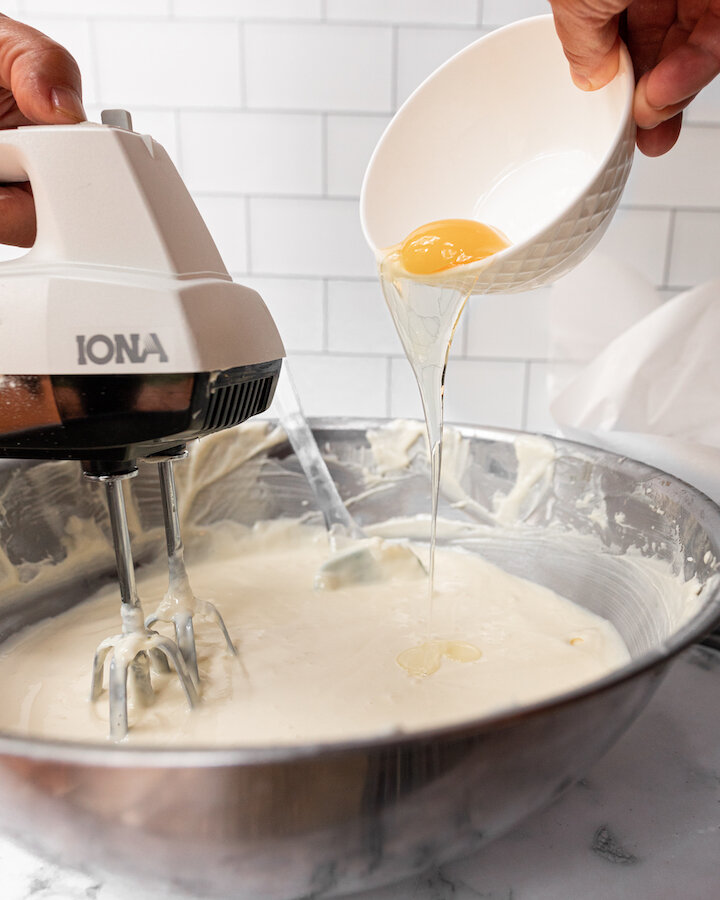
Blend softened butter and sugar together until fluffy. Add in your egg and fancy molasses.

In a separate bowl mix your flour, ginger, cinnamon, baking soda, ground cloves, and salt. Whisk until well mixed.

Slowly start to add your flour mixture into your butter mixture until a dough starts to form. You may want to finish it off with your hands.

Make two dough balls from the mixture and wrap them in plastic wrap before placing them in the fridge for an hour.

After an hour, remove the dough balls from the fridge and let them rest for 10 minutes before rolling them out to 1/4 inch thickness. I used my clean countertop to roll the dough out and placed wax paper on top of the dough for easy rolling.

Preheat oven to 350.

Cut out 2-3 cookies of each size (starting from smallest and working your way larger) of the Christmas Star and place them on a baking tray lined with parchment paper. Place each shape 1/2 - 1 inch apart because the cookies do spread out and puff up a little. I didn’t use all 10 of my stars (I think I stopped at 7) as I didn’t want my tree to be too big.

Bake for 11 minutes.

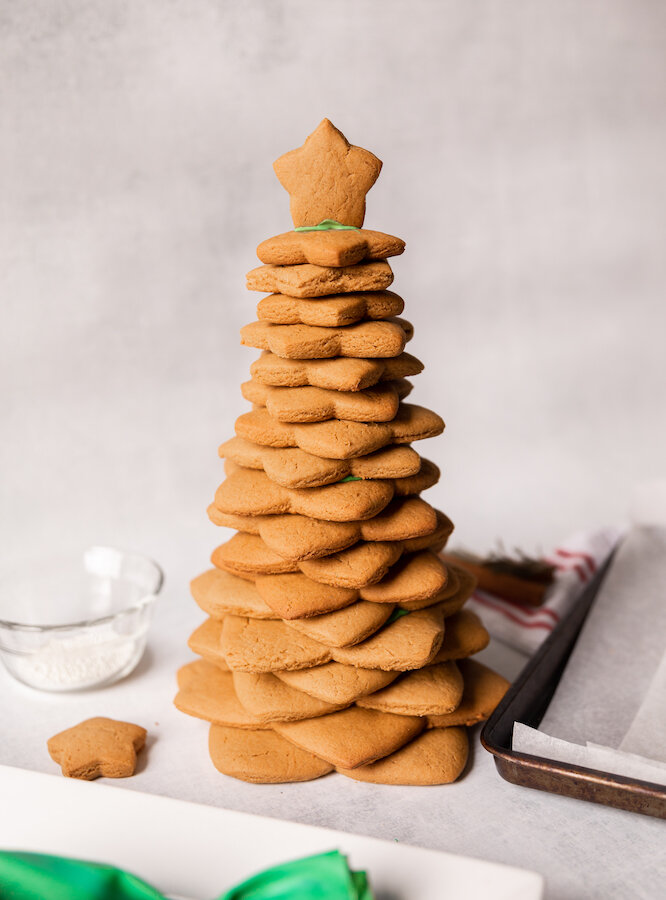
Remove from oven and allow to cool down before stacking them from the largest size to the smallest size. Use a little bit of icing when stacking to help hold them in place and level them out.

When you get to the final star cookie use icing to stick it to the top standing up to create a Christmas tree star!

Decorate as desired.

Allow to dry/harden in a safe place and store at room temperature.


I hope you enjoyed this recipe as much as I do. If you have any comments please leave them below and I'll be happy to answer them as soon as I can! Happy cooking!!!


PIN THIS POST

HOLIDAY DANISH WITH CREAM CHEESE DRIZZLE

With the holidays just around the corner I thought I would get a head start on trying some festive recipes, and since sweets go hand in hand with festive celebrations I thought I’d kick things off with this candy cane shaped danish! It’s the perfect dessert to bring to a friends for dinner and totally enhance any dessert table! I used store bought puff pastry and the left over cream cheese filling to create a icing drizzle which cut down on the time needed to whip this dessert up significantly. Also, feel free to switch up the jam and put your own unique twist on it! Happy Holidays!


FOLLOW ME ON INSTAGRAM @ISTHATSOH!


INGREDIENTS:

Serves 4-5 People

1 Sheet of Puff Pastry - leave out 2 hours in advance so it has time to de-thaw or place overnight in the fridge
2-3 TBSP of Flour - to sprinkle
2 TBSP of Unsalted Butter - melted as a wash

- Filling -

4 Oz of Cream Cheese
1 TSP of Vanilla
1/4 CUP of Sugar
Jam of Choice - I went with Raspberry

- Cream Cheese Icing -
Remaining Cream Cheese Filling
1 TBSP of Milk

- Tools -
Ruler
Knife


CHECK OUT THESE OTHER FESTIVE RECIPES!


DIRECTIONS:

Preheat oven to 375 degrees

Roll out puff pastry leaving the parchment paper on the backside. Using a ruler, measure and cut the pastry dough in half. Starting with one half, create isosceles triangles by notching every two inches down the longest side and finding the halfway point on the opposite side.

Next, overlap the triangles one by one in the shape of a candy cane. Press overlapping sides together to bind them.

In a bowl combine your cream cheese, sugar, and vanilla. Beat with a hand mixer until well combined.

Spoonful cream cheese mixture onto the thickest part of the dough leaving a 1/2 inch border along the outer edge followed by your choice of jam.

Fold triangle points over and pinch along the 1/2 inch border to secure in place.

Brush dough with melted butter. You can also use to it seal the triangle points into place.

Bake for 16-20 minutes or until golden brown and allow to cool for 5 -10 minutes before adding icing.

Combine the remaining cream cheese mixture with 1 TBSP of milk and beat with a fork. Depending on how much cream cheese you used for filling you may need to add a little bit more milk to the mixture to make it more liquid. You will know you have the right consistency when you hold the fork above the mixture and have a pretty steady stream. Drizzle cream cheese icing over the danish and serve.

Alternatively, you can also sprinkle with powdered sugar.

Enjoy!


I hope you enjoyed this recipe as much as I do. If you have any comments please leave them below and I'll be happy to answer them as soon as I can! Happy cooking!!!


PIN THIS POST

MY GRANDMOTHERS EASY OLD FASHIONED APPLE CRISP RECIPE! THE PERFECT THANKSGIVING DESSERT!

Apple season is upon up which means I’m getting request left, right, and center from my family to make some of our household fall favorites including my grandmothers old fashioned apple crisp recipe! It’s the perfect and easiest dessert to make if you are having a small gathering and is always a crowd please, not to mention its super delicious! If you’re looking for a dessert that gives you all the fall feels and is sure to be a hit, this is it!

Enjoy!

INGREDIENTS:

Serves 10-12 People

Crumble Topping
1.5 Cups of Flour
2 Cups of Old Fashion Oats
1.5 Cups of Brown Sugar
1/2 TSP of Salt
1.5 TSP of Cinnamon
1 Cups of Cold Butter - grated

Apple Filling
12 Granny Smith Apples - Peeled and cut into pieces
1.5 TSP of Cinnamon
1/2 TSP of Salt
1/2 a Cup of Granulated Sugar
1 TSP of Vanilla

Butter - to coat your baking tray or casserole dish ( I used a 13x9 Inch casserole dish)

DIRECTIONS:

Preheat oven at 375 degrees.

Butter your baking tray or casserole dish with butter.

In a large bowl, mix your crumble topping ingredients together and using your hands, mix ingredients together until butter feels evenly spread throughout and the flaky dry flour texture is gone. About 5-6 minutes. When done, place in fridge to keep cold.

In another large bowl, add in your apple filling ingredients and mix using clean hands. Apple slices should be evenly coated in all ingredients.

When ready, dump apple filling into buttered casserole dish, cover with crumble and place in oven to bake for 45-50 minutes or until you start to see the top turn golden brown and the juice from the apple filling to bubble up the sides.

When ready, remove and allow to cool for 5 minutes before serving either alone or with a slice of vanilla ice cream.

Enjoy!


FOLLOW ME ON INSTAGRAM @ISTHATSOH


I hope you enjoyed this recipe as much as I do. If you have any comments please leave them below and I'll be happy to answer them as soon as I can! Happy cooking!!!


PIN THIS POST

BURNT BASQUE CHEESECAKE

We may not be able to travel right now but that doesn’t mean we can’t eat the delicious foods we discovered while away. I recently was reminded of Adam and I’s trip to Spain and the small little surfing town of San Sebastian that we visited while there. In the evening, we would wander around the small town looking for a bar to grab some pinchos (small traditional snacks typically eaten in bars in northern Spain) and on one of those evenings, we were also introduced to a popular dessert in the region, the Burnt Basque Cheesecake. Unsure of how to make it myself, I recently scoured the internet in search of a recipe that was not only super simple but tasted just as I had remembered. Not only was I super happy with how my cheesecake turned out but I would highly recommend giving this dessert recipe a good if you are looking for something to whisp you away to memories of Spain with a single bite!

Enjoy!

INGREDIENTS:

Unsalted Butter
2 LBS of Cream Cheese - Room Temperature
1.5 CUPS of Sugar
6 Large Eggs
2 CUPS of Heavy Cream
1 TSP of Kosher Salt
1 TSP of Vanilla
1/3 CUP of Flour

10” Spring Form Pan
Parchment Paper
Sifter

DIRECTIONS:

Preheat oven to 400 degrees and make sure your middle rack is not obstructed.

Using unsalted butter, butter your springform pan and line with two pieces (overlappings slightly in the middle) of parchment paper. You need them to help hold up the cheesecake once it rises so it’s okay if it comes over the top of the pan (just make sure it’s not too tall where it will touch the oven elements.

Beat cream cheese and sugar with a hand mixer on medium-low until sugar dissolves and the texture is smooth. Remember to scrape the sides!

Next, increase your speed slightly before adding one egg in at a time in 15-seconds intervals.

Next, reduce your speed slightly and add in your cream, salt, and vanilla. Mix until well incorporated, approximately 20-30 seconds.

Next, sift in your flour and beat on low until well incorporated. Make sure to scrape down the sides of the bowl to get the extra build-up on there. The batter should be a smooth consistency.

When ready, pour batter into your springform pan and bake on the medium rack for 60-65 minutes until it’s a deep golden brown.

When ready, set cheesecake aside to cool in the springform pan. The cheesecake will fall dramatically so don’t worry if it came over the sides a lot. Once cooled you can remove springform pan and carefully peel away the parchment paper.

At this point, feel free to cut the cake into wedges and serve however I like the consistency more the following day when it becomes more reminiscent of thicker creamy cheesecake as oppose to a flan texture.


I hope you enjoyed this recipe as much as I do. If you have any comments please leave them below and I'll be happy to answer them as soon as I can! Happy cooking!!!


PIN THIS POST

CHOCOLATE ZUCCHINI BREAD

If you are trying to sneak more veggies into your diet, I highly recommend giving this zucchini bread a go. If you are looking to be a little healthier feel free to omit the chocolate, it still tastes great without it. Not only is this recipe nutritious but the bread is also so moist but it freezes well. My boyfriend and I love to enjoy a slice with some earl grey tea as the combo is simply divine.

Enjoy!

INGREDIENTS:

Makes 1 Loaf of Chocolate Zucchini Bread

Unsalted Butter - for greasing the loaf pan
4 OZ Bittersweet Chocolate - Chopped
1 CUP of All-Purpose Flour
1/2 CUP of Whole Wheat Flour
1/3 CUP Instant Oats
1 TSP of Baking Soda
1/2 CUP of Unsalted Butter
1/2 CUP of Sugar
2 Eggs
2 TBSP of Plain Yogurt
1 TSP of Vanilla
1/2 a TSP of Lemon Zest
2 CUPS of Zucchini - Shredded

You will also need:
Loaf Pan
Parchment Paper

DIRECTIONS:

Preheat oven to 350 degrees

Greece loaf pan and line with a piece of parchment paper.

Melt your chocolate on medium-low heat in a small saucepan on the stove.

In a bowl, combine flour (both - all-purpose and whole wheat), oats, and baking soda. Give it a whisk until well incorporated.

In a separate large bowl, combine sugar and butter and using a hand mixer, cream together until light and fluffy.

Next add eggs, yogurt, vanilla, lemon rind, and melted chocolate to your sugar and butter bowl, and beat until well incorporated.

Next, stir in your shredded zucchini before adding the flour mixture in a cup at a time and beating until nicely mixed. Make sure to scrape the sides and get all the flour built up there.

Lastly, spread your batter in the loaf pan and bake for 45 minutes or until a toothpick comes out clean.

Allow the zucchini loaf to cool in the pan for 20 minutes before removing it and letting it continue to cool on a cooling rack.

Enjoy!


I hope you enjoyed this recipe as much as I do. If you have any comments please leave them below and I'll be happy to answer them as soon as I can! Happy baking!!!


PIN THIS POST