KOREAN PICKLED RADISH RECIPE

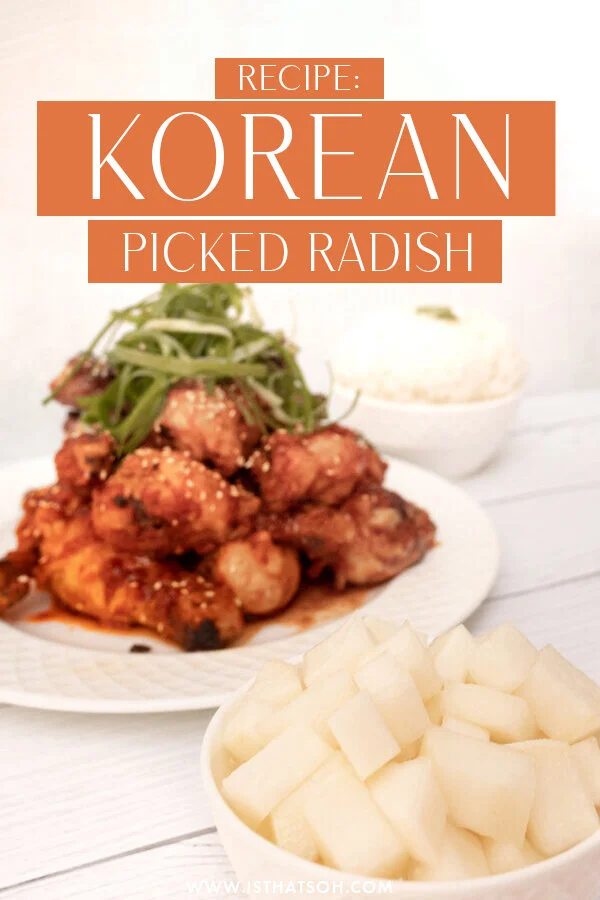
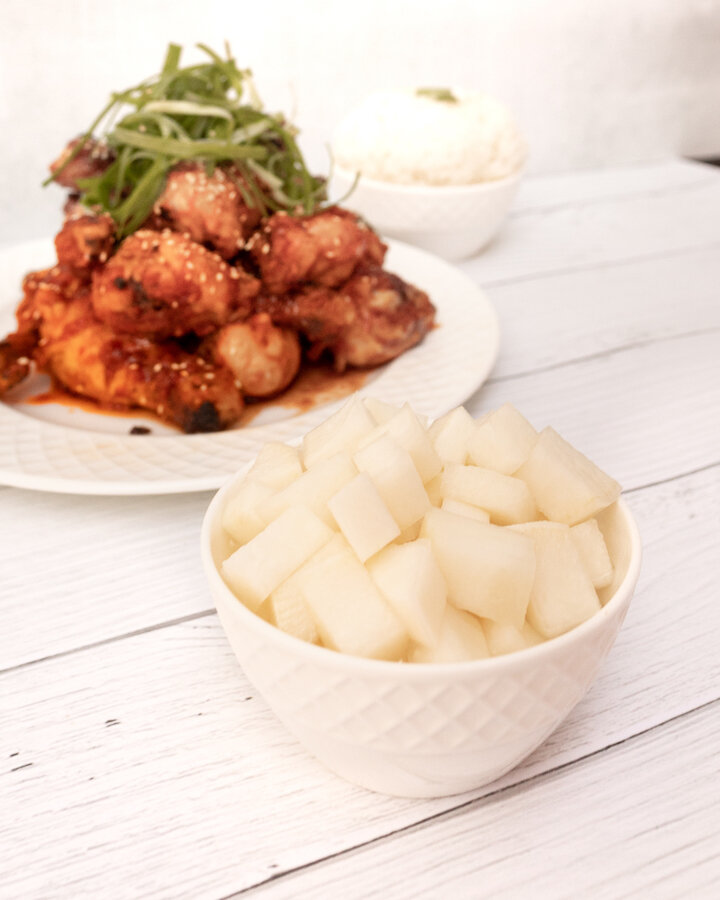
I am sure by now you can tell that I have recently developed a slight obsession with Korean food. Now having been introduced to Yangnyeom chicken by my boyfriend’s brother’s Korean girlfriend and already having a previous love for Bibimbap, I now wanted to start sharing recipes for some little side dishes that you often see being served with Korean food like this one, a simple Korean pickled radish dish. Unlike regular radish, Korean radish is massive in size and white on the outside as well as the inside. Usually served pickled along with other small side dishes, I find Korean pickled radish to be refreshing, almost like a palette cleanser that goes well with spicy dishes. Pickled korean radish can also be stored easily in the fridge for up to two weeks and made in batches which makes it easy to pull out during mealtime. We recently made Korean pickled radish to go with our Yangnyeom chicken dinner the other week and it was the best compliment for the dish! I think you will feel the same way also! Hope you like it!


INGREDIENTS:

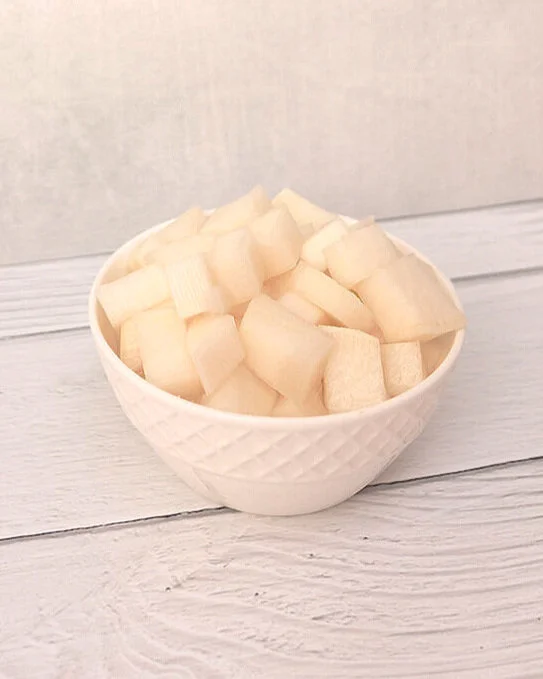
- Pickled Korean Radish -

1 lbs of Korean Radish, peeled and cubbed
1/3 CUP of Sugar
1/3 CUP & 1 TBSP of White Vinegar
3/4 CUP of Water
1 TSP of Kosher Salt


CHECK OUT THESE OTHER ASIAN INSPIRED RECIPES!


DIRECTIONS:

Combine sugar, vinegar, salt, and water in a large glass pickling jar and give it a stir so that it can mix well.

Next, add in your cubed radish, seal with a lid, and place in the fridge.

Allow to ‘pickle’ for a minimum of 2 hours before serving.

Korean pickled radish can be stored in the fridge for up to two weeks.

P.S. This recipe is usually served and pairs really well with Korean Fried Chicken (pictured below).


FOLLOW ME ON INSTAGRAM @ISTHATSOH

Gallery Block
This is an example. To display your Instagram posts, double-click here to add an account or select an existing connected account. Learn more

I hope you enjoyed this pickled Korean radish recipe as much as I do. If you have any comments please leave them below and I'll be happy to answer them as soon as I can! Happy cooking!!!


PIN THIS POST

HEALTHY-ISH SPICY KOREAN 'FRIED' CHICKEN (YANGNYEOM)

Yangnyeom (or Yum Yum chicken as we like to call it), is a fried Korean chicken recipe, usually served breaded, and coated in a red, spicy, Korean fried chicken sticky red sauce. My boyfriend’s brother’s Korean girlfriend recently made this fried Korean chicken for the family and we all loved the sweet-salty-spicy flavors. Since we are all health-conscious, slight changes were made to the typical traditional recipe (no flour, frying in oil, and less sugar) but the results were just as tasty. If you feel like making something unique and easy for dinner, I highly recommend giving this recipe a go. It pairs beautifully with Korean pickled radish, a bowl of sticky rice, and of course, a nice cold beer!

Enjoy!

INGREDIENTS:

- BBQ Chicken Marinade -
3 LBS of Drumsticks
Vegetable OIl (enough to coat chicken)

- Korean Sauce -
2 TBSP of Rice Vinegar
2 TSP Ginger (minced or grated)
3 TBSP of Ketchup
2 TBSP of Honey
2 TBSP of Brown Sugar
2 TBSP of Soya Sauce
2 TBSP of Garlic (minced or grated)
1 TBSP of Sesame Oil
2-2.5 TBSP of Hot Chilli Paste (Gochujang) *depending on how hot you want

- Garnish -
Roasted Sesame Seeds
Green Onions, finely shredded


CHECK OUT THESE OTHER ASIAN STYLE RECIPES


DIRECTIONS:

Coat the chicken in vegetable oil and bbq till they are cooked through.

In a deep saucepan or wok create your Korean Chicken Sauce and heat up over low to medium heat, stir well. Once it starts to bubble, reduce heat, add in your bbq chicken and toss until well coated in sauce.

Remove chicken from heat and garnish with roasted sesame seeds and green onion before serving.

Enjoy!

P.S. This recipe is usually served and pairs really well with Korean pickled radish (pictured below)!


FOLLOW ME ON INSTAGRAM @ISTHATSOH


I hope you enjoyed this spicy Korean chicken recipe as much as I do. If you have any comments please leave them below and I'll be happy to answer them as soon as I can! Happy cooking!!!


PIN THIS POST

LINGUINE ALLE VONGOLE - PASTA WITH CLAMS

Linguine alle Vongole (clams in Italian) or Spaghetti alle Vongole is a classic dish and one of the first dishes that I ever learned. This pasta alle vongole recipe was originally one of my friend’s moms and she used to make this for us when it was a little colder outside because of the broth base. This is a great and easy (not to mention inexpensive) seafood pasta recipe if you are a new cook. Remember to go easy on the salt as vegetable cubes have a lot of salt in them already and you are salting the water to boil your pasta which will be absorbed by your linguine.

Enjoy

INGREDIENTS:

Serves 2-3 People

4 TBSP of Olive Oil
4 TBSP of Fresh Parsley (chopped) *Save a little as a garnish
2 Large Garlic Cloves (minced)
1 Chopped Shallot (chopped finely)
½ TSP of Pepper
1 CUP of White Wine
1 Vegetable Cube - no need to use them to create a broth beforehand because we use the cubes to flavor the sauce
2 (10oz) Cans of Clams with Juice or 10 Clams Per Person
1 LBS of Cooked Linguine
Grated Parmesan as garnish (optional)
1 French Baguette (Optional)

*Feel free to cook and place a couple of fresh clams still in shells on top for extra esthetic.


CHECK OUT THESE OTHER PASTA DISHES


DIRECTIONS:

If using fresh clams, soak clams in lukewarm to cold water for 25 minutes before you start so they can open up and release the sand inside. Scrub shells lightly and set aside.

Next, fill a pasta pot with water and place on the stove to boil

Using a sauté pan heat your olive oil and sauté your shallots, garlic and parsley for 4-5 minutes until the shallots become translucent.

Next add the juice from the cans of clams (exempt if using fresh clams), wine and vegetable cube. Once the vegetable cube melts salt and pepper to taste.

Once the water is boiling, salt the water and add in your linguine. Make sure to save some pasta water before you drain it.

Allow to simmer for 10 minutes to reduce liquid before adding the clams from can and continuing to cook for an additional 5 minutes. If using fresh clams, add clam shells into sauce pan making sure none of them overlap (they wont open as well otherwise), cover and allow to simmer for 10 minutes (or until the majority of the shells are open) so that the clam water can release from shells and mix with the sauce. Once ready, taste the broth and make sure it is seasoned to you liking otheriwse add more salt and pepper.

Drain pasta and toss it in clams and sauce while adding about 1-2 TBSP of pasta water to thicken it. Garnish with parsley and serve.

I love adding and recommend trying this dish with Parmesan but you can do whatever you like.


FOLLOW ME ON INSTAGRAM @ISTHATSOH

Gallery Block
This is an example. To display your Instagram posts, double-click here to add an account or select an existing connected account. Learn more

I hope you enjoyed this spaghetti alla vongole recipe as much as I do. If you have any comments please leave them below and I'll be happy to answer them as soon as I can!  Bon Appetito!!!


PIN THIS POST

CHORIZO TACOS WITH POTATO!!! A SUPER EASY AND DELICIOUS RECIPE!

Is there a better way to celebrate the end of the work week than with margaritas and tacos? I think not! For the last 4 weeks in a row, Adam’s family and I have been partying it up every Friday with this chorizo potato taco recipe. First introduced to us by my sister, this recipe has become a Weiers family favorite and I am not mad about it. If you are looking for an easy Carne taco recipe to whip up for your next taco Tuesday or get together, baby you found it! It’s so easy, juicy, and packed full of flavor your friends will be begging you for the recipe.

Enjoy!

INGREDIENTS:

- Serves 4 People -

- Chorizo Filling -

8 Pork Sausage (If you can’t find chorizo sausage you can use mild or Italian with the Chorizo spices)
1 Spanish Onion - diced
1 medium Sweet Potato - peeled and diced

- Chorizo Spice Mix -

1 TBSP of Ancho Chilli Powder
1 TBSP of Paprika
1/2 TSP of Kosher Salt
1/2 TSP of Garlic Powder
I/2 TSP of Onion Powder
1/2 TSP of Cumin
1/2 TSP of Ground Black Pepper
1/4 TSP of Oregano
1/4 TSP of Thyme
1/4 TSP of Coriander
1/4 TSP of Ground Clove
Pinch of Cinnamon
1 Bay Leaf

- Optional Ingredients and Garnishes -

Tortillas
Hot Sauce
Guacamole
Tomatoes - diced
Jalapeno
Cilantro
Cojita
Red Onion - pickled

DIRECTIONS:

In a large bowl, remove raw pork sausage from casing. If the sausage is not already spiced with chorizo, make and add in the chorizo spice mix. Mix thoroughly and set aside to marinate for 30 minutes.

When ready, in a large skillet add in a handful of sausage, allow to cook on medium heat until the fat starts to render out before adding in your onions. Cook onions until translucent, around 2-3- minutes before adding in the remaining sausage, breaking it apart as it cooks for 5-7 minutes.

When further fat is released from the sausage, add in sweet potato and allow to cook further for 30 or so minutes until the potato is tender and meat is fully cooked. Stir every few minutes to avoid burning and to ensure both the meat and potatoes are being cooked evenly.

Remove from heat and build your taco using tortillas and optional garnishes.

Enjoy!


If you like this recipe or have any comments/questions, feel free to leave them in the comment section below!


PIN THIS POST

BRAISED OXTAIL WITH COCONUT CAULIFLOWER RICE

A personal favorite of mine, Oxtail is a very tender, juicy, gelatin-rich meat. Usually found slow-cooked as a stew or braised, my version is packed full of amazing savory flavors and braised for 7 hours until it falls off the bone. Although, I didn’t cook the oxtail in the typical Jamaican style, I did pair mine with coconut cauliflower rice to give it a hint of sweetness while keeping it low in carbs. The results were amazing and had my family fighting over leftovers. If you like braised juicy meat, I highly recommend giving this recipe a try!

Enjoy!

INGREDIENTS:

- Serves 6 People -

- Braised Oxtail -

6LBS of Oxtail
Kosher Salt
3.5 TBSP of Curry
4 TBSP of Vegetable Oil
10 CUPS of Chicken Broth
8 Scallions - diced
2 Garlic Heads - cut in half
Pinch of Chilli Pepper Flakes
Pinch of Thyme
6” Piece of Giner - sliced in 1/8 slivers
4 TBSP of Soy
2 TBSP of Brown Sugar

- Coconut Cauliflower Rice -

1 TBSP of Butter
2 Cloves of Garlic - minced
2’ Piece of Ginger -Chopped
3 Scallions - diced
1/2 CUP of Unsweetened Coconut Milk
1/2 TSP of Brown Sugar
1000 Grams of Cauliflower Rice - I used from frozen

DIRECTIONS:

Heat oven to 250 degrees

In a large bowl, season oxtail generously with salt followed by the curry powder.

In a large deep skillet, or using a dutch oven heat up vegetable oil on the stove on medium-high and sear both sides of oxtail until browned. If you don’t have an oven-safe skillet or a large enough dutch oven to fit all the meat and liquid, first sear the oxtail in the skillet and then moved them to a roasting pan.

Once you have seared all the oxtail remove from skillet/dutch oven and add in chicken broth, scallions, garlic, chili pepper flakes, thyme, soy, ginger, and brown sugar. Allow this to come to a simmer and scrape the bits of oxtail that stuck to the bottom of the skillet to become loose before adding the mixture into your roasting pan, or placing the oxtail back in the dutch oven. The oxtail should be submerged in liquid.

Next, place the roasting pan or dutch oven with the oxtail in the oven to slow cook. Position lid partially off and allow to cook for 7 hours flipping pieces around halfway through. If at the halfway point the liquid has gone down a lot you can add in 1/2 cup of water.

30 minutes prior to Oxtail being ready its time to make the coconut cauliflower rice. Grab a large skillet, add in your butter and allow to heat up on medium. When hot add in your garlic, ginger, and scallions - saute for 3-4 minutes.

Next, add in your unsweetened coconut milk and brown sugar. Mix until well incorporated.

Finally, add in your cauliflower rice and allow it to steam and mix with sauce until fully coated.

Serve oxtail on rice when ready and garnish with more scallions.

Enjoy!


If you like this recipe or have any comments/questions, feel free to leave them in the comment section below!


PIN THIS POST