5 BENEFITS OF A SILK PILLOWCASE & WHY I'M SUCH A BIG FAN OF OLESILK!

* Please Note - Although this post is not sponsored, some links may be affiliate links *

It finally happened. I did it. I jumped on the bandwagon and ordered a silk Mulberry pillowcase after taking one for a test ride over the holidays. After a few days of sleeping on such a luxurious surface while at my family home I knew I had to order one for myself. And why not? We deserve to treat ourselves after yet another COVID shutdown. If I can’t go out you better believe I’m going to make staying in as comfortable as possible. If you have been looking for an excuse or reason to buy yourself a silk mulberry pillowcase, I have a few, and some of them may surprise you.

5 BENEFITS OF SILK PILLOWCASE

Mulberry silk pillowcases are gentler on your skin and hair than a regular cotton or bamboo pillowcase which means less friction, less inflammation, and more hydration overall.

Silk doesn’t absorb dirt and sweat like cotton fabrics and therefore your pillow stays cleaner longer. It’s also an organic and hypoallergenic material thanks to the proteins that naturally coat the fibres of your Mulberry silk pillowcase. These fibres naturally repel allergens, fungus, and dust mites so you don’t have to worry about sleeping with a dirty pillow pressed up against your face.

Remember all those expensive lotions you put on your face before bed? Well, chances are you didn’t shell out those big bucks to have your pillow soak them up while you’re sleeping. Similar to dirt and sweat, silk Mulberry pillowcases don’t absorb skincare products like a cotton or bamboo pillowcase so your anti-aging serums and creams won’t go to waste!

A 100% silk pillowcase will keep your hair health and shiny! That’s right! Sleeping on a Mulberry pillowcase wont cause friction or tangles that inevitably dry out your hair making it more susceptible to damage, frizziness and loss of vibrancy.

They are so comfy to sleep on and they keep your head and face cool all night long! Never will I sleep on a warm, rough pillow again!


FOLLOW ME ON INSTAGRAM @ISTHATSOH


MULBERRY SILK PILLOWCASE

You may have been thinking of getting a Mulberry pillowcase but aren’t sure what Mulberry silk is and why it’s more expensive than other silks. Simply put, it's a type of silk produced by silkworms that eat leaves from Mulberry trees. Mulberry silk, when produced in a controlled environment results in minimal variation and a more refined filament which produces the best quality silk. Mulberry silk is also both fine and light making it very luxurious to the touch which is why it is commonly used for bedding, sleep ware and pillowcases. Just make sure when you are shopping around for a Mulberry pillowcase that the pillowcase you end up with is made of 100% pure Mulberry silk so you don’t get ripped off. Further, make sure that the pillowcase you end up with has a high ‘momme' count (the equivalent to thread count in cotton fabric). The higher the better as it is a measure of density, softness and strength of the material!

Silk pillowcases or sheets with 19 momme equates roughly to a 600 thread count while a 22 momme pillowcase or sheet set equates to a 900 thread count.

Fun fact: A strand of mulberry silk is stronger than a strand of steel of the same diameter!

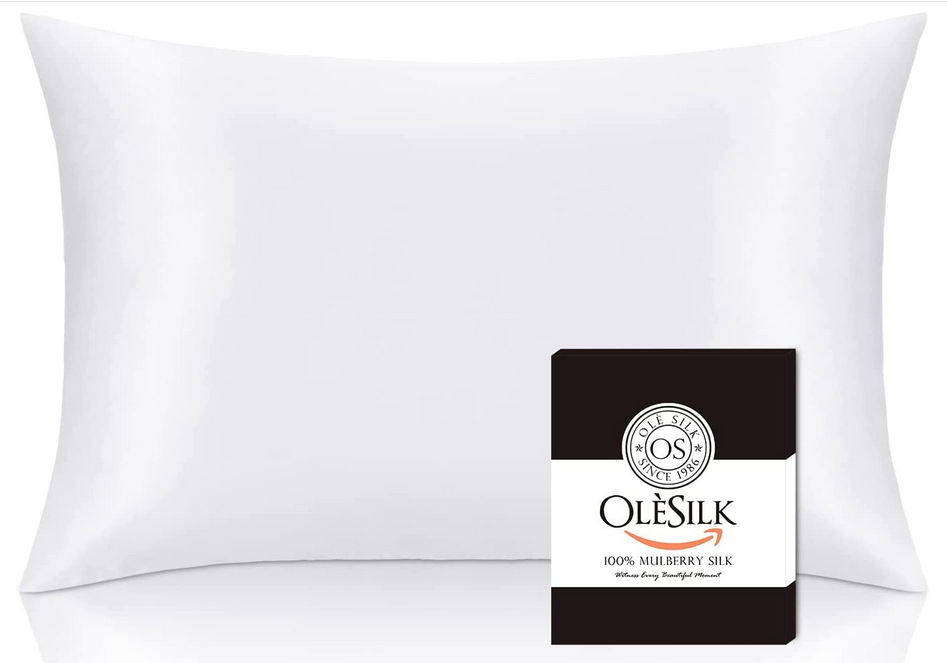
MY OLESILK 100% PURE MULBERRY PILLOWCASE

If you want a recommendation for a silk Mulberry pillowcase, I highly recommend the one I got from OlèSilk. It’s 100% Mulberry silk, comes in a variety of colours and sizes, is 25 momme (similar to a 1000 thread count density) and is less than $40 CAD on Amazon!

OleSilk has been a manufacturer of pillowcases, bedding, and sleepwear using 100% pure natural mulberry silk since 1986. I find their prices to be more affordable then other brands that I have seen online and delivery is fast when ordering on Amazon. I also love how my OleSilk Mulberry Silk Pillowcase has a zip closure so that it stays securely on my pillow throughout the night and doesn’t accidentally slip off. Lastly, as a former fashion designer I have very high standards when it comes to quality of fabric and manufacturing, and you can really tell OleSilk produces products with great care and high standards of craftsmanship which is why I do not hesitate to recommend them. As a matter of fact, I bought another one for my bff’s birthday this past week as well as they make great gifts for any beauty lover in your life!

BEST PILLOWCASE FOR ACNE

A lot of people think that silk Mulberry pillowcases are the best pillowcase for acne when in fact there is no proof that they help with acne. The best pillowcase for acne is actually a copper pillowcase because they are antimicrobial which means that they battle bacteria, are anti-inflammatory and help with restoring damaged tissue. Copper may sound like a funny thing to incorporate in textiles but the truth is copper has been used in the manufacturing of hospital linens, scrubs, and other medical fabrics because they prevent the growth and spread of bacteria! I haven’t tried any copper pillowcases so I unfortunately can’t recommend one, but it’s something to keep in mind if you have skincare concerns.

SILK VS SATIN PILLOWCASE

If you are debating whether to get a silk vs. satin pillowcase you should first be aware that satin, although shiny, is a product of a weaving technique (a satin weave) that produces a characteristically glossy, smooth or lustrous finish. Silk on the other hand is a natural thread filament produced by silk worms that when combined with other silk filaments becomes thick enough to become a usable fibre that can be woven into silk fabric.

Back in the day when I was in fashion school we learned all about different textiles and weaves, and some main differences between satin and silk fabrics are that satin fabrics are commonly made from synthetic fibres like nylon or polyester (which are derived from oil or petroleum) while silk is a natural fibre produced by silk worms. Silk from a tactile perspective is also soft and luxurious on both sides whereas satin tends to be silky or glossy on one side and dull and coarse on the other. Since satin is made from synthetic fibres it’s also very easy and fast to make while one pound of raw silk can take 2500 silkworms up to 8 days to produce. Because of this silk garments are generally more expensive than garments made from a satin material.

Further, unlike silk, satin is not breathable. It sucks up dirt and moisture easily, and will create friction against your skin resulting in static and frizz. Additionally, because synthetic fabrics are not breathable you will find your satin pillowcase becomes warm quickly while silk pillowcases are known for staying cool longer.


NEW TO ISTHATSOH.COM? CHECK OUT THESE OTHER BEAUTY POSTS!


HOW TO WASH SILK PILLOWCASES

It may seem intimidating but washing a silk pillowcase is actually quite easy. Most silk, unless specifically outlined in your garment care label, can be washed by hand using lukewarm water and a gentle washing detergent. Here are step by step instructions on how to wash a silk pillowcase at home.

1) Dissolve your gentle washing detergent in a large bowl of lukewarm water.

2) Add your garment to the bowl of soapy water and agitate until it is fully soaked. You can rub stains out lightly using your hands.

3) Once you are done washing the pillowcase, form a ball and squeeze out excess water. Do not twist and wring out your fabric as this can cause damage.

4) Change the water for fresh lukewarm water and soak the silk pillowcase once more to remove remaining detergent. You can also add a tablespoon of distilled white vinegar to disinfect and neutralize alkali traces.

5) Lay the pillowcase on a clean dry towel and gently press the water out of the fabric by rolling it up in the towel before hanging to air dry.


I hope this blog post answered all your questions regarding the benefits of silk pillowcases, how to wash silk pillowcases, the difference between a silk vs. satin pillowcase, what mulberry pillowcases are/how they are made, and which pillowcases are the best for acne. If you have any further questions feel free to leave them in the comment section below! Until then, sleep easy!

- Soheila


PIN THIS POST

DIY NATURAL HAIR MASK TREATMENT

Quarantine has been a bit of an emotional roller coaster for many of us, myself included!

At first, I struggled to adapt to self-isolation and as a result, a lot of things I used to do beauty-wise, fell to the waist side. Now that time has gone by and I have had the time to properly adjust to the situation, I am trying to build a new and improved routine, one that involves a few extra self-love beauty practices like doing a DIY hair mask at home using natural ingredients.

Hair mask are great for a variety of reasons. For 1) they promote scalp health and can help balance the PH levels of your scalp making it either less oily or less flaky, 2) it can help strengthen the hair and reduce breakage, 3) it can add moisture back into your hair so that it feels softer and is shiny, and 4) it can actually help stimulate growth and thickness.

For me personally, I wanted to have something that added moisture back into my scalp and strengthen my hair so I used coconut oil, honey, banana, and egg in mine.

During the research and development phase of this blog post though what I quickly figured out about hair masks was that when it comes to ingredients any combination from the below list goes, it just depends on what kind of results you are after!

So next, I encourage you to take a look at the list of ingredients below and review their benefits before creating a hair mask that fits your personal hair needs.

HAPPY MASKING!


- STRENGTHENING PROTEIN -
Used to protect and strengthen hair, reduce breakage, make hair shiny, and cleanse the scalp.

  • Honey

  • Egg

- HYDRATION -
Used to add moisture back into the scalp and hair for less breakage, frizz, and more healthy feeling/ looking hair.

  • Coconut Oil

  • Avocado or Avocado Oil

  • Banana

  • Olive Oil

  • Yogurt

  • Mayonaise

- PROMOTE SCALP HEALTH -
Used to balance scalp PH levels, exfoliate your scalp and get rid of dandruff.

  • Apple Cider Vinegar - good for oily hair

  • Peppermint Oil - stimulates follicles

  • Cinnamon - exfoliates

  • baking soda - exfoliates

  • Lemon Juice - clarifies

  • Sugar - exfoliates

  • Baking Soda - clarifies and exfoliates


- HAIR GROWTH -
Used to nourish follicles for better/fast hair growth.

  • Castor Oil

To see a demonstration of me doing a DIY hair mask at home, check out the video below. Also, don’t forget to follow me on Instagram!

View this post on Instagram

At first, I struggled to adapt to self-isolation and as a result, a lot of things I used to do beauty-wise, fell to the waist side. Now that time has gone by and I have had the time to properly adjust to the situation, I am trying to build a new and improved routine, one that involves a few extra self-love beauty practices like doing a DIY hair mask at home using natural ingredients. Hair mask are great for a variety of reasons. For 1) they promote scalp health and can help balance the PH levels of your scalp making it either less oily or less flaky, 2) it can help strengthen the hair and reduce breakage, 3) it can add moisture back into your hair so that it feels softer and is shiny, and 4) it can actually help stimulate growth and thickness. For me personally, I wanted to have something that added moisture back into my scalp and strengthen my hair so I used coconut oil, honey, banana, and egg in mine. During the research and development phase of this video, I quickly figured out that when it comes to hair masks ingredients, any combination from a list of natural household incredients go, it just depends on what kind of results you are after! So next, I encourage you to take a look at the list of ingredients that I have posted on my blog and review their benefits before creating a hair mask that fits your personal hair needs. HAPPY MASKING! ::::: 📍 @seetorontonow. 📸 @apple Iphone XS Max #isthatsoh . . . . . #canadiangirl #prettylittleiiinspo #hairgrowth #hairtreatment #diyhairtreatment #healthyhair #scalphealth #torontoblogger #inspiremyinstagram #blondehair #softhair #hydration #toronto #torontohair #diyhair #hairsalon #torontolife #hairinspo #beautytutorial #torontoigers #hairtransformation #torontoliving #torontogirl #hairtutorial #selfcare #selfisolation

A post shared by SOHEILA HAKIMI | LIFE + TRAVEL (@isthatsoh) on


If you have any questions or comments about this blog post feel free to leave them in the comment section below.

EASY AT HOME GLOSS TREATMENT TO REVIVE BLONDE HAIR

Not sure about you but I have gotten to the point in self-isolation where my hair could use a little more love. It's been looking a little brassy lately and has been feeling dry so I decided to order an at-home gloss treatment kit from Lac and Co, and boy am I happy with the results.

The gloss treatment is perfect for anyone looking to revive their color and add some shine back into their hair. It also comes with a Virtue Labs Restorative Treatment Hair Mask so you can also take advantage of some extra hydration after you finish the treatment.

Not only does my hair smell amazing, but my colour is looking beautiful once more! On top of that, it also feels super soft, hydrated, and looking very shiny.

If you are looking for something to do at home that will give your locks a boost I definitely recommend checking this treatment out!

View this post on Instagram

A post shared by SOHEILA HAKIMI | LIFE + TRAVEL (@isthatsoh) on

AUGUST FAVS!

Your girl is back with a new video and this time I am spilling the beans on all my August hair care and skincare favs!

I have been so fortunate to be able to try so many new products these past couple months - some of them I purchased, some of them other bloggers recommend to me, some of them brands have sent with hopes to make it into a video like this. Ready to see who made the cut?! Keep watching!!!!!

If you follow me on my social platforms you would of seen by now that in conjunction with this video I am also doing a giveaway! I have accumulated as many full size samples of these products as I could so that I could share them with you because I wanted you to try them out for yourself!

To enter the giveaway you must:
- Already follow me on Instagram! If you don't just go ahead now and hit that follow button
- Tag a friend in the comment section on Instagram you think would also like this giveaway!
- Subscribe to my YouTube channel and like this video!

DAS IT! I will be checking so make sure to do all those things.

Contest is open until Friday September 1st 2017!

AND NOW for my usual disclaimer: Although I have worked with some of these brands in the past on campaigns or have been sent products from some of these brands this video was NOT sponsored. I am not getting paid for this video however these brands were nice enough to give me some product to pass onto you! YAY

I also just wanted to remind you to subscribe to my channel and follow me on my social handles if you aren't already! When you follow me I know I am dong a good job and will be more amped up to produce more videos and do more giveaways for you!

Alright lets do this!

Subscribe to my channelgoo.gl/iidBfF
Instagramgoo.gl/n8WdGv
Snapchatgoo.gl/vBsoGd
Twitter goo.gl/xR6W14
Periscope ▷ SoheilaOnline

Want more of my shenanigans! Bring it on!

Soft Cut Crease Makeup Tutorial goo.gl/cah1rm
Copper Red Smokey Eyegoo.gl/9He6nD
Tartelette In Bloom Palettegoo.gl/LFqwEq

Products I Showed You In This Video

L'Oreal Professionnel - Mystic Hair Oil
Garnier Whole Blends - Honey Treasures Repair Shampoo -
Product donated to giveaway by Sheblogs!
LaCoupe ORGNX - Coconut and Macadamia Oil Intensive Repair Treatment
Lush - Bubbly Shower Gel
L'Oreal Professionnel - Liss Unlimited Leave In Conditioner
Anthony - Aluminum Free, Alcohol Free, Paraben Free, Sulphate Free, Deodorant
Anthony - Shaving Cream
Vasanti - Brighten Up! Exfoliating Cleanser
Aveda - Tulasara Wedding Masque - available at Aveda Experience Centers and Salons
Cake Beauty - 'Do Gooder' Dry Shampoo


If you have any questions feel free to leave them in the comments below along with any tutorial request you may have! That's it for today and i'll see you guys again soon!

xo

-Soheila

HOW TO: L'OREAL COLORISTA

Can I get a WOOP WOOP! Seriously though guys, I'm on a roll with these videos! HAHA

So as many of you know I dyed my hair ‘purple’ recently (I really used three shades - Colorista Purple, Colorista Ice Blue, and Colorista Indigo). If you didn't see my Snaps/Instastory (...I see how it is....) then you would have missed me talking about how I wanted to go silver ever since I had a dream where my hair was silver. Anyways, wouldn't you know it but the universe a couple of weeks later would sent me some L'Oreal Colorista hair dye - now that's freaking serendipitous if you ask me.  Next thing I know I'm dying my hair, at home, by myself with absolutely no experience. THAT'S RIGHT FOLKS I DID THIS ALL BY MYSELF!


FOLLOW ME ON INSTAGRAM @ISTHATSOH!


In this video, I share with you a couple of really good tips and tricks on how to do this at home. Make sure to take your time, half the work when coloring your hair is prep so be patient. I'm also going to list a bunch of good tips below for you so make sure to check those out.

If for some reason you thought this was going to be another makeup tutorial you are sadly mistaken my friend but fret not, here is one of my recent previous videos -> 'Mauve Glitter Cay Eye Makeup Tutorial!'

***Although ONE Instagram post for this L'Oreal Colorista campaign was sponsored this video was certainly NOT. I am not getting paid for this video however once I posted the sponsored photo everyone asked me how I did it and well let’s just say I'm glad I filmed my process.

I also just wanted to remind you to subscribe to my channel and follow me on my social handles if you aren't already! When you follow me I know I am doIng a good job and will be more amped up to produce more videos for you!


CHECK OUT THESE OTHER BEAUTY POSTS!


PRODUCTS I USED IN THIS TUTORIAL


L'Oreal Colorista in
Colorista Purple, Colorista Ice Blue , and Colorista Indigo (3 Colours Total all 'Cool Tones')
- each box comes with a brush for application and a couple of sets of gloves!

YOU WILL ALSO NEED


- A t-shirt you don't care about
- A towel to sit on so you don’t stain your chair!
- A hairbrush
- A hair sectioning comb
- Small plastic elastics
- Bowls covered with a plastic bags (I used three - one for each colour)

TIPS AND TRICKS!


- If you zigzag the top section you will be able to see the colours underneath better and it won’t be so stark on top and obviously one colour.
- These colours in particular are made for blonde hair which is why it showed up more prominent on the areas that were previously blonde so make sure you have good colours for your hair colour.
- I did a test the night before at the back of my neck to see if I liked all three colours together before I started.
- Make sure the sections at the front of your face are symmetrical and that the colours you use for the front piece horizontal from each other are the same all the way up.
- After the 30 minutes is up and it's time to wash out the dye use only shampoo, conditioner will make the colour fade out faster.
- If you don’t want it as dark then alternatively use conditioner when you wash your hair so that the colour will fade out more.


If you have any questions about L’Oreal Colorista feel free to leave them in the comments below along with any tutorial request you may have! That's it for today and I'll see you guys again soon!

xo

-Soheila


PIN THIS POST