LASH LIFT REVIEW: THE BEFORE AND AFTER IS AMAZING!

Lash lift review: Before and after

Lash lift results

I GOT A LASH LIFT!

Yes! The rumours are all true! I got a lash lift and to be honest the results were better than expected!

Earlier this week, I headed to Lac Beauty in Toronto’s Yorkville neighbourhood for my first ever lash lift with makeup and brow artist Jenna Want. If this is the first you are hearing about lash lifts, they are essentially a ‘perm’ for your lashes. Much like the effects of a perm for your hair, lash lifts sets a permanent curl into your lashes and the outcome is bigger, more awake looking eyes and more predominant lashes. Additionally, lash lifts are a low maintenance alternative to always using false lashes or getting lash extensions and they last way longer!


FOLLOW ME ON INSTAGRAM @ISTHATSOH


LASH LIFT BEFORE AND AFTER

All lashes have a natural shape to them and mine are long but unfortunately, pretty dead straight. As I have been getting older I have also noticed my eyelids have become more hooded. You can really notice from this ‘lash lift before and after’ picture that the curled lashes now hide the excess skin on my eyelid and make my eyes appear bigger and more awake. Further, since a lash lift curls your lashes from the base all the way to the tip, you really get to see the full length of your natural lashes which helps them appear even longer and stand out more predominantly. It’s quite amazing how such a little thing can make such a big difference.

lash lift before and after

My lash lift before and after photo

HOW LONG DOES A LASH LIFT LAST

How long does a lash lift last? The short answer is 2 months. The long answer is, it really depends on you. Like everything on our body that regenerates, our eyelashes are also on a cycle. Typically, lash cycles are about 2 months long but it really depends on a person’s genes. Either way, over the course of 2-3 months you can expect a whole new set of lashes to grow in and push the old permed lashes out.

LASH LIFT AFTERCARE

Lash lift aftercare is super simple and is one of the main reasons why I favour it over lash extensions or even false lashes. Much like a hair perm, all you need to do for the first 24-48 hours after your treatment is let the perm set. That means, do not wash your face or wear makeup for the first 24 -48 hours. If you do wash your face and water does get on your lashes, the perm wont set and the lash lift results could be badly affected. After 24 hours it is back to business as usually. You can wear makeup, mascara, wash your face with your facial cleanser, apply creams, etc. as you normally would.

See, told you lash lift aftercare was simple!

For anyone that uses lash growth serums to help lengthen, nourish, and condition your lashes, you can still use these products but you may want to use them less as they could speed up your regrowth cycle causing you to have to go back for another lash lift session sooner.

EYELASH LIFT AND TINT

When I did my lash lift I didn’t get a lash tint because I already have naturally dark lashes but it is very common for people to do an eyelash lift and tint at the same time. Ideally you would want to get the lift done before the tint to ensure you have the best curl, but that doesn’t mean you can’t get a lash lift if you’ve recently tinted your eyelashes. If you have blonde lashes or lashes that you can barely see, getting an eyelash lift and tint would be perfect and really make your eyes pop! Plus, it’s really only one extra step!

LASH LIFT VS. LASH EXTENSIONS

I have had both a lash lift and lash extensions and I would 100% say I like lash lifts more. When comparing lash lift vs. lash extensions there are a few reason why I like lash lifts more:

They are significantly cheaper! Lash lifts are around $95 whereas lash extensions start at $150 and go up depending on how dense you want them.

Lash lifts last longer - approximately 2 months! Lash extensions on the other hand last maybe two weeks depending on how quickly they start to fall out. Also, when you start to lose lash extensions your lash line looks sparse and it’s super noticeable whereas when a lash lift grows out it’s way less obvious cause you’re using your natural lashes.

You can wash your face as normal with a lash lift. When you have lash extensions you have to be careful when washing your face to avoid the eye area. I like wearing makeup but I also like having good hygiene and I was always worried with lash extensions that the glue would be a breading ground for bacteria, especially if I couldn’t wash the area. Even naturally, bacteria grow along your lash line and in your mascara tube which is why you are suppose to throw out your mascara ever three months. With lash extensions, you are more susceptible to getting an eye infection which is enough for me to choose a lash lift over a lash extension every time.

You can wear makeup as normal with lash lifts. Yes, it’s true! Load on as much of that eyeshadow, eyeliner and mascara as you want because you can wash your lashes as normal. Feel free to keep using your favourite Micellar make up remover and wipes while you’re at it! Unlike lash extensions, you can continue to do your makeup as normal unlike lash extensions where you are advised to touch the eyes as little as possible and keep them clean. Either way, because cleaning is harder with lash extensions in general, you don’t really wear makeup quite the same way.

Lash lifts look more natural than lash extensions because they use your natural lashes. In addition to using the full length of your natural lash to make them appear more prominently once permed, they also don’t look sparse once a new cycle grows in. Lash extensions on the other hand can look fake and, I find, often not done well. Unless you are going to a pro, they tend to be very dramatic, dark, overdone and need constant maintenance which can be a pain in the ass.


CHECK OUT SOME OF MY OTHER RECENT BEAUTY POSTS


LASH LIFT PROS AND CONS

Still on the fence as to whether to give a lash lift a go? Here are some lash lift pros and cons to help you get more comfortable.

Some lash lift pros are:

  • They give your lashes a natural looking curl that opens up your eyes and makes you look more awake.

  • They last for as long as your lash cycle (approximately two months).

  • They aren’t insanely expensive - Lac Beauty charges $70.

  • They can help hid hooded eyelids.

  • You can wear makeup and wash your face, use your favourite moisturizer, etc. as normal.

  • You can choose how dramatic of a curl you want! *More on this to come!

Some lash lift cons:

  • They don’t last forever.

  • It isn’t cheap. - “But, If you don’t spend your money, who will?”

  • You are putting chemicals near your eye. Another reason to make sure you go see a professional.

  • If done incorrectly, you can over process your eyelashes and damage them. Yet another reason to go to a professional for this service.

WHERE TO GO GET A LASH LIFT IN TORONTO

Well, I’m obviously going to recommend the place where I went because I loved my experience with Jenna and I’ve always had great treatments there. I actually also go to their sister hair salon Lac and Co. down the street to get my hair coloured - shout out to Kiki! She’s the best!

Lac Beauty is a conceptual lifestyle and beauty boutique spa located at 162 Davenport Rd in Yorkville, and in my opinion, one of the best spas in Toronto. In addition to lash lifts, they also offer facials, manicures and pedicures, brows, waxing, makeup services for all occasions including bridle, and spray tans. In the past I have also been to Lac Beauty for Biologique Recherche facials which I also highly recommend trying because of how they give life back to your skin and drown it in hydration to reveal a dewy ass glow!

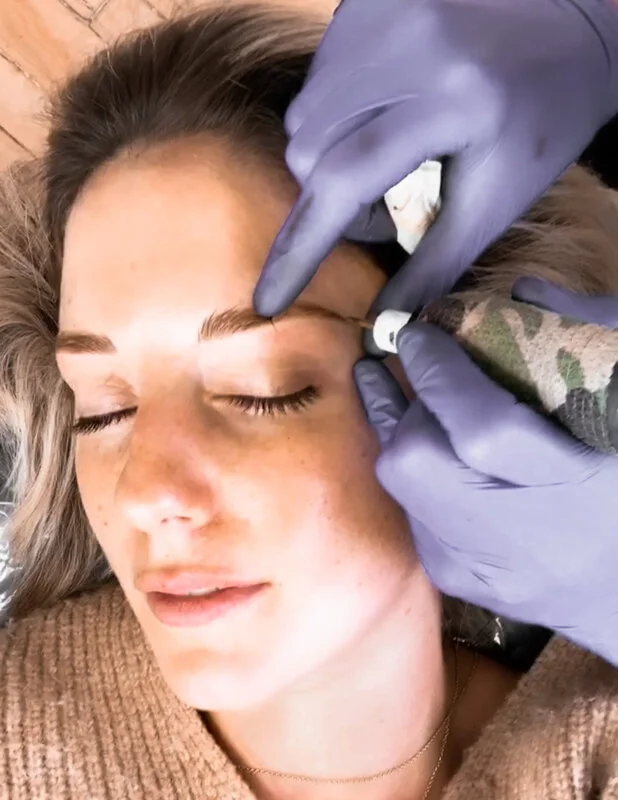
My lash lift experience took a total of 40 minutes and included a quick consultation at the beginning so Jenna could examine my lashes and help me choose a suitable curl. I went with something natural but you can actually pick different degrees of perms depending on how dramatic of a curl you want, which I thought was pretty cool. Other than a small unpleasant smell, the procedure was quick and easy. I felt no stinging, irritation, or cause for concern during or after my procedure and left with beautifully curled lashes. As someone who does have sensitive lashes (they sometimes become super itchy depending on what mascara I use) I was relieved to see that I experienced zero irritation and would 100% go back to do it again. Maybe I’ll see you there!

I didn’t only leave Lac Beauty with a lash lift though, I also left with some funny photos and videos from my treatment which I thought were too good to hide from the world! So I quickly edited them together for you so you can see the struggle of content creation during a lash lift. OMG, I love my job but sometimes it’s a laugh and this one is on me! Enjoy!


Thank you so much for visiting the blog today and watching my lash lift review video. If you enjoyed this lash lift review feel free to let me know in the comments below. I’m also happy to answer any further questions around the topic. I’m going to be posting more videos on YouTube as well so I want to encourage you to subscribe to my 'Is That Soh YouTube channel’ if you aren’t already so you can keep up with all the great content I have planned!

Until next time,

-Soheila


PIN THIS POST

I GOT MY EYEBROWS MICROBLADED!

Last week it happened! I did it! I finally pulled the trigger and got my eyebrows microbladed, well actually I did a hybrid which is part microblading part powder brows!

Is Microblading Permanant? How Long Does Microblading Last?

I am sure many people would agree with me when I say that microblading brows, although an old and popular practice in Asia, feels like a new beauty phenomenon that only recently started to grow in popularity here in North America. This craze of ‘semi-permanent tattooed eyebrows’ first caught my attention about two years ago when a couple of girls I follow on Instagram started talking about it in videos and stories. Right off the bat, I was curious. The whole idea of being able to wake up and have sharp, beautiful brows was very appealing to me. As someone who naturally doesn’t really have an eyebrow tail and is constantly filling them in every day, I knew this could be the solution I was looking for. It is important to keep in mind however that both microbladed eyebrows and powder eyebrows will fade over time especially as skin cells turn over and they are exposed to the sun (another reason to wear sunscreen) so you can expect to need to get touch-ups every 6 months - 1 years.


*** UPDATE *** Just wanted to drop in here quick and update you as it has been over a year and a half now since I had my eyebrows microbladed / powder brows done and although the shape is not as sharp and defined as it used to be (some fading at the top of the arch has occurred and at the tail as predicted) they still look great and I can still get away with not having to fill them in every morning.


So what took me so long? I know when it comes to things like travel or food I can often be a person of impulse, but when it comes to getting a tattoo on my face, it’s a totally different story. Before diving headfirst into getting my eyebrows microbladed / powder brows, I wanted to be completely aware of what I was doing, who I would be going with, and that what I am seeing on IG wasn’t all smoke and mirrors (because let’s be honest you never REALLY know). I wanted to be diligent. I wanted to find someone I could trust. I wanted to make sure they had a good reputation with many happy clients who gave raving reviews.


FOLLOW ME ON INSTAGRAM @ISTHATSOH


But How Much Does Microblading Cost?

Microblading isn’t cheap and neither is tattoo removal so it’s very important to be confident with who you are going to go with when getting your eyebrows microbladed / powder brows as well as feel comfortable with the cost! With that being said I paid $650 CAD!

So, fast forwarding to a little over a month ago when I finally decided to pull the trigger. I had been following the journey of this brow artist named Nicole (@browsxbianca) for a while and loved her work. I knew she had professional training, had a studio in Toronto, and did pop-ups in Halifax. She had also already microbladed eyebrows on a couple of girls that I knew and they were all very excited and happy with her work. I was elated to hear how thorough she was at explaining everything and making you feel comfortable; how she personalized the brows to suit your face shape, preference and colouring; and how she talks you through the healing process. It all felt very genuine and natural, and I felt so confident she would do a great job that even when she threw me a curveball and suggested that I don’t fully microblade my brows but instead actually do half-soft powder eyebrows (which I had never heard of before), I already had so much confidence about my decision to go with her I didn’t second guess it. She’s the expert after all! 

Does Microblading Hurt?

Surprisingly, not really… with that being said Nicole did use a numbing cream on me after the first pass of microblading which was like a 4-6 out of 10 in terms of what I can handle (I have a tattoo as well so I'm no stranger to this kind of pain) so it wasn’t so bad. I did sneeze a lot though and start to get teary eye but not because of pain, more so because the whole area is connected - kind of like allergies when you rub your eyes and it makes you sneeze.

Microblading Healing Process

Going into my appointment, I knew that I would receive tons of questions about the procedure and the microblading healing process so I decided to make it easy and film the whole thing. I have broken up the whole program into three parts because although the process of getting microbladed eyebrows / powder brows usually only takes 1.5-2 hours, the entire healing process of microblading can take up to a month and you have to go back for touch-ups in 6 weeks’ time.

So here is part one of my three-part ‘Microblading Brows Series’. A little behind the scenes of my journey if you will. I even made sure to share clips of my brows before and after microblading so you can really see the difference it makes! Nicole also does talk about the microblading healing stages and microblading aftercare so if you’re curious to know what that looks like make sure to watch it! Hope you enjoy it!

I will be updating this blog post with two more videos, one documenting the stages of microblading healing and another when I go for my touchups so you can get a real look into what getting your eyebrows microbladed /powder brows really means.


MICROBLADING BROWS PART 2 - THE HEALING PROCESS OF MICROBLADING

As promised, I am back with part 2 of my powder brow / microbladed eyebrow journey. This time we are talking all about the healing process of microblading. Over the course of three and a half weeks, I documented every big milestone in my microblading healing process so that you can get a clear understanding of what you are in for. I have compiled all of the clips into a simple, straightforward video for a perfect ‘behind the scenes' post microblading / powder brow experience to give you a full understanding of all the stages of microblading healing. Hope you like it!


MICROBLADING / POWDER BROWS PART 3 - TOUCH UPS

Hello Friends! I am back with the final video/part 3 of my microblading / powder brows journey. This time I will be going in for my touch ups and making a few adjustments to my shape and intensity. One thing I learned through my microblading journey is that the process is not a wham-bam, thank you mame thing! Touch-ups after your first session are necessary to achieve the perfect microbladed eyebrow or powder brow. Anyways, today I am taking you back to Brows By Bianca Studio here in Toronto for a behind the scenes look at how we achieved my perfect brow! In this video Nicole also explains the benefits of going for powder brows over microbladed brows and why she recommends powder eyebrows or hybrid brows to the majority of her clients like me.

To learn more about Nicole you can check out her website at www.browsbybianca.com 

If you have any questions about my microbladed eyebrows / powder brow journey or my microblading healing process / questions about aftercare for microblading, please feel free to leave them in the comments below, otherwise don’t forget to check back for updates or follow me on Instagram @IsThatSoh for video releases and announcements!

Xo

-Soheila 


DON’T FORGET TO ALSO CHECK OUT MY LATEST FASHION & BEAUTY POSTS!


PIN THIS POST

'CHERRY BOMB' WITH MY UD NAKED CHERRY PALETTE

Hey, lovelies! Welcome back to my blog! I recently recieved the new Urban Decay Naked Cherry palette in the mail with some other PR and wanted to do a look for you. I had some time over the Canadian Thanksgiving weekend to play with it and I’m honestly really enjoying all the ‘Cherry Bomb’ feels it’s giving me. Anyways - here is one of the looks I came up with - hope you like it!

Also please know that this is an open space - if you guys have any suggestions as to what type of content you want to see or eye looks you want me to recreate just hit me up in the comment section below.

This video is not sponsored but I am going to list all the products that I used for you guys down below so you can purchase them/find them. I also just wanted to remind you to subscribe to my channel and follow me on my social handles if you aren't already! When you follow me I know I am doing a good job and will be more amped up to produce more videos for you!

Alright, let's do this!

Vero ▷Isthatsoh
Instagramhttp://bit.ly/2HgzPTn
Snapchathttp://bit.ly/2GRnN3x
Twitter http://bit.ly/2GQCiR3
Periscope ▷ SoheilaOnline

Want more of my shenanigans! Bring it on!

ABH Glam with my Prism Palette http://bit.ly/2EFhcTO
Glitter Glam with ABH Artist Palettehttp://bit.ly/2JG6AYv
Pink and Purple Ombre Eye Lookhttp://bit.ly/2EE8vsU
Mauve Glitter Cat Eye Makeup Tutorialhttp://bit.ly/2v2znTQ
Green and Gold ABH Prism Palette http://bit.ly/2FIcRRY

Products I Used in This Tutorial:

-EYES-
Urban Decay Naked Cherry Bomb Palette - Hot Spot, Juicy, Feelz, Devilish and Privacy
Becca Cosmetics - Opal Highlighter
Kat Von D - Tattoo Liner in Black ‘Trooper’
Bare Minerals - Lashtopia in Ultimate Black

-FACE-
Make Up For Ever - Ultra HD Underpainting Color Correcting Palette in 25
Make Up For Ever - Ultra HD Foundation in R230
Laura Mercier - Translucent Loose Setting Powder
Benefit - Hoola Bronzer
Becca Cosmetics - Opal Highlighter
Bare Minerals - Gen Nude Powder Blush in ‘Call My Blush’
Urban Decay Cosmetics - All Nighter Makeup Setting Spray

-BROWS-
NYX Cosmetics - Micro Brow Pencil in Ash Brown
Becca Cosmetics - Opal Highlighter

-LIPS-
Bare Minerals - Matte Lip gloss in the shade ‘Slay’

-BRUSHES-
MAC Cosmetics - 195 Brush
Beauty Blender
L.A.B 2 - Just Blending In Brush
Anastasia Beverly Hills - Palette Brush
NYX Cosmetics - Flat Head Brush
Morphe - M431 Pencil Brush
MAC Cosmetics - 221S Blending Brush
MAC Cosmetics - 135 Brush
MAC Cosmetics - 187 Brush
Luxie - Tapered Highlighter Brush
Small Flat Head School Brush
School Blush Brush

If you have any questions, comments or requests feel free to leave them in the comments below!!

See you soon xo

-Soheila

MY EVERYDAY MAKEUP ROUTINE

Today I wanted to quickly show you my everyday makeup routine. It is a super easy, super natural/neutral look that goes great with any outfit.

Read more

ABH GLAM WITH MY PRISM PALETTE | COACHELLA VIBES + DESERT SUNRISE

Today I created this green, orange desert sunrise look using my ABH Prism Palette. I even paired it with some bold lashes from KISS NYC and what can I say - I just love it. If you are curious to know how I created this look HIT THAT PLAY BUTTON!

Read more